

Old furniture doesn’t have to end up on the curb. You can give worn pieces a second life by painting, refinishing, swapping hardware, or adding simple upgrades.
These projects help you save money and let you design pieces that actually fit your home and style.
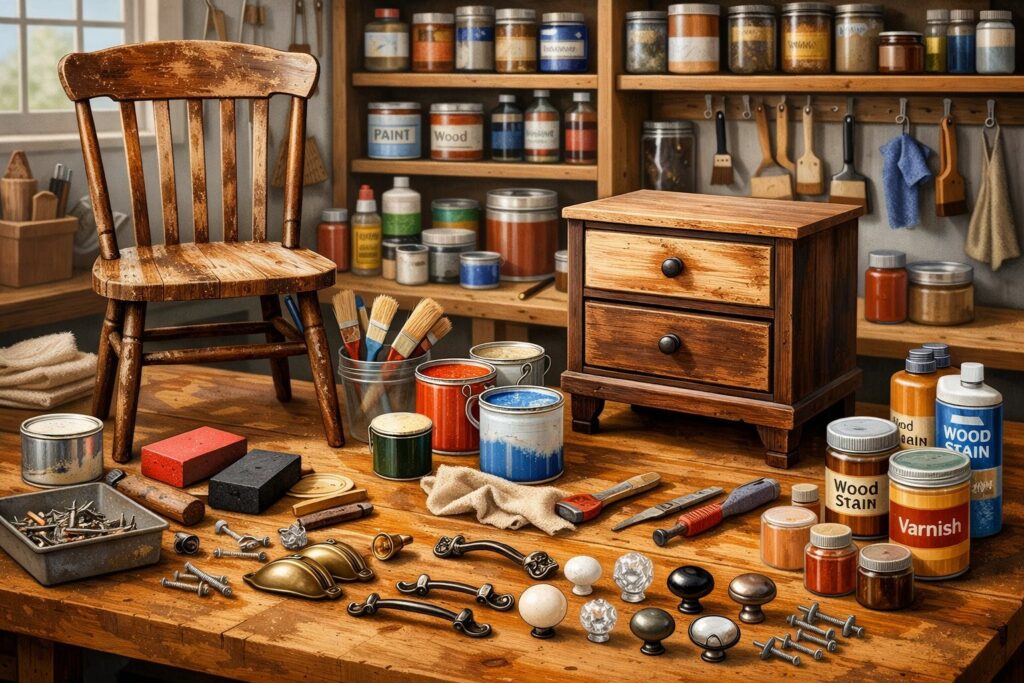
Most furniture refreshes need just a few basics: sandpaper, a cleaner, some paint or stain, and maybe new knobs or pulls.
Once you get the hang of the steps, the process feels pretty straightforward.
You’ll pick up how to prep surfaces, apply finishes that last, and make upgrades that look good and actually work for you.
Maybe you want to paint an old dresser, refinish a table, or just swap out those dated brass handles.
This guide covers each step in detail, with tips on tools, avoiding rookie mistakes, and getting results that look pro without draining your wallet.
Key Takeaways
- Clean and prep furniture before adding new paint or stain so it sticks and lasts
- Pick painting for bold color changes, or refinishing if you want to show off the wood grain
- Swapping hardware and adding a topcoat can totally finish the look and make it last longer
Setting Up for Success: Tools, Materials, and Workspace
Gathering your supplies and setting up a good workspace before you start makes things way easier.
You’ll want some basic tools for cleaning, stripping, sanding, and finishing, plus safety gear and a spot with good airflow.
Essential Refinishing Supplies and Tools
Get a random orbital sander for smoothing big flat areas like tabletops. It saves your arms and does a better job than sanding by hand.
Use 60-grit sandpaper for the first pass, then 220-grit to smooth things out between coats.
For corners and tight spots, a sanding block is your friend. It lets you get into places the power sander can’t reach.
Pick up a tack cloth to grab dust after sanding. Regular rags just don’t cut it for the fine stuff.
Wood filler is great for patching up scratches and holes. Spread it with a putty knife, let it dry, then sand it smooth.
If you need to strip old paint, a heat gun works without chemicals, but be careful not to scorch the wood.
Other supplies you’ll want: Krud Kutter or dish soap for cleaning, screwdrivers for taking off hardware, paint stripper (like Citristrip), a scraper, primer (Zinsser 123 is solid), paintbrushes, and foam rollers. Don’t forget your paint or stain and maybe a topcoat.
Safety Gear and Preparation Tips
Wear safety glasses when sanding or using strippers. You don’t want to mess around with dust or chemicals near your eyes.
Nitrile gloves keep your skin safe from harsh stuff in cleaners and finishes.
A dust mask or respirator protects your lungs from dust and fumes. An N95 is the bare minimum, but a proper respirator is even better if you’re doing this often.
Cover your work area with drop cloths or plastic. Old sheets can work, but they might soak through if you’re using liquid strippers.
Take off all hardware before you start, and toss the screws in labeled bags so you don’t lose them.
Choosing a Workspace and Ventilation Best Practices
Work outside if you can. Fresh air is your best friend when you’re dealing with fumes or dust.
Garages with doors open are usually fine, but don’t use a closed basement unless you can get good airflow.
If you have to work inside, open all the windows and use fans to push air through. Set one fan blowing in and another blowing out to keep things moving.
Check the weather before you start if you’re working outdoors. Paint and finish need temps between 50 and 85°F to dry right.
Skip painting in direct sun. It dries too fast and can leave ugly brush marks.
Evaluating and Preparing Old Furniture
Before you get started, look over your piece and see what you’re dealing with. Good prep saves you headaches later and helps you get a finish that lasts.
Assessing Furniture Condition and Type
Figure out if your piece is solid wood, veneer, or laminate. Solid wood can take a lot of sanding and stripping.
Veneer is a thin wood layer glued onto cheaper material, so go easy or you’ll sand right through. Laminate is basically plastic, so it won’t take stain, but you can still paint it.
Look for damage: cracks, loose joints, water stains, or missing veneer. Check if the hardware is all there and if drawers and doors actually work.
Decide if it’s worth fixing. Little scratches or a tired finish are easy, but if it’s falling apart or waterlogged, maybe skip it for now.
Cleaning and Disassembly
Take off all the hardware and stash the screws in a labeled bag. Pull out drawers and take off doors if you can.
This makes the job easier and gives you cleaner results.
Clean every surface with a degreaser like Krud Kutter, or just use Dawn dish soap and water in a spray bottle. Wipe it all down with an old t-shirt or soft rag.
You’ll be surprised how much grime comes off, even if it looked clean.
Wipe it again with clean water to get rid of any soap, then let it dry all the way. A few hours is usually enough.
Minor Repairs Before Refinishing
Glue loose joints and clamp them until dry, usually about a day.
Fill cracks and holes with wood filler and let it dry as the directions say.
Sand those spots smooth after they’re dry. If veneer is peeling, glue it down and clamp it flat.
A warm iron over a cloth can help reactivate old glue on veneer, but test it somewhere hidden first.
Tighten any loose screws or swap out stripped ones for slightly bigger screws. Make sure drawers and doors work right before you start refinishing.
Removing Old Finishes: Stripping and Sanding Techniques
Getting old paint or finish off takes the right approach so you don’t wreck the wood. Chemical strippers work well for thick or stubborn finishes, while sanding is good for lighter jobs and smoothing things out.
How to Remove Old Finish Safely
Set up your workspace somewhere with lots of fresh air, like outside or in a garage. Basements hold on to chemical fumes, which isn’t safe.
Put on safety gear before you start: chemical-resistant gloves, splashproof goggles, and a respirator with fresh filters. An apron helps keep chemicals off your clothes.
Cover your surface with newspaper. Keep a metal tray handy to catch extra stripper you can reuse.
Take off all hardware and label the pieces with numbers or take photos so you remember where everything goes.
Test your stripper on a hidden spot first. Brush on a thick coat and wait for the finish to bubble up.
Don’t dump chemical waste down the drain or outside. Call your local waste folks to find out how to toss it safely.
Choosing Between Chemical Strippers and Sanding
Chemical strippers break down thick paint or finish fast. They’re best for:
- Furniture with lots of old paint layers
- Detailed carvings or curves
- Getting rid of varnish, lacquer, or shellac
There are a few kinds. Eco-friendly strippers take longer but are less toxic. Medium-fast ones are a balance. Methylene chloride-based strippers work fastest but are pretty nasty, so only use them if you really have to.
Sanding is good for lighter finishes or prepping the surface. It’s great for:
- Furniture with thin or beat-up coatings
- Smoothing out after stripping
- Getting the surface ready for paint or stain
Start with 100-grit sandpaper. Only move to finer grits if you need extra smoothness. Sanding makes a lot of dust, so wear a mask and keep the air moving.
Sanding Techniques for the Best Results
Always sand with the grain. Going against it leaves scratches that show through your finish.
Use 100-grit sandpaper for most stripping. Keep your pressure even and check your progress so you don’t sand too much.
A cork-padded block helps avoid swirl marks on flat spots.
For curves, wrap sandpaper around something flexible or use sanding sponges that bend with the shape. Use fine-grit sponges for carved details.
Let the wood dry all the way after stripping before you sand. Stripping raises the wood grain, so a light sanding smooths it back down.
Stop once the surface feels even. If you sand too much, you can lose the character of old pieces.
Lightly sand between coats of new finish. It helps each layer stick and gives you a better look in the end.
Painting and Refinishing for a Fresh Look
Painting and refinishing are both solid ways to update old furniture. Paint covers everything, while refinishing lets the wood show through.
How to Paint Furniture for Lasting Results
Start by cleaning the piece with Krud Kutter or a dish soap and water mix. This gets rid of grease and grime that can mess up your paint.
Sand the surface with 120 or 150 grit sandpaper. You don’t need to take off all the old finish, just rough it up a bit.
Wipe away all the dust with a damp cloth before moving on.
Use a primer made for furniture. BIN shellac primer is great for blocking stains and stopping old finishes from bleeding through.
If you’re painting dark colors, skip the white primer and use a tinted one close to your final color. White under dark paint just shows chips more.
Use furniture paint, not wall paint. It’s tougher and holds up to daily use.
Paint in thin coats with a brush, foam roller, or sprayer. Let each coat dry before adding the next. Usually, two or three coats are enough.
Finish with a protective topcoat like water-based polyurethane. This helps prevent scratches and water damage.
Let it cure for at least 24 hours before you use the furniture.
Product suggestions: Zinsser BIN Shellac-Based Primer and General Finishes High Performance Water-Based Topcoat
Using Stains to Revive Wood Grain
Wood stain brings out natural grain patterns and adds color. You can pick from water-based stains, oil-based ones, or gel stains.
Water-based stains dry quickly and clean up with soap and water. Gel stains sit on top of the wood, so they’re great for surfaces that absorb unevenly.
Sand your furniture to 220 grit for smooth, even stain absorption. Coarser grits leave scratches that get darker when you stain.
Test your stain on a hidden spot first to see the color. Apply it with a brush or cloth, following the grain.
Let the stain sit for 5 to 15 minutes, depending on how dark you want it. Wipe off extra stain with a clean cloth before it dries.
The longer you leave the stain, the deeper the color gets. If you want a richer tone, add more coats, but let each one dry first.
Seal the stained wood with polyurethane, lacquer, or hardwax oil to protect it. Water-based polyurethane stays clear and doesn’t yellow over time.
Refinishing Methods for Different Wood Types
Solid wood can handle aggressive sanding. Start with 80 or 100 grit to remove old finish, then move up through 120 and 150 grit, finishing at 180 or 220 grit.
You don’t have to worry about sanding too deep on solid wood. It’s more forgiving than veneer.
Veneer furniture needs a gentler touch since the wood layer is thin. Start with 150 grit or finer and use light pressure.
Check your progress often to avoid sanding through. If the finish is thick, try a chemical stripper instead of heavy sanding.
For heavy paint or varnish, use paint stripper first. This softens layers so you can scrape them away without sanding too hard.
Work in a well-ventilated area and wear gloves and goggles when stripping. Safety first, always.
Once you’ve stripped or sanded, you can paint, stain, or just use a clear finish. Clear finishes like polyurethane protect wood and show off its natural look.
Sealing and Protecting Your Finish
A good topcoat protects your furniture from scratches, moisture, and daily wear. Your choice depends on the project and the look you want.
Applying Protective Topcoats: Polyurethane, Lacquer, and More
Polyurethane is super popular for protecting furniture. It creates a tough layer that handles heavy use.
You can brush it on, use a foam applicator, or spray it. Lacquer dries faster and gives a smooth, glassy finish.
If you need to apply several coats quickly, lacquer is handy. Spray it on in thin layers, either with a spray gun or an aerosol can.
Other options? Shellac, hardwax oils, and wax. Shellac dries quickly and offers good protection, but it’s not as tough against water or heat.
Hardwax oils soak in and keep a natural look. Wax adds a soft sheen but doesn’t protect much, so it’s best as a final touch over another finish.
Sand lightly between coats with 220 grit sandpaper. This makes each layer stick better and leaves a smoother finish.
Choosing Between Water-Based and Oil-Based Finishes
Water-based polyurethane dries clear and doesn’t yellow. It’s perfect for white or light-colored furniture.
It dries in about 2 to 3 hours and cleans up with soap and water. Oil-based polyurethane is tougher and more scratch-resistant.
It gives wood a warm amber tone, which can really bring out stains. The downside? It takes 6 to 8 hours to dry and you need mineral spirits for cleanup.
For painted surfaces, definitely use water-based to avoid yellowing. For natural wood or stained pieces, either option works.
Oil-based finishes give you more working time to fix bubbles or streaks. Always apply 2 or 3 thin coats rather than one thick one.
Thin layers dry more evenly and help avoid drips or brush marks.
Hardware Swaps and Simple Upgrades
Switching out hardware or adding details can make old furniture look fresh and modern. These changes usually take less than an hour per piece and cost between $20 and $100.
Replacing Pulls, Knobs, and Hinges
Measure your current hardware before buying new ones. You’ll need the center-to-center measurement for pulls, usually 3 or 3.75 inches, and single-hole for knobs.
Take off old hardware by unscrewing it from the back. Wipe the area with a damp cloth and let it dry.
If there’s old glue or grime, use a little rubbing alcohol on a cloth. Install new hardware by threading screws from the front and tightening from the back.
Check that pulls are level before tightening all the way. If the new hardware doesn’t fit the old holes, fill them with wood filler, sand smooth, and drill new ones.
Hinges can make a big difference. Swap old brass hinges for matte black or brushed nickel, or go for hidden European-style hinges for a cleaner look.
Product suggestions: Liberty Hardware has drawer pulls starting at $3 each. Amerock offers modern cabinet knobs in several finishes, usually $5 to $15 each.
Adding Decorative Accents and Accessories
Stick-on trim pieces add depth to flat drawer fronts. You can find wooden appliqués at craft stores and attach them with wood glue.
Sand them smooth, then paint to match your furniture. Changing furniture legs can totally change the style of a piece.
Screw-in legs come in mid-century, traditional, or modern metal hairpin styles. Most attach with hanger bolts or mounting plates in the corners.
Edge banding covers chipped or damaged laminate edges. It’s a thin strip of wood veneer or plastic with heat-activated adhesive on the back.
Press it on with a household iron set to medium. Decorative corner brackets add vintage style to plain bookcases or cabinets.
Metal or wooden brackets attach with small screws or nails. Put them at the top corners or along the base for a custom look.
Fast, High-Impact Upgrades Anyone Can Do
Swap out basic wooden knobs for leather pulls on dressers or cabinets. You can make these with leather strips and screws, or buy pre-made ones.
Add contact paper or peel-and-stick wallpaper inside drawers. It only takes about 10 minutes per drawer and adds a nice surprise when you open them.
Cut the paper a bit smaller than the drawer so it doesn’t catch. Install soft-close drawer slides to stop drawers from slamming shut.
These slides cost $15 to $30 per drawer and make furniture feel more expensive. You’ll need a drill and screwdriver to change them out.
Stick felt pads or furniture feet on the bottom to protect floors and make moving pieces easier. Felt pads are cheap, usually under $5 for a pack of 20.
Product suggestion: Waddell wooden legs come in lots of styles and heights, usually $8 to $25 for a set of four.
Recommended Products for Refreshing Furniture
The right products make refinishing furniture easier and give you better results. Good tools and materials save time and help avoid rookie mistakes.
Top Choices: Paint Stripper
Citristrip is a favorite paint stripper for furniture. It clings to vertical surfaces and works through multiple layers of old paint or varnish.
It smells like citrus, not harsh chemicals, so you can use it indoors. Brush it on, cover with plastic wrap to keep it moist, and let it sit for 30 minutes to 24 hours.
Scrape off the softened finish with a plastic scraper. Smart Strip is another solid option, though it works slower.
It’s safer for antiques since it won’t harm the wood. Smart Strip removes oil-based paint, latex, and polyurethane too.
Best Sanding Tools
A random orbital sander makes refinishing go way faster. The DeWalt DWE6423K is reliable and easy for beginners to use.
It has variable speed and a 3 amp motor, so it’s not too aggressive. Use different grits for different steps.
Start with 60 or 80 grit for rough spots and old finish. Move to 120 grit for smoothing, then finish with 220 grit before painting or staining.
Sanding blocks help in corners and curved spots where your sander can’t reach. Foam blocks are fine and cheap, but they wear out quickly, so keep extras.
Go-To Finishing Products
Zinsser 123 Primer makes a great base for painted furniture. It blocks stains and sticks better than cheaper primers.
Two coats prevent most paint problems before they start. For topcoats, Minwax Polycrylic Protective Finish is great for painted pieces.
This water-based polyurethane dries clear and doesn’t yellow. You can pick from matte to gloss finishes.
General Finishes High Performance Water Based Topcoat is another solid pick. It’s tougher than regular polyurethane and resists water rings and scratches.
That’s especially nice for tables and dressers that see a lot of use.
Frequently Asked Questions
Painting old furniture starts with cleaning and sanding. Hardware swaps need you to measure the existing holes.
Chalk paint is a quick way for beginners to transform pieces without much prep.
What steps are involved in painting and rejuvenating worn-out furniture?
First, clean your furniture with a degreaser like Krud Kutter, or just use Dawn and water. This gets rid of dirt and grease that can keep paint from sticking.
Sand with 120 or 150 grit sandpaper to give the primer something to grab. You don’t have to remove all the old finish unless it’s peeling.
Apply a good primer like Zinsser BIN shellac-based primer. Let it dry fully, following the directions on the can.
Use paint made for furniture, not wall paint. Furniture paint stands up to daily wear better.
Apply two thin coats for the best coverage. Sand lightly between coats with 220 grit for a smoother finish.
Seal your work with a water-based polyurethane topcoat. This adds durability and protects against scratches and moisture.
Can you refinish wood furniture without using a stripper, and if so, how?
You can refinish furniture without stripper by cleaning and sanding the existing finish. Use a degreaser first so your sandpaper doesn’t clog up.
Start sanding with 150 grit on a random orbital sander. This removes the finish gradually, no mess or fumes.
Work up through 180 and 220 grit for smoothness. If you’re sanding by hand, go with the grain to avoid scratches.
Be extra gentle with veneer since the wood layer is so thin. Start with 180 grit and use light pressure.
Once it’s smooth, wipe with a tack cloth. You can stain or clear-coat right on the prepped wood.
What are creative yet simple upcycling ideas for revamping old furniture?
Swap out old hardware for modern pulls or knobs. Brass, matte black, or brushed nickel can totally change the look.
Paint just the outside of a dresser and leave the drawer fronts natural for a two-tone effect. It’s an easy way to add interest.
Add decorative trim or molding to plain drawers or cabinet doors. You can find cheap trim at home improvement stores and glue or nail it on.
Switch solid cabinet doors for glass or wire mesh inserts for an airy feel. This works nicely on china cabinets or bookcases.
Stick wallpaper or contact paper inside drawers or on cabinet backs for a pop of pattern. It’s renter-friendly and easy to remove later.
Cover table or dresser tops with contact paper that looks like marble or wood. It protects the surface and gives it a new look.
When replacing hardware on furniture, what are the best practices to follow?
Start by measuring the distance between your existing screw holes before you shop for new hardware. This measurement, known as the center-to-center distance, helps you avoid drilling extra holes later.
Take off one piece of old hardware at a time, then pop the new one on right away. Otherwise, it’s surprisingly easy to mix up which holes go with which drawer or door.
If your new hardware doesn’t match the old holes, fill the old ones with wood filler. Wait for it to dry, sand it smooth, and then drill new pilot holes for your replacement hardware.
Grab a drill bit that’s just a bit smaller than your screw diameter to make pilot holes. This step keeps the wood from splitting when you put in the new hardware.
Keep your screws together in a small container or bag as you take them out. Sometimes, the original screws fit the new hardware if the threading lines up.
Tighten the hardware so it’s snug, but don’t go overboard. If you overtighten, you might strip the wood or even crack the pull. If a screw feels loose, try adding a drop of wood glue to the hole before you put it back in.
What products are recommended for effectively refinishing and upgrading furniture?
General Finishes gel stains give you a lot of control over color, and they’re great for beginners since they don’t drip or run. You can use these stains on both raw and finished wood.
Varathane water-based polyurethane protects your furniture without turning yellow. It dries clear and stands up to scratches and water on painted or stained surfaces.
Rust-Oleum spray primers make things easier on pieces with lots of carvings or spindles. The spray gets into all those little crevices that brushes tend to miss.
Bondo wood filler is great for deep repairs and doesn’t shrink or expand, no matter the temperature. It’s a lot tougher than standard wood filler and works for big gouges or missing veneer.
A random orbital sander, like the Dewalt DWE6423K, really speeds up stripping and smoothing. This tool sands in every direction and doesn’t leave obvious swirl marks, which is a relief.
How can a beginner approach upcycling furniture with Chalk paint?
Chalk paint makes things easy, since you don’t have to do much prep. Just clean the surface with soap and water, and you’re basically ready to go.
Grab a synthetic brush meant for water-based paints. Try to use thin, even coats, and honestly, you’ll probably need two or three layers to get it looking right.
Let each coat dry for at least one or two hours. Chalk paint dries pretty fast, but if you rush, you might mess up the layer underneath.
If you want that vintage, worn-in vibe, sand the edges with 220 grit sandpaper after your last coat dries. Concentrate on spots like corners and edges, where furniture usually gets scuffed up anyway.
To protect your work, seal the paint with wax or water-based polyurethane. Wax leaves a soft, matte look, while polyurethane is tougher and works better for stuff you’ll use a lot.
Wash your brushes right away with soap and water. If chalk paint dries on them, good luck getting it out.


