back to top
Home Blog Page 2

Eliminating Household Odors Naturally: Room-by-Room Solutions

0

Bad smells in your home don’t need harsh chemicals or artificial fragrances to disappear. You can eliminate household odors naturally using simple ingredients like baking soda, vinegar, and essential oils that target the source of smells instead of just covering them up.

These natural methods work just as well as store-bought products, and you won’t expose your family to questionable chemicals in the process.

Most household odors come from specific sources like food residue, pet accidents, mold, or trapped moisture. If you know what causes these smells, you can pick the right natural solution and actually get rid of them for good.

Each room needs its own approach. Knowing which method works best in each space will save you time and effort.

You’ll find tips here for kitchens, bathrooms, bedrooms, and more. Plus, a few ideas on how to keep odors from coming back and some genuinely useful natural products.

Key Takeaways

  • Natural ingredients like baking soda, vinegar, and activated charcoal eliminate odors by targeting their source rather than masking them
  • Each room requires specific odor-removal methods based on common smell causes like food, moisture, or pet accidents
  • Prevention through proper ventilation, regular cleaning, and moisture control stops most household odors before they start

Understanding the Causes of Household Odors

Bad smells in your home usually come from specific sources that release particles into the air and get absorbed into surfaces. Once you figure out where odors start and how they spread, you can actually deal with the root cause instead of just spraying air freshener and hoping for the best.

Odor Sources in the Home

Your kitchen produces most household smells through cooking and food waste. Cooking smells from frying oils, fish, and strong spices can stick around for days.

Kitchen odors also come from garbage disposals that trap food particles, trash cans with leaking bags, and refrigerators with spoiled food. It’s not just the kitchen, though.

Bathrooms create odors through moisture and odor-causing bacteria. These bacteria grow in damp areas like shower drains, toilet bowls, and bath mats.

Mold and mildew also develop in poorly ventilated bathrooms. It’s a whole ecosystem if you let it go too long.

Other common sources include:

  • Pet areas: Litter boxes, pet beds, and accidents on carpets
  • Laundry rooms: Washing machines with mildew buildup and dirty clothes hampers
  • Living spaces: Upholstery that absorbs body oils and food smells
  • Closets: Shoes, dirty clothes, and musty air from poor circulation

How Odors Linger in Materials and Air

Porous materials trap smell particles deep in their fibers. Carpets, curtains, and furniture absorb odors and release them slowly over time.

Fabric surfaces hold onto cooking smells, pet odors, and body oils even after you clean visible dirt. It’s frustrating, honestly.

Hard surfaces seem cleaner but still harbor smells. Wooden cutting boards absorb food odors.

Tile grout in bathrooms traps bacteria and moisture. Sometimes, you just can’t win.

Poor ventilation makes odor problems worse. Without fresh air flow, smell particles stay concentrated in rooms.

Closed spaces like closets and basements build up stale air. Your HVAC system can spread odors throughout your home if filters are dirty or vents are blocked.

Health Risks Associated with Indoor Odors

Some odors signal real health hazards, not just gross smells. Mold and mildew release spores that trigger allergies, asthma attacks, and respiratory problems.

These fungi grow in damp areas with bathroom odors and poor air circulation. It’s not something to ignore.

Odor-causing bacteria in trash, drains, and pet waste can spread illness. Breathing air with high bacteria counts may cause headaches, nausea, and infections in sensitive people.

Chemical fumes from cleaning products, paint, or gas leaks pose serious dangers. A rotten egg smell means a possible natural gas leak that requires immediate action.

Persistent musty odors might indicate hidden water damage that supports harmful mold growth behind walls.

Natural Odor Elimination Strategies

Opening windows and using natural products like baking soda can remove odors without chemicals. Regular cleaning stops smells from building up in the first place.

Increasing Ventilation and Airflow

Good airflow is one of the easiest ways to remove odors from your home. Open windows on opposite sides to create cross-ventilation.

This pushes stale air out and brings fresh air in. Sometimes, that’s all you need.

Run exhaust fans in your kitchen while cooking and for 20-30 minutes after. These fans remove cooking smells before they settle into fabrics and walls.

Do the same in bathrooms during and after showers to prevent moisture buildup. It’s a small habit, but it helps.

Ceiling fans help circulate air throughout rooms. Set them to rotate counterclockwise in summer to push air down.

In winter, reverse them to pull warm air from the ceiling. It’s easy to forget, but it does make a difference.

Place portable fans near problem areas like litter boxes or garbage cans. Point them toward open windows to direct smells outside.

Keep interior doors open when possible to improve air circulation between rooms. Don’t let spaces get stuffy.

Clean or replace HVAC filters every 1-3 months. Dirty filters trap odors and spread them through your ventilation system.

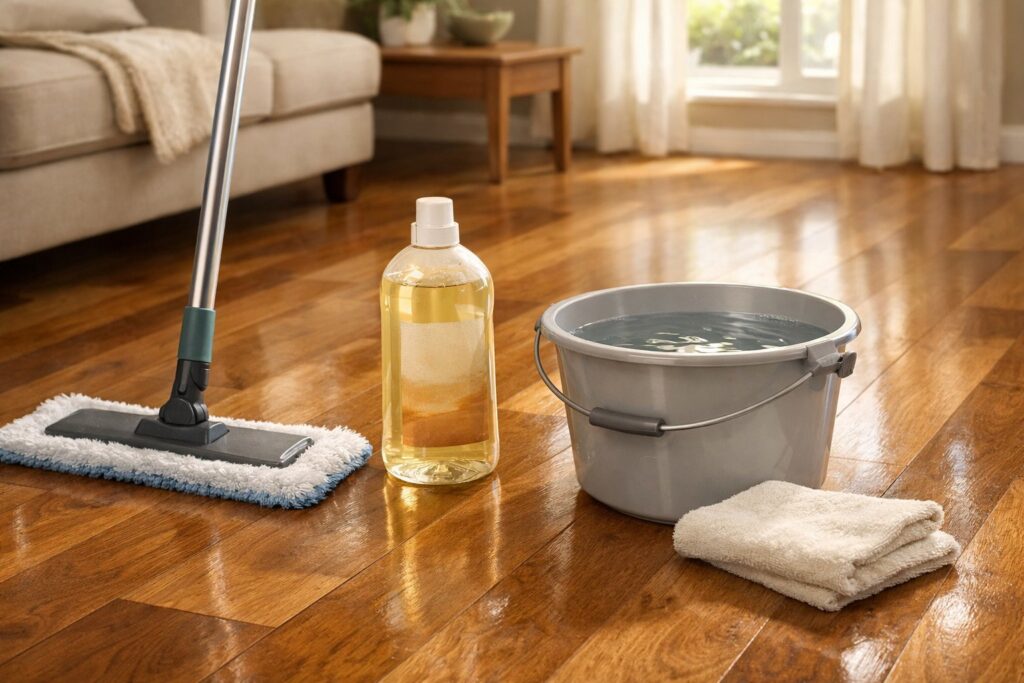
Regular Deep Cleaning Techniques

Deep cleaning tackles odor sources that regular tidying misses. Wash walls, baseboards, and ceilings every few months using warm water with a small amount of dish soap.

Odors cling to these surfaces over time. It’s easy to overlook, but it matters.

Enzymatic cleaners break down organic matter like pet accidents, food spills, and body oils. These cleaners use natural enzymes and bacteria to eliminate odor-causing substances at the source.

Apply them to carpets, upholstery, and hard floors according to package directions. It’s worth the effort for tough odors.

Steam clean carpets and furniture twice a year. The heat kills bacteria and lifts embedded dirt that holds smells.

Empty and clean your vacuum cleaner after each use to prevent it from spreading odors. Don’t forget this step.

Don’t forget hidden spots:

  • Inside cabinets and drawers
  • Behind appliances
  • Under furniture
  • Inside trash cans
  • Washing machine gaskets

Wash pet bedding, curtains, and throw pillows monthly. These items absorb smells from the air and need regular cleaning.

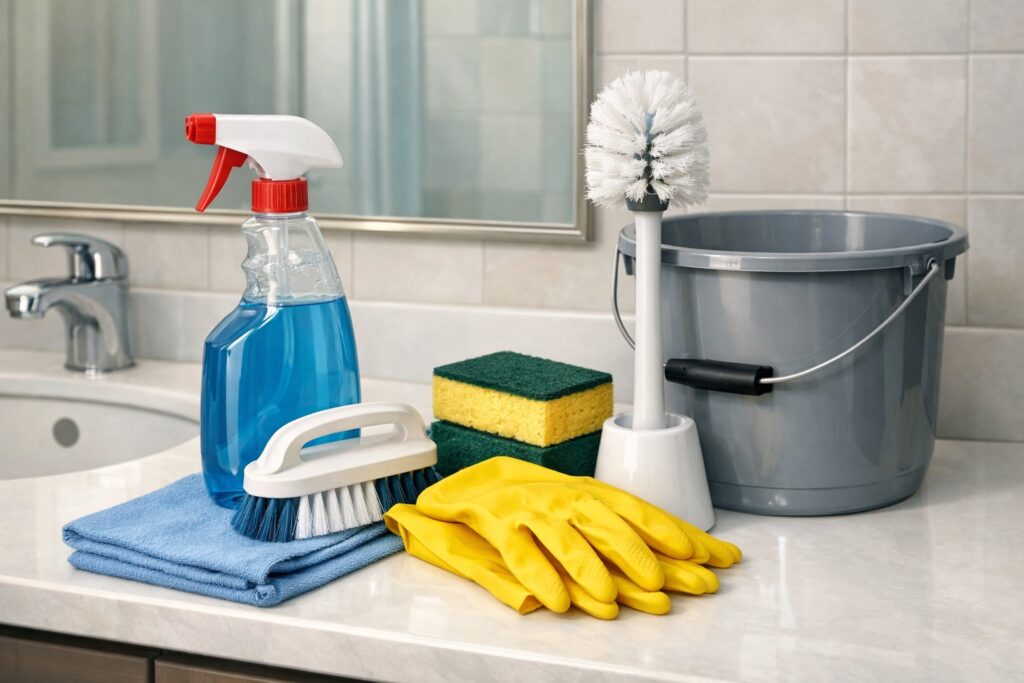
Using Natural Deodorizers

Baking soda absorbs odors instead of covering them up. Sprinkle it on carpets, let it sit for 30 minutes, then vacuum thoroughly.

Place open boxes in refrigerators, closets, and near litter boxes. It’s simple and works surprisingly well.

White vinegar neutralizes many household smells. Mix equal parts water and vinegar in a spray bottle for a natural deodorizer.

Spray it on hard surfaces, then wipe clean. The vinegar smell disappears as it dries.

Activated charcoal traps odor molecules in its porous surface. Put it in small cloth bags and place them in smelly areas.

Replace every 2-3 months for best results. It’s a set-it-and-forget-it solution.

Coffee grounds absorb refrigerator and freezer odors. Place dried grounds in a shallow dish and leave them inside for 24 hours.

Fresh grounds work well in garbage disposals too. It’s a little bonus if you love coffee.

Essential oils add pleasant scents while fighting bacteria. Add 10-15 drops of tea tree, lavender, or lemon oil to water in a spray bottle.

Shake before each use and mist rooms as needed. The scent lifts your mood, too.

Room-Specific Odor Removal Tips

Different rooms in your home face unique odor challenges based on their function and humidity levels. Targeting odors at their source with room-appropriate solutions keeps things fresher, longer.

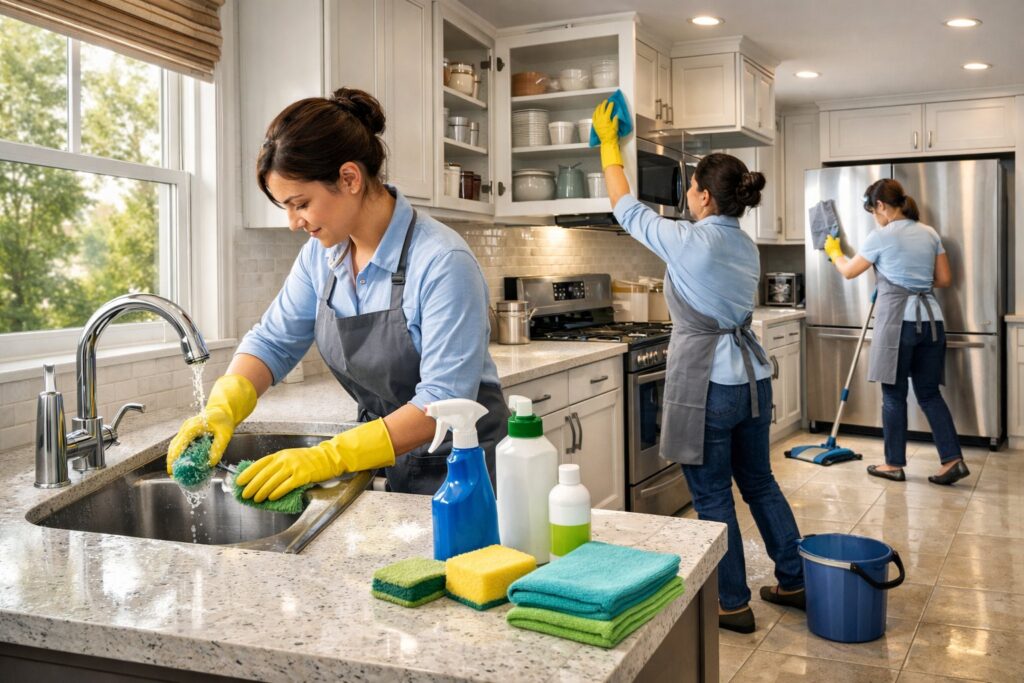
Kitchen: Banishing Cooking Smells and Food Odors

Kitchen odors from cooking, trash, and food waste need quick attention. Strong cooking smells from fish, onions, or hing can linger for hours if you don’t deal with them.

Simmer citrus peels with cinnamon sticks and cloves in a pot of water on your stovetop while cooking strong-smelling foods. This releases natural oils that neutralize kitchen odors instead of just covering them up.

You can also boil a cup of white vinegar for 15 minutes to eliminate stubborn cooking smells. It doesn’t smell great while boiling, but it works.

Your garbage disposal needs regular cleaning to prevent odor buildup. Run citrus peels through the disposal with cold water, then follow with ice cubes and salt to scrub away debris.

For deeper cleaning, pour half a cup of baking soda down the drain, wait 15 minutes, then flush with hot water. It really helps with lingering odors.

Place an open box of baking soda near your trash can and replace it monthly. Sprinkle baking soda directly into the bottom of your trash bin before adding a new bag.

This natural deodorizer absorbs smells before they become noticeable.

Bathroom: Managing Moisture and Mildew

Bathroom odors usually come from moisture, mildew, and poor ventilation. These conditions create the perfect environment for musty smells and bacteria.

Run your exhaust fan during showers and for 30 minutes afterward to reduce moisture buildup. If you don’t have a fan, crack a window to allow air circulation.

Keep bathroom surfaces dry by wiping down the shower, tub, and sink after each use. It’s a bit of extra work, but it pays off.

Mix equal parts white vinegar and water in a spray bottle to clean tile, grout, and shower curtains. Spray the solution on problem areas and let it sit for 10 minutes before wiping clean.

The vinegar eliminates mildew and neutralizes odors without harsh chemicals. The smell fades as it dries.

Place bowls of activated charcoal or baking soda in cabinets under sinks where moisture accumulates. These natural deodorizers absorb both odors and excess humidity.

Pour baking soda down drains weekly, followed by hot water, to prevent bacterial buildup in pipes.

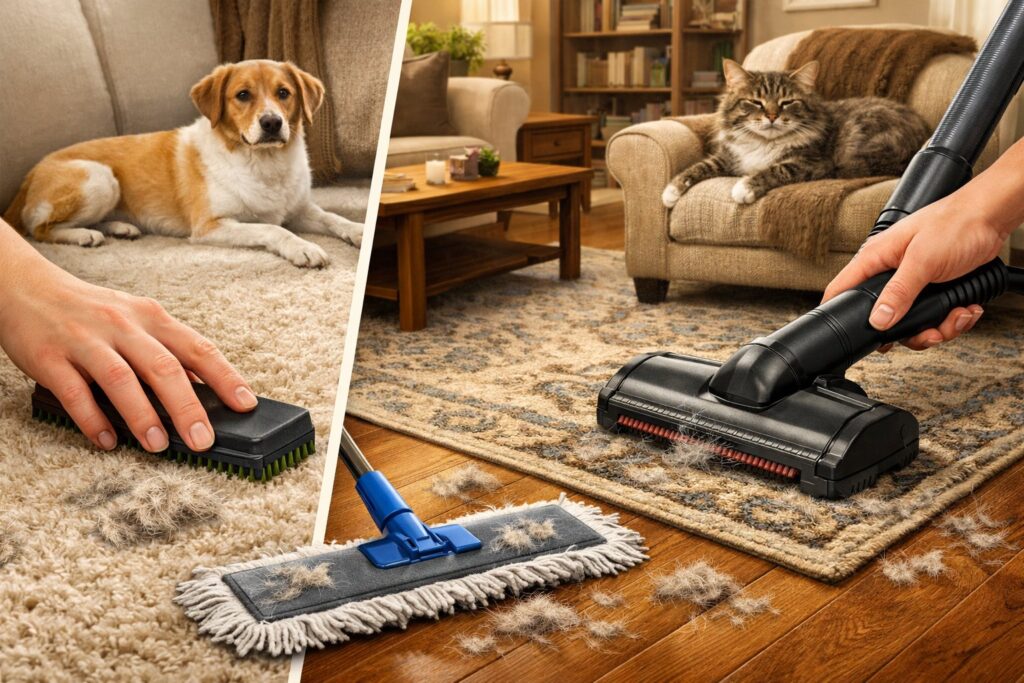
Living Room: Refreshing Upholstery and Soft Furnishings

Living room odors cling to upholstery, carpets, and curtains because fabric traps smells from pets, cooking, and daily activities. These soft surfaces need regular treatment to stay fresh.

Sprinkle baking soda generously over carpets, sofas, and chairs. Let it sit overnight to absorb odors, then vacuum thoroughly in the morning.

For stronger odors, mix a few drops of essential oil with the baking soda before sprinkling. It adds a nice touch.

Create a fabric spray with one cup of water, two tablespoons of white vinegar, and 10 drops of essential oil in a spray bottle. Lightly mist curtains, cushions, and upholstery.

The vinegar smell disappears as it dries, taking other odors with it. It’s a quick fix that works.

Place air-purifying plants like spider plants or peace lilies in your living room. These plants naturally filter air pollutants while adding visual appeal.

Open windows regularly to circulate fresh air and prevent stale odors from settling into fabrics.

Bedroom and Closet: Keeping Fabrics and Clothes Fresh

Bedroom and closet odors develop from body oils, sweat, and poor air circulation in enclosed spaces. Fabrics in these areas need gentle treatment to stay fresh without damage.

Wash bedding weekly in hot water and dry completely before putting it back on the bed. Sprinkle baking soda on your mattress, let it sit for several hours, then vacuum it off.

This removes body odors that accumulate over time. It’s worth the effort for a fresher bed.

Place sachets filled with dried lavender, cedar chips, or dried coffee grounds in dresser drawers and on closet shelves. These natural options absorb moisture and add pleasant scents to clothing.

Avoid overcrowding your closet, as packed clothes prevent air circulation and trap odors. It’s tempting to stuff everything in, but don’t.

Hang worn clothes outside the closet overnight before putting them away. This allows them to air out and prevents transferring body odors to clean clothes.

Keep shoes in a separate area and place dried tea bags or dryer sheets inside them to combat foot odors.

Basement and Garage: Preventing Musty Odors

Basements and garages get that musty smell when moisture creeps in and sets the stage for mold. If you want to keep things fresh, you’ve got to control humidity and store stuff the right way so bacteria doesn’t take over.

Dehumidifying and Moisture Control

Try to keep your basement’s humidity below 60 percent. A hygrometer will tell you where you’re at, but shoot for 30 to 50 percent if you can.

Compressor dehumidifiers do the heavy lifting in basements. They pull water from the air by running it over cold coils, and yeah, you’ll need to empty the tank pretty often unless you set up a drain hose.

Fix leaks as soon as you spot them. Check pipes for condensation and wrap them with foam pipe insulation if needed.

After it rains, look for water around basement windows and clear out any gunk from window wells. Don’t let water just sit there.

Open the windows whenever the weather’s decent. Fans help too, pushing fresh air through and kicking out the damp air that mold loves.

If you see moisture building up on walls or surfaces, wipe it down. Seal cracks in concrete floors to keep water from sneaking in.

If you keep having foundation leaks, you might want to call a waterproofing pro. Sometimes, it’s just too much for DIY.

Storage Solutions to Minimize Odor

Ditch cardboard boxes for plastic bins with tight lids. Cardboard soaks up moisture and turns into a mold magnet, while plastic keeps your stuff dry and safe.

Use shelves or pallets to keep things off the floor. That way, nothing sits right on the damp concrete and air can move underneath.

Keep boxes and bins a few inches from the wall. Better airflow means less chance for smells to settle in.

Baking soda bowls work wonders as cheap deodorizers. Just set them out and swap them monthly. Activated charcoal works too, and it really traps those musty smells.

Try not to store old clothes or upholstered furniture down there. If you must, make sure it’s bone dry first and check now and then for any mildew creeping back.

Popular Natural Products and Remedies

Some basic household items tackle odors without harsh chemicals. Baking soda soaks up smells in all sorts of spots, and activated charcoal grabs odor particles thanks to its zillion tiny holes. Hing is surprisingly good for certain food smells, though not everyone’s a fan.

Baking Soda Applications

Baking soda doesn’t just cover up smells, it actually absorbs them. Sprinkle it on carpets or your couch, wait at least 8 hours, then vacuum it up.

Open containers of baking soda work well in the fridge, closets, and by the trash. Swap them out every month or so.

For laundry, toss in half a cup to freshen up clothes without using weird chemicals. It’s simple and it works.

Common Baking Soda Uses:

  • Carpet deodorizing
  • Refrigerator odor control
  • Trash can freshening
  • Drain cleaning
  • Shoe deodorizing

Mix baking soda with water for a scrubbing paste. It’s great for cutting boards or microwaves where food smells just won’t quit.

Activated Charcoal Uses

Activated charcoal is packed with tiny pores that grab onto odor molecules. Bowls of it in basements, bathrooms, or other damp spots can really help.

It doesn’t need power or much upkeep. Just replace the charcoal every couple months, depending on how bad the smell is.

Buy it loose for bowls or get charcoal bags for closets and cars. Some come in nice containers that actually look decent on a shelf.

For small spaces like fridges, use a couple ounces. If you’re tackling a bigger room, you’ll need a lot more, maybe 8 to 12 ounces.

Hing as a Natural Odor Remedy

Hing, or asafoetida, is a natural deodorizer that’s oddly effective for food smells. Its own scent is strong at first, but it really does soak up kitchen odors if you use it right.

Mix hing powder with water to make a cleaning solution for kitchen counters or stovetops. It takes care of lingering food smells fast.

Stick a little hing in a cloth sachet and leave it near a problem area. It breaks down odor-causing bacteria naturally, so you don’t have to worry about chemicals.

Try combining hing with citrus peels for a double whammy in the kitchen. Boil peels with a pinch of hing in water and let the steam clear out stubborn cooking smells.

Preventing Odors Before They Start

If you can stop bad smells before they start, you save yourself a ton of work later. Regular upkeep, decent airflow, and a few natural tricks go a long way to keeping your place fresh.

Routine Maintenance and Cleaning Schedules

Set a simple cleaning routine to keep odor-causing bacteria from building up. Wash pet bedding, blankets, and toys every week or two so smells don’t have a chance to stick around.

Once a month, pour a cup of baking soda and a cup of vinegar down your garbage disposal. Let it sit for an hour, then rinse. It’s an easy fix for funky sink smells.

Swap out kitchen sponges every week or two. They trap food bits and get gross fast. Wash curtains once a year, especially in the kitchen where grease makes them smell weird.

Run your washing machine empty with hot water and bleach once a month to keep mold away. Wipe trash cans inside and out weekly, then spray them with vinegar to disinfect.

If you want to get fancy, toss a dryer sheet at the bottom of empty bins to catch new odors before they start.

Managing Humidity and Ventilation

Good airflow keeps moisture from turning into a smelly mess. Crack the windows for 10 or 15 minutes a day, even in winter, just to let some fresh air in.

Run exhaust fans while you’re cooking or after a shower for about 20 minutes. That steam has to go somewhere, and if it lingers, so will the smell.

Check that kitchen and bathroom vents actually lead outside. If they just dump air into the attic, you’re asking for trouble.

Keep humidity inside between 30 and 50 percent. Dehumidifiers help in damp basements or windowless bathrooms. Fix leaks and clean up water damage fast, within a day or two, or you’ll get stuck with stubborn odors and maybe even mold.

Safe Use of Essential Oil Diffusers

Essential oil diffusers add a nice scent and can actually help kill off some bacteria. In bathrooms, try tea tree or eucalyptus since they’re naturally antimicrobial.

Lemon or peppermint oils work well in the kitchen for masking food smells. Usually, 3 to 5 drops per 100ml of water is enough.

Don’t run the diffuser all day though. Thirty to sixty minutes at a time is plenty or it can get overpowering.

Clean your diffuser weekly with white vinegar to keep it working right. Always put it somewhere safe and out of reach of kids and pets, and don’t leave it running if you’re not home.

Recommended Natural Odor-Elimination Products

Sometimes, you need more than DIY. A few natural products out there do a better job at targeting stubborn smells or keeping things fresh longer.

Enzymatic Cleaners for Pet and Organic Odors

Enzymatic cleaners break down the actual molecules that cause most smells. They use natural bacteria and enzymes to digest stuff like pet urine, food spills, or sweat.

Protease enzymes attack protein stains, while lipase goes after fats and oils. These cleaners are especially good for carpets, upholstery, and mattresses where smells sink in deep.

Soak the area well and let the cleaner sit as long as the label says. The enzymes need moisture to work, so don’t let it dry out too soon.

Check the label for active ingredients and skip anything with added fragrances. The best ones have several enzyme types to cover different messes. They might work slowly, but they get rid of smells for good instead of just hiding them.

Essential Oil Diffusers for Fresh Scents

Diffusers spread natural oils into the air for a fresh scent. Ultrasonic diffusers use water and vibrations to make a mist, while nebulizers use air to spray pure oil.

Best essential oils for odor control:

  • Lemon and citrus oils for kitchen smells
  • Lavender in bedrooms or bathrooms
  • Tea tree oil for musty areas
  • Eucalyptus to clear out stale air
  • Peppermint for strong kitchen odors

Ultrasonic diffusers cover bigger rooms and don’t need refilling as often. They also add a little humidity, which can be nice in dry climates. Nebulizers make a stronger scent but go through oil quickly and cost a bit more.

Clean your diffuser weekly with vinegar. Three to five drops of oil per 100ml of water is usually enough for ultrasonic models.

Activated Charcoal Bags for Continuous Odor Absorption

Activated charcoal bags just keep working, no batteries or power needed, for up to two years. The bamboo charcoal inside grabs onto odor molecules, moisture, and even some pollutants.

They’re great for closets, cars, bathrooms, or the fridge. Use 200-gram bags for shoes or gym bags, and 500-gram or bigger for closets and rooms.

Recharge the bags by putting them in sunlight for an hour or two each month. UV rays clear out the trapped stuff and make them work like new. After about two years, it’s time to replace them.

Charcoal bags don’t add any scent, they just take away the bad ones. Perfect if you’re sensitive to perfumes or just want your space to smell like nothing at all.

Frequently Asked Questions

People have plenty of questions about natural odor removal. Here are some straightforward answers to help you handle smells safely and effectively.

What are effective natural remedies for neutralizing bad odors in different rooms of the house?

Baking soda is a go-to for bedrooms and living rooms. Sprinkle it on carpets, let it sit for half an hour, then vacuum it up. Open boxes in closets or by shoes soak up smells too.

White vinegar is great for the kitchen. Simmer a pot of water with a cup of vinegar for 15 minutes to clear out cooking smells. In the bathroom, spray surfaces with straight vinegar and let it sit for 10 minutes before wiping.

Activated charcoal bags work well in basements and garages. Stick them in corners or near damp spots. Swap them out every few months to keep them effective.

Essential oils freshen up any room. Mix 10 drops of lemon or lavender oil with water in a spray bottle, shake, and spritz on fabrics or in the air. Tea tree oil and water make a handy bathroom spray for fighting mold and mildew.

Coffee grounds absorb fridge odors. Just put a small bowl of dry grounds on a shelf and change it out weekly.


Can vinegar be used to combat unpleasant smells in the home, and if so, how?

White vinegar actually neutralizes odors. Its acetic acid breaks down the compounds that cause smells.

You can use vinegar in almost every room. It won’t leave any harmful residue behind.

For air freshening, just fill a spray bottle with equal parts water and white vinegar. Spray it in the air or on fabrics like curtains and upholstery.

The vinegar scent fades as it dries, taking other odors with it. It’s surprisingly effective, even if the initial smell is a bit sharp.

To tackle kitchen drain smells, pour a cup of baking soda down the drain, then follow with two cups of hot vinegar. Let it fizz for 15 minutes.

Flush everything with hot water. This breaks down the buildup that causes those stubborn odors.

If your garbage disposal smells, grind some ice cubes and lemon peels first. Then pour half a cup of vinegar down the drain.

Run cold water for about 30 seconds after. The combo helps freshen things up fast.

For bathrooms, spray undiluted vinegar on toilet bowls, tiles, or shower walls. Let it sit for 10 minutes, then scrub.

This process kills odor-causing bacteria and gets rid of soap scum. You’ll notice the difference pretty quickly.

Wash smelly towels and gym clothes by adding a cup of white vinegar to the rinse cycle. It eliminates bacteria without damaging fabrics.


What are some affordable natural methods to maintain a fresh-smelling home?

Regular ventilation doesn’t cost a thing and really helps prevent odors. Open windows for 10 or 15 minutes daily, even if it’s chilly out.

Fresh air replaces the stale stuff and reduces moisture that leads to musty smells. It’s a simple habit but makes a big impact.

Baking soda is one of the cheapest odor fighters out there. A one-pound box costs about two bucks and lasts for months.

Sprinkle it on carpets before vacuuming, stash open boxes in the fridge, or mix with water to scrub surfaces. It’s versatile and easy to use.

White vinegar usually costs less than three dollars a gallon. Use it to clean floors, counters, or bathrooms.

Mix vinegar with water in a spray bottle for an all-purpose cleaner that neutralizes smells. It’s straightforward and gets the job done.

If you eat oranges or lemons, save the peels. Simmer them in a pot of water for 20 minutes to fill your home with a fresh scent.

You can reuse the same peels a couple of times. It’s a clever way to get more mileage out of your fruit.

Make your own air freshener by mixing water with a few drops of essential oil in a spray bottle. A small bottle of essential oil costs about five to ten dollars and lasts ages.

Sunlight kills odor-causing bacteria and costs nothing. Hang clothes, blankets, or pillows outside on sunny days.

Even two hours in direct sunlight can remove musty smells. It’s old-fashioned but works wonders.


Which non-chemical products are recommended for keeping household odors at bay?

Activated charcoal bags absorb moisture and odors without any chemicals. Put them in closets, shoes, gym bags, or even your car.

Bamboo charcoal bags last up to two years if you refresh them monthly by leaving them in the sun for an hour. They’re low maintenance and reusable.

Essential oil diffusers spread natural scents throughout your home. Oils like eucalyptus, peppermint, or lemon have antibacterial properties.

Diffusers come in simple reed styles or electric versions with timers. There’s something for every taste and budget.

HEPA air purifiers with activated carbon filters remove odor particles from the air. Look for models that mention odor elimination, not just particle filtration.

Replace filters as the manufacturer suggests, usually every three to six months. It’s worth it if you’re sensitive to smells.

Natural enzyme cleaners break down organic matter that causes odors. They work well on pet accidents, food spills, and bathroom surfaces.

These cleaners use bacteria to eat the compounds that smell. It’s a bit weird, but it works.

Wool dryer balls replace chemical-laden dryer sheets. Add a few drops of essential oil to the balls before tossing them in the dryer.

They reduce static and add a light fragrance naturally. Plus, you can use them over and over.

Beeswax candles purify air as they burn. Unlike paraffin candles, they release negative ions that bind to odor particles and allergens.

Burn them for an hour at a time in rooms that need freshening. They’re a cozy, natural way to clear the air.


How can one quickly remove offensive odors from their house using natural solutions?

If you need a quick fix, toss some cinnamon sticks, cloves, and orange peels into a pot of water and let it simmer. The steam wafts the scent through your home in about 10 or 15 minutes.

This trick comes in handy right before guests show up.

Try spraying undiluted white vinegar right onto whatever’s causing the smell. It knocks out pet accidents, food spills, or trash odors pretty fast.

The vinegar scent disappears as it dries, so don’t worry about your house smelling like a salad for long.

For carpets or upholstery, sprinkle baking soda on the spot. Let it sit for 15 to 30 minutes, then vacuum it up.

If you’re in a rush, lightly mist the baking soda with water to speed things along.

Throw open all the windows and doors to get some cross ventilation going. Flip on ceiling fans, or set a box fan in the window to shove stale air out.

This clears out smoke or cooking smells in maybe 20 or 30 minutes, depending on how stubborn they are.

Set out bowls of white vinegar or coffee grounds around the room. They soak up lingering odors in about an hour.


Weekly Bathroom Cleaning Routine: Steps, Tools, and Time-Saving Tips

0

Cleaning your bathroom every week might feel like a chore, but honestly, it doesn’t have to eat up your whole day. A simple weekly bathroom cleaning routine takes about 15 to 30 minutes and keeps germs, soap scum, and hard water stains from building up.

When you follow the same steps each week, the job gets faster and easier. You end up staying ahead of the mess instead of scrubbing away weeks of grime.

You don’t need fancy equipment or overpriced products to get your bathroom looking good. Basic things like a solid all-purpose cleaner, some microfiber cloths, and a toilet brush will do the trick for most jobs.

The trick is working in the right order and using a few smart moves that save you time and effort. This guide lays out what you need for a weekly bathroom cleaning routine that actually works.

You’ll find out which supplies to keep handy, what order to clean in, and how to cut down your cleaning time without skipping the important stuff.

Key Takeaways

  • A weekly bathroom cleaning routine takes 15 to 30 minutes and prevents buildup of dirt and germs
  • Working in the right order with basic supplies makes bathroom cleaning faster and more effective
  • Time-saving strategies and the right products help you maintain a clean bathroom with less effort

Essential Cleaning Supplies and Tools

Having the right cleaning supplies makes your bathroom routine way easier. You just need basic products for different surfaces and tools that actually work.

Pick options that fit your budget and what you care about. No need to overthink it.

Must-Have Cleaning Products

Toilet bowl cleaner is a must for bathroom sanitation. Brands like Clorox Toilet Bowl Cleaner or Lysol Power Toilet Bowl Cleaner remove stains and kill germs.

All-purpose cleaner works on most bathroom surfaces, like counters, sinks, and tubs. You can use it in several areas without swapping bottles.

Glass cleaner keeps mirrors streak-free and clear. Use a clean cloth for the best results.

Disinfectant spray kills bacteria on things like door handles, faucets, and light switches. Look for one that works on hard and soft surfaces.

A bathroom cleaner made for soap scum and mildew handles shower walls and tubs better than a generic spray. You also need shower cleaner for weekly deep cleaning of tile and glass doors.

Products with bleach or hydrogen peroxide help prevent mold growth. Not a fan of strong chemicals? There are gentler options too.

Recommended Cleaning Tools

A sturdy toilet brush with firm bristles gets under the rim and removes stains. Swap it out every few months for hygiene.

Microfiber cloths are great for wiping any surface. They trap dirt and bacteria better than old rags. Try using different colors for different spots to avoid cross-contamination.

A scrub brush with stiff bristles handles grout lines and textured areas. Get one with a handle to protect your hands and reach tricky spots.

Rubber gloves keep your skin safe from chemicals and germs. Find a pair that fits well and gives you a good grip.

A squeegee stops water spots on shower doors and keeps them cleaner for longer. Use it after each shower if you can. A sponge with a rough side is handy for scrubbing soap scum off fixtures.

Eco-Friendly and Homemade Solutions

Baking soda is a gentle abrasive that removes stains without scratching. Mix it with water to make a paste for tubs and tiles.

White vinegar cuts through soap scum and hard water deposits naturally. Mix equal parts vinegar and water in a spray bottle for a solid homemade cleaning solution.

You can make your own toilet cleaner by mixing baking soda and vinegar right in the bowl. This combo fizzes and loosens buildup without harsh chemicals.

For mirrors and glass, mix one part vinegar with four parts water. Wipe with a microfiber cloth for a streak-free shine. These natural options are cheaper than store-bought stuff and cut down on chemicals in your home.

Step-by-Step Weekly Bathroom Cleaning Routine

A weekly bathroom cleaning routine goes smoother if you follow a set order, starting with dry tasks and moving to wet cleaning. This way, you avoid redoing work and finish faster.

Declutter and Prepare Surfaces

Clear everything off your countertops, shelves, and shower ledges before starting. Move soap dispensers, toothbrush holders, and decorations out of the way.

Empty the trash can and remove dirty towels and bath mats. Check under the sink and around the toilet for anything that shouldn’t be there.

This only takes a couple minutes but saves you hassle later. Put on rubber gloves to protect your hands.

Open a window or turn on the fan for some fresh air. Gather your cleaning supplies in a caddy so you can carry them around easily.

If your shower curtain liner looks dirty or has mildew, pull it down and toss it in the washing machine with a few towels. Let it wash while you clean the rest of the bathroom.

Dusting and Vacuuming

Start by dusting light fixtures, exhaust vents, and the top of your medicine cabinet. Use a microfiber cloth or duster so you actually catch the dust, not just move it around.

Work from top to bottom so dust falls to the floor, not onto freshly cleaned areas. Wipe down cabinet fronts and door handles with a dry cloth.

Check corners and baseboards for cobwebs or dust. Vacuum the bathroom floor to pick up hair, dust, and random debris.

Use the crevice tool along baseboards and behind the toilet. This dry step stops you from pushing dirt around when you mop later.

Empty the vacuum canister if it gets full or seems clogged. A quick vacuum now makes mopping way easier.

Cleaning and Disinfecting Surfaces

Squirt toilet bowl cleaner inside the bowl and let it sit while you clean other stuff. This gives it time to break down stains and kill germs.

Wipe mirrors and glass with glass cleaner and a clean microfiber cloth. Use circular motions and buff dry to avoid streaks.

You can also use a few drops of dish soap on a damp cloth for a fog-free finish. Clean the sink basin, faucet, and countertop with all-purpose cleaner or disinfecting spray.

Scrub around the faucet base where toothpaste and soap gunk collect. Rinse your cloth often and wipe everything dry.

Spray shower walls, the tub, and fixtures with a bathroom cleaner made for soap scum. Let it sit a few minutes, then scrub with a brush or sponge.

Focus on corners and around the drain where buildup happens fast. Rinse everything with warm water.

Scrub the toilet bowl with a toilet brush, reaching under the rim and around the waterline. Wipe down the outside of the toilet, including the tank, seat, lid, and base with disinfecting wipes or spray.

Don’t forget the flush handle, that’s a germ hotspot.

Final Touches and Reset

Mop the bathroom floor, starting from the far corner and working toward the door. Use a floor cleaner mixed with water or pre-moistened pads.

Get into corners and around the toilet base where grime sneaks in. Replace your clean bath mat and hang up fresh towels.

Put your stuff back on the counter and shelves. Refill soap dispensers if they’re almost empty.

Take out the trash and put in a new liner. Do a quick check for water spots on the faucet and mirrors.

The whole routine should take 15-25 minutes, depending on how big your bathroom is. Keep your bathroom cleaning checklist somewhere handy for next week.

Detailed Cleaning for Each Bathroom Area

Every part of your bathroom needs its own approach to get really clean. The main thing is to get rid of buildup, kill germs, and keep stains from coming back, using the right tools and methods.

Toilet Deep Cleaning

Start by squirting toilet cleaner inside the bowl, making sure to get under the rim. Let it sit for 5-10 minutes while you tackle other spots.

Use a toilet brush to scrub the whole inside of the bowl, especially under the rim where bacteria hide. Spray disinfectant on the handle, lid, seat (both sides), and outside of the bowl.

Wipe everything down with a microfiber cloth or paper towel. Don’t forget the base of the toilet, that’s where dust and grime build up.

For tough stains, sprinkle baking soda in the bowl before scrubbing. The mix of toilet cleaner and baking soda helps break down mineral deposits.

Clean the toilet brush holder too by rinsing it with hot water. It’s easy to forget but totally worth it.

Shower and Tub Maintenance

Spray shower cleaner or bathroom cleaner on all surfaces, including walls, doors, and fixtures. Let it sit a few minutes to break down soap scum and body oils.

Use a scrub brush for the tub and shower floor, since that’s where grime piles up. For grout lines, use a grout brush with bathroom cleaner to get rid of mildew and dirt.

Scrub in small circles along each line. Hard water stains on glass doors need extra attention with a cleaner made for mineral deposits.

Rinse everything well with warm water. Wipe down glass doors with a squeegee or dry cloth to stop new water spots from forming.

Sink and Faucet Care

Clean the sink basin with bathroom cleaner or a paste of baking soda and water. Scrub the whole surface, paying extra attention to the drain area where toothpaste and soap love to collect.

Baking soda is nice because it’s mildly abrasive but won’t scratch. Wipe down faucets with disinfectant spray to kill germs.

Use an old toothbrush to clean around the base of the faucet, where gunk hides. For hard water stains on chrome, wrap a cloth soaked in white vinegar around the faucet for 10 minutes, then wipe clean.

Dry fixtures with a clean cloth after each cleaning to keep water spots away. It’s a small thing but keeps your sink looking polished.

Mirror and Glass Polishing

Clean mirrors and glass with a few drops of dish soap on a damp microfiber cloth, or just use glass cleaner. Wipe in a circular motion first, then finish with vertical strokes to avoid streaks.

Use a dry microfiber cloth for the final polish. For a fog-free mirror, the dish soap trick leaves a thin protective coating.

Remove water spots with a mix of equal parts water and white vinegar. Spray lightly and wipe right away with a clean, dry cloth.

Clean mirrors weekly to stop buildup of hairspray, toothpaste splatters, and dust. Good lighting helps you spot any missed streaks or spots.

Cleaning Floors, Rugs, and High-Touch Areas

Bathroom floors pick up moisture and dirt fast, and bath mats trap water and germs. Light fixtures and exhaust fans need a wipe now and then to keep dust from messing with your air quality.

Floor Cleaning Techniques

Start by picking up anything on the floor. Sweep or vacuum to catch hair and debris.

Vacuuming really helps in corners and around the toilet base, where dust just loves to gather.

Mix your floor cleaner as the label says. Mop from the far corner, backing out toward the door.

Focus on spots near the toilet and sink since spills happen there a lot.

Let the floor air dry all the way before tossing bath mats back down. This keeps moisture from getting trapped and growing mold.

If you’re in a rush, crack a window or flip on the exhaust fan to speed things up.

Caring for Bath Mats and Rugs

Wash bath mats every week to get rid of soap scum, moisture, and bacteria. Check the care label, but most can go in the washer with regular detergent.

Give your bath rug a good shake before washing to get out loose hair and dirt. Wash with warm water, and toss in half a cup of white vinegar to fight odors and kill germs.

Skip the fabric softener, since it makes mats less absorbent. Hang mats up to dry fully instead of putting them back on a damp floor.

If you have more than one mat, swap them out weekly so each gets time to dry. Rotating helps keep them fresher.

Sanitizing Light Fixtures and Ventilation

Dust light fixtures with a microfiber cloth or duster once a week. Turn off the lights and let bulbs cool first if they’ve been on.

Wipe gently so you don’t damage delicate parts. For exhaust fans, clean them monthly by taking off the cover if you can and wiping away dust with a damp cloth.

A clean exhaust fan pulls out moisture better and helps stop mold. Use your vacuum’s brush attachment to reach dust inside the vent.

Wipe down light switches and doorknobs with a disinfectant wipe each week. These spots collect germs from everyone, so they need regular attention.

Time-Saving Strategies for Bathroom Cleaning

If you use the right approach, you can cut your bathroom cleaning time in half. Doing quick daily tasks and following a smart order really helps prevent dirt from piling up.

Efficient Cleaning Order

Clear off all surfaces, like toothbrushes and soap dispensers, before wiping anything down. This makes cleaning faster since you’re not dodging stuff.

Work from the top down. Dust light fixtures, then mirrors and windows, then counters, and finish with the floor.

Gravity is your friend here, since dust and debris fall as you go. Clean the toilet while other surfaces soak with cleaner.

Spray shower walls, then clean the sink while the spray works on soap scum. Use a toilet bowl cleaner that sits while you handle other things.

Keep all your cleaning supplies in a caddy you can carry. It saves trips back and forth for forgotten products.

Quick Daily Maintenance Tips

These little habits take less than two minutes but save you big headaches. Wipe your sink after brushing to get rid of toothpaste and water spots before they dry.

Squeegee shower walls after every use. It stops water stains and mildew, and honestly, it means less scrubbing later.

Hang towels so they can actually dry between uses. Damp towels get musty fast and end up needing more frequent washes.

Stash disinfecting wipes under the sink for quick counter and faucet touch-ups. If you see drips inside your toothbrush holder, give it a quick rinse.

Expert Product Suggestions

The right products make bathroom cleaning faster and easier. Good tools and cleaners help you get the job done with less effort.

Best Bathroom Cleaning Product Picks

Bar Keepers Friend is great for scrubbing tubs, showers, sinks, and toilets. If you’re into natural options, try baking soda mixed with Castile soap.

For an all-purpose cleaner, grab a multipurpose spray with vinegar if hard water spots drive you nuts. It’ll help with mineral buildup on fixtures and glass.

Hydrogen peroxide in a spray bottle works as a solid green disinfectant. It sanitizes without harsh chemicals.

For daily shower maintenance, mix a cup of water, half a cup of rubbing alcohol, and 10 drops of peppermint oil for a spray that keeps soap scum and mildew away.

Use streak-free glass cleaner on mirrors and chrome. It keeps them shiny without those annoying water marks.

Tools That Simplify Your Routine

Microfiber cloths are a must. Have at least three kinds: one for windows, one for counters, and a tougher one for scrubbing.

Keep extras so you can swap out for each product. A toilet brush with a holder should stay in every bathroom, so you’re not running around with one brush.

A microfiber deep clean mop cleans and disinfects floors with just water. It cuts out the need for extra floor products and speeds things up.

Add a handled microfiber duster for high spots, a big scrub brush for the tub and shower, and a shower squeegee to fight water spots. Store it all in a cleaning caddy so you can carry it from bathroom to bathroom.

Frequently Asked Questions

Keeping your bathroom clean every week brings up all sorts of questions about timing, tools, and what really works. Here are some answers to help you build a routine that fits your schedule and actually gets results.

What are the essential steps to maintaining a clean bathroom on a weekly basis?

Your weekly bathroom cleaning should follow a set order so you don’t double up on work. Start by grabbing all your supplies so you aren’t searching for things mid-clean.

Clear countertops and remove anything that doesn’t belong. Spray cleaner on the shower, tub, and toilet so it can sit while you work elsewhere.

Wipe mirrors and light fixtures first. Scrub the shower, tub, toilet bowl, and sink next.

Sweep or vacuum the floor to pick up hair and debris. Mop last with a damp mop and mild cleaner, focusing on corners and baseboards.


Which cleaning tools are necessary for an efficient weekly bathroom cleanup?

You don’t need a ton of tools to clean your bathroom well. A toilet brush with sturdy bristles handles the bowl, and a grout brush or old toothbrush gets into tight spots around faucets and tiles.

Microfiber cloths are your best bet for wiping surfaces and mirrors without streaks. Use different cloths for different areas to avoid spreading germs.

A squeegee quickly clears water from shower walls and glass doors, stopping water spots and soap scum. You’ll also want a mop with a washable head for the floors.

A spray bottle helps you mix your own solutions or spread store-bought cleaner evenly. A bucket is handy for carrying supplies and mixing mop water.


Can you recommend time-saving techniques for weekly bathroom cleaning?

Let cleaning products sit while you tackle other tasks to cut down on scrubbing. Spray the shower, tub, and toilet first, then wipe mirrors and counters while the cleaner works on grime.

Use a daily shower spray after each use to slow down soap scum and hard water stains. It means less scrubbing on cleaning day.

Keep a portable caddy with your cleaning supplies under the bathroom sink. You won’t waste time gathering things from all over the house.

Squeegee shower walls right after you shower. It only takes half a minute and saves you from tough scrubbing later.


What are the best cleaning products for a thorough weekly bathroom clean?

An all-purpose bathroom cleaner covers most surfaces, like counters, sinks, and tubs, without needing a bunch of different products. Look for one that cuts through soap scum and hard water stains.

For toilets, a thick disinfecting bowl cleaner sticks to the bowl and gets under the rim. Clorox or Lysol Toilet Bowl Cleaner both work well.

White vinegar mixed with water in a spray bottle cleans mirrors, fixtures, and glass shower doors. It removes water spots and leaves things streak-free without harsh chemicals.

If you want an eco-friendly option, Method Antibacterial Bathroom Cleaner uses plant-based ingredients. For tough mold and mildew, Tilex Mold and Mildew Remover targets the problem without much scrubbing.


How long should a typical bathroom cleaning session take each week?

Usually, a bathroom cleaning session takes 15 to 30 minutes if you stick to a routine. Small bathrooms with just a toilet, sink, and shower usually need about 15 to 20 minutes.

Bigger bathrooms with double sinks or separate tubs and showers take closer to 30 minutes. The first few times might take longer as you figure out what works best for your space.

Once you get into a groove, it goes faster because less dirt builds up between cleanings. If you’ve skipped a few weeks, though, plan on 45 minutes to an hour to catch up.


What is a good weekly schedule to keep your bathroom clean and fresh?

Pick a day each week for bathroom cleaning so it becomes a habit. Saturday or Sunday mornings often work since most people have more free time and the light’s better.

If weekends get packed, try a weeknight like Wednesday instead. That way, you can break up your week and avoid letting too much mess pile up.

Some folks with more than one bathroom will rotate which one they clean on different days. It spreads out the work and doesn’t feel as overwhelming.

Daily maintenance helps keep things fresher without much effort. Wipe down the sink and counter after your morning routine.

Squeegee the shower walls after you use them, and give the toilet bowl a quick brush every few days.


Cleaning Hardwood Floors Safely: The Essential Guide for Homeowners

0

Hardwood floors add beauty and value to your home, but keeping them looking great takes the right cleaning habits. It’s surprisingly easy to damage these floors with too much water, harsh chemicals, or just the wrong tools.

The trick to cleaning hardwood safely? Stick with pH-neutral cleaners, use as little moisture as you can, and reach for gentle tools like microfiber mops. Steer clear of steam mops, vinegar, and anything abrasive.

It doesn’t matter if you have solid hardwood or engineered wood, cleaning them right means more than just sweeping up crumbs. You need to know which cleaners are safe for your floor’s finish, how often to clean, and what to avoid if you don’t want scratches or dull, warped boards.

This guide walks you through daily sweeping, deep cleaning, and how to keep your floors looking good for years. Let’s see what actually works, and what you can skip.

Key Takeaways

  • Clean hardwood floors daily with dry sweeping or vacuuming, then damp mop weekly with pH-neutral cleaners made for wood
  • Skip steam mops, vinegar, ammonia, and lots of water, all of which can mess up the finish or warp the wood
  • Prevent scratches by using felt pads under furniture, trimming pet nails, and keeping indoor humidity between 35-55%

Understanding Hardwood Floors

Different hardwood floors need different care. The wood type, how it’s constructed, and the finish all play a part in how you should clean them.

Types of Hardwood Flooring

You’ve got two main types: solid hardwood and engineered hardwood. Solid hardwood is just one chunk of wood, cut straight from a tree. Oak, maple, cherry, and walnut are all popular choices. Each one has its own hardness and grain pattern.

Engineered hardwood is a little different. It’s made from layers of wood pressed together, with a real hardwood veneer on top and plywood or similar material underneath. This makes engineered wood more stable if your home has big swings in humidity or temperature.

Common Hardwood Species:

  • Oak (red and white)
  • Maple
  • Cherry
  • Hickory
  • Walnut
  • Ash

The species matters. Softer woods like pine need gentler cleaning than hard ones like hickory.

Engineered Hardwood Versus Solid Wood

Solid wood floors are usually 3/4 inch thick, so you can sand and refinish them many times. With good care, they last for decades. You might get up to 7-10 refinishes depending on thickness.

Engineered hardwood is thinner, maybe 1/4 to 1/2 inch thick. The top layer is real wood, but you can only sand it once or twice—sometimes not at all if the veneer is really thin.

Both types need similar cleaning routines, but engineered hardwood doesn’t handle water as well. Too much moisture can make the layers separate, so you’ll want to be extra careful with spills and wet mopping.

Surface Finishes and Their Impact on Cleaning

The finish on your floor decides what cleaners and methods are safe. Polyurethane finishes are the most common. They form a protective coating that handles light moisture but still needs gentle care.

Oil finishes soak into the wood, giving a more natural look. These need special cleaners—regular hardwood cleaners won’t work.

Wax finishes are rare these days but show up in older homes. Only use wax-based products and skip anything water-based.

Sealed floors have a protective barrier, so they’re easier to clean. Unsealed floors soak up liquids fast, so if you spill something, you have to move quickly.

Essential Tools and Products for Safe Cleaning

The right tools make a huge difference. Microfiber mops, pH-neutral cleaners, and the correct vacuum attachments help protect your floor’s finish and actually get rid of dirt.

Choosing the Right Microfiber Mop

Go for a microfiber mop with a big, flat head. Those tiny fibers grab dust from cracks and grooves without scratching anything. Removable, machine-washable pads save money and cut down on waste.

Swiffer Sweepers are popular, but brands like Old Home Kitchen sell reusable pads—less than $15 for two. Pick a mop that lets you wring out water easily. The pad should be damp, not soaking wet.

Skip traditional string mops. They hold way too much water and can actually harm your floors over time.

Recommended Wood Floor Cleaners

Stick with pH-neutral, wax-free, and petroleum-free cleaners for surface-finished floors. Bona PowerPlus Hardwood Floor Deep Cleaner is a solid choice. If you like DIY, mix ¼ cup dish soap with a gallon of warm water.

If you have oil-finished floors, use solvent-based cleaners. Mineral spirits work for old wax buildup, and you can follow up with a solvent-based wax like Trewax Paste Wax to bring back shine.

Dr. Bronner’s castile soap is safe if you dilute just a couple of drops in a spray bottle of water. For really dirty floors, you can use white vinegar—just make sure it’s diluted, about ½ cup per gallon of water. Never use vinegar straight, though, or you’ll mess up the finish.

Vacuuming Without Damaging the Finish

Use a vacuum with a floor-brush attachment. The soft bristles clean without scratching up your floors. Make sure you turn off the beater bar, since that spinning brush can leave dents or marks.

Pay extra attention to spots where floorboards meet. Dirt collects in those seams. Move slowly so the vacuum has time to do its job.

Vacuum once a week to stop dirt from building up and scratching the floor.

Routine Cleaning Methods for Hardwood Floors

Regular cleaning keeps your hardwood floors safe from grime and scuffs. A good routine means daily dry cleaning, weekly damp mopping, and quick action on spills.

Daily Dry Dusting and Sweeping

Sweep or dust your floors every day to get rid of dirt and grit. Even tiny particles can scratch up the finish over time.

Use a soft-bristle broom or a microfiber dust mop. These grab dust instead of just moving it around. If you prefer vacuuming, pick one with a hardwood floor or brush setting. Never use a beater bar attachment, since it can gouge the finish.

Focus on high-traffic spots like doorways, hallways, and kitchens. Microfiber mops are great because they attract dust and pet hair. For corners and edges, a dry microfiber cloth works wonders.

Weekly Damp Mopping Technique

Give your floors a deeper clean once a week with a damp mop. This helps get rid of any residue left after sweeping.

Start by clearing away loose dirt with a broom or vacuum. Mix a pH-neutral hardwood floor cleaner with water, following the instructions. Dip your microfiber mop in, then wring it out so it’s just barely damp—almost dry, really.

Mop in small sections, always following the grain. Rinse your mop often, so you aren’t just spreading dirt around. When you’re done, dry each area with a soft towel. Don’t let water sit on the floor, since even a little bit can sneak into the seams and cause damage.

Avoid vinegar, ammonia, or dish soap for regular cleaning. Those can strip the finish and leave your floors looking dull.

Spot Cleaning Spills Correctly

Deal with spills right away to keep them from staining or soaking in. The longer liquid sits, the more likely it is to cause problems.

Blot up spills with a dry, absorbent cloth. Don’t wipe, since that can spread the mess and push it into cracks. For sticky stuff like juice, use a cloth that’s just barely damp with water or hardwood cleaner. Press it onto the spot and lift straight up.

Dry the area with a clean towel. Once it’s dry, check to make sure there’s no sticky feeling left. If there is, go over it again with your damp mop and towel it off.

Deep Cleaning and Stain Removal

Deep cleaning takes a bit more effort, but it lifts out dirt that regular sweeping can’t touch. Different stains need different tricks, and the right method will keep your floors safe while making them look great again.

How to Deep Clean Hardwood Floors

First, vacuum or dust mop to get rid of loose dirt. Mix a pH-neutral cleaner with warm water, following directions. Dampen your mop and wring it out until it’s almost dry.

Work in small areas, moving with the wood grain. Never let water pool up, since moisture can seep between boards and cause warping. Dry each section right away with a clean microfiber cloth.

If your floors haven’t had a deep clean in a while, you might need to go over busy areas twice. For textured or hand-scraped floors, use a soft-bristled brush to get into the grooves. Finish by buffing the whole floor with a dry cloth to bring back the shine and pick up leftover cleaner.

Removing Common Stains Safely

Water stains show up as white rings if moisture only hits the finish. Lay a dry cloth over the spot and press it with a warm iron for a few seconds at a time. For darker water stains that go deeper, try a cloth soaked in 3% hydrogen peroxide and leave it on for a few hours.

Pet stains need enzyme cleaners to break down the mess and get rid of odors. Put the cleaner right on the stain and let it sit as the label says. You can use hydrogen peroxide to lighten any discoloration after treating with enzymes.

Grease and oil come up best with a little dish soap and water. Blot, don’t rub. For ink or wine, dab with isopropyl alcohol, starting at the edges and working inward so it doesn’t spread.

Avoiding Damage During Intensive Cleaning

Don’t use vinegar undiluted, since its acidity can strip away your floor’s protective finish over time. Steam mops create too much heat and moisture, which makes boards expand or even crack.

Abrasive scrubbers like steel wool or rough sponges? Skip them, they’ll scratch the surface fast.

Test any new cleaning product on a hidden spot first, just in case. Letting cleaning solutions sit on the floor for too long is a bad idea.

Avoid ammonia-based products unless they’re made for hardwood, since they can cloud finishes.

If you’re fighting stubborn stains, don’t go wild with scrubbing. Gentle, repeated treatments usually work better than one aggressive attack.

If a stain just won’t budge after a few tries, it might be time to sand and refinish that section instead of risking bigger damage with stronger chemicals.

The Do’s and Don’ts of Cleaning Hardwood Floors

Taking care of hardwood floors is a decent investment, but it really pays off. The right cleaning methods keep your floors looking good and help you avoid expensive repairs or replacements later.

Best Practices for Everyday Care

Sweep or dust mop your hardwood floors every day to catch dirt and grit before they scratch the surface. Even tiny particles act like sandpaper under your feet and cause wear.

Vacuum once or twice a week using a hardwood floor setting or a soft brush attachment. Never use the beater bar, since it can scratch and dent the wood.

If you need to wet clean, grab a barely damp microfiber mop and a pH-neutral hardwood floor cleaner. That’s usually enough.

Wipe up spills right away with a dry or slightly damp cloth. Blot, don’t smear it around, so you don’t spread the mess.

Standing water can sneak between boards and cause warping or stains, so don’t let any puddles linger.

Put doormats at every entrance to catch dirt and moisture before they hit your floors. Add felt pads under all furniture legs, so moving chairs or tables doesn’t leave marks.

Trim your pets’ nails regularly to minimize surface scratches from claws.

Common Mistakes That Cause Damage

Steam mops might look convenient, but they’re tough on hardwood floors. The steam drives moisture deep into the wood, leading to warping, buckling, or finish damage.

Stick with damp mopping instead. Never leave water standing on your floors after cleaning, since excess moisture leads to swelling, gaps, or stains.

Always wring out your mop really well before using it.

Dragging heavy furniture across hardwood makes deep scratches and gouges. Lift furniture or use sliders when moving things around.

Abrasive scrub pads and steel wool will mess up the finish if you try to tackle tough stains with them.

Ignoring humidity control is risky. Wood expands and contracts with the seasons, so keep indoor humidity between 35 and 55 percent. Use a humidifier in winter, dehumidifier in summer if needed.

Big swings in humidity cause gaps, cupping, or cracking in your floors.

Choosing Products That Protect Your Floors

Only use cleaners made for hardwood floors. Look for pH-neutral formulas that won’t damage the finish, and check that the label says “safe for hardwood.”

Microfiber mops are your best bet for maintenance, since they pick up dirt without scratching. Avoid string mops because they hold too much water and can soak your floors.

Pick furniture pads made of felt instead of rubber or plastic. Rubber-backed mats and pads can trap moisture or stain the wood underneath.

Replace pads regularly, since dirt can collect underneath and cause scratches.

Stick with commercial hardwood floor cleaners recommended by your floor’s manufacturer. These are tested to work with specific finishes and won’t mess up your warranty.

Safe Ingredients to Use and Avoid

pH-neutral hardwood floor cleaners are the safest for regular cleaning. They clean without stripping the finish or leaving a residue.

If you’re in a pinch, a drop of mild dish soap in a gallon of water works, but go easy on it. Never use vinegar, ammonia, or lemon juice on hardwood floors.

These acidic ingredients break down the finish and dull the wood. Some folks swear by vinegar, but honestly, it can cause permanent damage over time.

Skip oil-based soaps and waxes on prefinished floors. They create buildup that makes refinishing harder later, and can leave a dull film that attracts more dirt.

Harsh chemicals like bleach or abrasive cleaners will strip your floor’s protective coating. Stick to products made for hardwood care, and always check the ingredient list for strong solvents or alkalis.

Long-Term Maintenance and Protection Strategies

Keeping hardwood floors in great shape is more than just daily cleaning. You have to shield them from scratches and sun, follow seasonal routines, and know when to call in the pros for deep cleaning or refinishing.

Preventing Scratches, Dents, and Sun Fading

Add felt pads under all furniture legs to prevent scratches when you move chairs and tables. Change them out every few months as they wear down.

Use area rugs in busy spots like hallways and entryways. Rugs catch dirt and debris before it hits your floors.

Put doormats at every entrance to trap outdoor particles that scratch the wood. Trim your pets’ nails regularly to avoid claw marks.

Keep food and water bowls on mats to catch spills before they hit the wood. Install curtains or blinds on windows that let in direct sunlight.

UV rays fade hardwood floors and cause discoloration. Close window coverings when the sun’s at its strongest to protect the finish.

Take your shoes off indoors to avoid dents from heels and tracking in grit. Keep a shoe rack near the door to make it easier for everyone.

Seasonal and Annual Maintenance Tips

Check your home’s humidity levels year-round. Wood expands in humidity and contracts when air is dry.

Keep humidity between 35 and 55 percent using humidifiers in winter and dehumidifiers in summer. Inspect your floors every few months for signs of wear.

Look for spots where the finish has dulled or worn through, and deal with them quickly to prevent deeper damage. Deep clean twice a year with products designed for your floor’s finish.

This gets rid of built-up residue regular mopping misses. For polyurethane floors, use something like Bona hardwood cleaner. For oil-finished floors, apply maintenance coats of oil as recommended by your flooring manufacturer.

Recoat high-traffic areas every three to five years to keep protection up. Adding a fresh layer of finish helps your floors look new and puts off full refinishing for longer.

Professional Hardwood Floor Cleaning Services

Call in professionals if you see deep scratches, warping, or a lot of finish wear. They’ll assess the damage and suggest recoating or refinishing if needed.

Pros have equipment that cleans deeper than your usual tools. Professional hardwood floor cleaning gets rid of embedded dirt and grime that regular cleaning can’t touch.

They can also refinish your floors when they need a full reset. This involves sanding down the surface and applying new finish coats.

Book professional maintenance every few years, depending on how much traffic your floors get. Busy homes may need it more often.

Professional care helps you avoid expensive repairs and keeps your floors looking good for decades.

Frequently Asked Questions

Hardwood floor care isn’t rocket science, but it does take specific cleaning methods, the right products, and a little know-how about what actually damages wood. Here are some common questions that come up when you’re trying to keep your floors in top shape.

What is the ideal method for regular maintenance of hardwood floors?

For regular upkeep, dry mop with a microfiber or cotton mop several times a week. This picks up dust and dirt before they scratch the floor.

For weekly cleaning, use a damp mop with warm water and a hardwood-specific cleaner. Wring out the mop so it’s just barely damp, not wet.

Too much water is always bad news for wood. Vacuum once or twice a week with a soft brush attachment, and make sure your vacuum doesn’t have a rotating brush that could scratch the wood.


Which cleaning agents should be avoided to prevent damage to hardwood floors?

Never use bleach or ammonia-based cleaners on hardwood. They strip away the finish and leave floors looking dull and vulnerable.

Avoid two-in-one cleaners or polishes with acrylics or urethane, since they create sticky buildup that’s tough to remove. Murphy’s Oil Soap is pretty popular, but it leaves residue that builds up and dulls your floor’s finish.


What are the essential do’s and don’ts when cleaning hardwood floors?

Do use cleaning products made for your floor’s finish. Polyurethane and oil-finished floors need different cleaners, so follow your flooring pro’s advice.

Do put area rugs in high-traffic spots to protect the wood. Clean up spills right away to prevent stains and water damage.

Don’t use steam mops, ever. The heat and moisture can warp and delaminate the wood, causing permanent damage.

Don’t let water pool on your floors. Even with damp mopping, dry the area quickly to keep moisture from seeping into seams.


Can natural solutions be effectively used to clean hardwood floors, and if so, which ones?

White vinegar diluted in water is a gentle natural cleaner for hardwood. Mix a small amount with warm water and use it sparingly with a well-wrung mop.

This is safer than strong chemicals, but too much liquid is still risky for wood, no matter what you use. For oil-finished floors, stick with specialized natural oil soaps designed for wood. These clean and nourish the wood while keeping the finish healthy.


How should one go about deep cleaning very dirty hardwood floors without causing harm?

Start by vacuuming or dry mopping thoroughly to get rid of loose dirt. This helps prevent scratches when you move to wet cleaning.

Use a damp mop with a cleaner made for your floor’s finish. Work in small sections and dry each area right away with a clean cloth.

For stubborn spots, put a little cleaner directly on the area and gently wipe with a soft cloth. Don’t scrub hard or use abrasive tools, since that can damage the finish.


What are some professional tips for keeping hardwood floors in pristine condition?

Adjust how often you clean based on each room’s traffic. Living rooms and dining areas usually need more attention than bedrooms, which see less foot traffic.

Think about your floor’s finish before picking cleaning products or tools. Oil-finished floors do best with cotton mops and oil-specific cleaners.

If you have polyurethane floors, try a microfiber mop and something like Bona hardwood cleaner. It really makes a difference in how the floor looks and feels.

When you start seeing deep scratches, warping, or the finish looking tired, it’s probably time to call in the pros. They can refinish or recoat your floors, bringing back the shine without having to replace everything.


Remove Pet Hair: Detailed Guide for Furniture, Carpets, and Floors

0

Pet hair on your furniture, carpets, and floors is a headache for just about every pet owner. Sure, your furry friends bring a lot of joy, but their shedding? That can turn cleaning into a job that never seems to end.

The good news, though, is you don’t have to suffer. With the right tools and a bit of know-how, getting rid of pet hair doesn’t have to be such a pain.

The most effective way to remove pet hair is to use a combination of tools like lint rollers for furniture, rubber squeegees or carpet rakes for carpets, and microfiber mops for hard floors. Each surface in your home needs a different approach because pet hair sticks differently to fabric, carpet fibers, and smooth floors.

Understanding which tools work best for each surface will save you a lot of time and frustration. This guide covers everything you need to know about getting rid of pet hair in your home.

You’ll find out which tools work best for different surfaces and how to prevent hair from building up in the first place. Whether your pet sheds a little or a ton, these methods can help you keep things under control.

Key Takeaways

  • Different surfaces need specific tools, like lint rollers for clothes, rubber gloves for furniture, and microfiber mops for hard floors
  • Regular grooming and washing pet bedding weekly are the best ways to cut down on pet hair in your home
  • Fabric softener, dryer sheets, and anti-static sprays help loosen pet hair and make it easier to remove

Why Pet Hair Sticks to Surfaces

Pet hair clings to your furniture, clothes, and floors because of static electricity, the texture of different materials, and the way animal fur works. Once you get why this happens, it gets easier to pick the right removal methods for each spot in your home.

Electrostatic Charges and Clinging

Pet hair carries an electrostatic charge, so it sticks to most surfaces like a magnet. When your pet moves around, the friction between their fur and your stuff creates static electricity.

This static charge makes individual hairs cling tightly to fabrics, carpets, and even smooth surfaces. Dry indoor air makes it worse, especially in winter when heaters dry things out and boost static buildup.

Lower humidity means more static, so you’ll probably spot more pet hair on your couch in January than in July. The hair itself is so light, static can easily overpower gravity and keep it stuck to wherever it lands.

Surface Material Impact

Different materials attract and hold pet hair in their own ways. Fabric surfaces like couches, blankets, and clothing have tiny fibers that trap hair between the threads.

Velvet, corduroy, and other textured fabrics are especially bad because their raised patterns give hair more places to hide. Smooth surfaces like leather and vinyl don’t trap hair as much, but static still makes the hair cling.

Hard floors like wood or tile let hair collect in corners and along baseboards instead of getting stuck in the floor itself. Synthetics tend to create more static than natural fibers, so polyester furniture often ends up with more pet hair than cotton does.

Carpet pile height matters too. Deep pile carpets trap hair much more than low-pile ones, which can make cleanup really frustrating.

Pet Hair Types and Shedding Patterns

Your pet’s coat type has a huge effect on how much hair you’ll be picking up. Dogs and cats with double coats shed a lot during seasonal changes, dumping thick undercoats in the spring and fall.

Single-coated breeds shed year-round, but usually not as much overall. Long hair forms bigger clumps that are easier to see and grab, while short hair gets deep into fabrics and carpets.

Fine, fluffy undercoat hair floats through the air longer before landing, so it ends up everywhere. Some breeds barely shed, while others seem to lose fur by the handful every day.

Regular grooming really helps keep loose hair off your furniture and floors. It’s one of those simple things that can make a big difference if you stay on top of it.

Essential Tools and Products for Pet Hair Removal

The right tools really speed up pet hair removal. Each one works a little differently, whether it’s sticky, uses friction, or just has a strong vacuum.

Lint Rollers and ChomChom Roller

Lint rollers have sticky sheets that grab hair from clothes and furniture. You just roll them over the surface and peel off the sheet when it’s full.

They’re great for quick jobs and small spots. The ChomChom roller is a step up for most people. It’s reusable, with a textured fabric brush inside a rolling mechanism.

You roll it over your furniture, and the hair collects in a compartment you can empty. It’s pretty wide, so you can cover big areas fast. Plus, you don’t have to keep buying refills or batteries, which is nice.

Just remember to empty the fur compartment after each use so it doesn’t jam up.

Rubber Gloves and Rubber Broom

Rubber gloves work by creating friction that lifts pet hair from fabric. Just put on a damp glove and rub your hand over the surface. The hair clumps together and sticks to the glove, so you can rinse it off and keep going.

A rubber broom, like the Furemover, works on floors the same way. It has rubber teeth on one side and a squeegee edge on the other. The squeegee side is great for pulling hair from carpet, tile, and linoleum without just pushing it around.

You’ll need to put in a bit of elbow grease with a rubber broom. The handle extends for comfort, which is a thoughtful touch. After you’re done, use a vacuum to pick up the loose hair and any leftover debris.

Vacuum Cleaners with HEPA Filters

Pet vacuums with HEPA filters are lifesavers. They suck up hair and trap allergens at the same time. A handheld vacuum like the Shark UltraCyclone Pet Pro+ gives you about 25 minutes of cordless suction, and the silicone fins help stop hair from wrapping around the roller.

For big carpeted spaces, upright vacuums with pet attachments are better. Motorized brush rolls really help with embedded fur. The HEPA filters catch almost all the pet dander and keep it from blowing back out.

Always empty the canister after each use. Clean or change filters as the manufacturer suggests to keep your vacuum running strong.

Electrostatic and Microfiber Cloths

Microfiber cloths attract pet hair because of static electricity. Use them dry on hard surfaces like tables and shelves. For floors, a microfiber mop with Swiffer Pet Heavy Duty cloths works well for picking up soft undercoat hair.

These cloths have thousands of tiny fibers that trap hair and dust. They’re best for smooth surfaces and softer hair types, but might not handle coarse hair as well.

You can wash and reuse microfiber cloths over and over, which saves money compared to disposable ones. That’s always a plus.

How to Remove Pet Hair from Furniture

Furniture traps pet hair in different ways depending on what it’s made of. Rubber tools use static and friction, vacuum attachments pull hair out of fabric, and microfiber cloths grab loose strands pretty well.

Damp Rubber Glove Method

Grab a standard rubber cleaning glove and get it a little bit damp. Run your gloved hand across the furniture in one direction. The rubber and moisture work together to lift and clump the hair.

You’ll see the hair ball up, making it easy to pick up and toss. This works especially well on fabric upholstery, microfiber sofas, and cushions where hair really digs in.

If you don’t want to use your hands, a rubber broom or squeegee can work too. Just rinse the glove when it’s covered in hair and keep going until the whole surface is clean.

This method barely costs anything and you probably already have what you need at home.

Vacuum Attachments and Handheld Vacuums

A handheld vacuum is probably the easiest way to tackle pet hair on furniture. Look for one with a motorized brush roll that actually agitates the fabric and pulls out the hair.

Standard vacuums with upholstery attachments work too, as long as you vacuum slowly and make several passes. Use short, overlapping strokes and try vacuuming in different directions to get hair that’s lying flat.

Don’t forget to focus on crevices between cushions and seams where hair piles up. A lint roller is handy for touch-ups between vacuuming sessions.

Empty the vacuum canister often, since hair can clog filters and kill suction fast. Keep up with filter cleaning or replacement on schedule to keep things working right.

Microfiber Cloth and Anti-Static Spray

A dry microfiber cloth grabs pet hair thanks to its fine fibers and static charge. Wipe down furniture with firm pressure and you’ll see the hair cling to the cloth.

Shake the cloth outside or rinse it off when it gets full, then keep going. Anti-static spray is a nice touch after you clean, since it cuts down on static and keeps hair from sticking as much next time.

You can spray the anti-static stuff right on your microfiber cloth too. This combo works really well on leather furniture and other smooth surfaces where hair just sits on top.

Removing Pet Hair from Carpets and Rugs

Carpets and rugs are a whole other beast, since they trap pet hair deep in the fibers. The best way to get it out is to use mechanical tools like rubber brooms and carpet rakes, plus vacuums and maybe a few household tricks.

Rubber Broom and Carpet Rake Techniques

A rubber broom uses static and friction to pull hair out of carpet fibers. Just run the broom over your carpet in short, overlapping strokes. The rubber bristles gather the hair into clumps you can pick up by hand.

Carpet rakes have stiff bristles that dig deeper into the pile. Push the rake in one direction with steady pressure. You’ll see hair come up to the surface, ready for the vacuum.

Both tools work best on dry carpets. For stubborn spots, make a few passes in different directions. If you have a long-haired pet, these methods can make a big difference.

Pet Vacuums with Rotating Brush Heads

Pet vacuums come with rotating brush heads that stir up carpet fibers and lift out embedded hair. Look for models with strong suction, usually measured in air watts.

The brush roll should have stiff bristles and spin quickly. Vacuum in a few different directions to catch hair from all angles.

Make slow, overlapping passes to give the vacuum enough time to pull out fur. Empty the canister or change the bag often, since pet hair fills them up fast.

HEPA filters trap dander and allergens that come up with the hair. Clean or swap out filters about once a month to keep suction strong.

Models with tangle-free brush rolls stop hair from wrapping around the mechanism. That alone can save you a headache.

Fabric Softener and Baking Soda Methods

Mix one part fabric softener with three parts water in a spray bottle. Lightly spray your carpet and let it sit for five minutes.

The softener loosens hair’s grip on the carpet fibers. Once the carpet dries, vacuum thoroughly.

Baking soda is a dry alternative. Sprinkle it generously over the carpet and let it sit for 15 minutes.

The powder works into the fibers and helps separate hair from the carpet. Vacuum a few times in different directions to get up both the baking soda and the loosened fur.

It’s smart to test both methods on a small, hidden area first, just in case they stain or damage the carpet. Better safe than sorry.

Best Practices for Pet Hair Removal from Floors

Hard floors need a different approach than carpets when it comes to picking up pet hair. The right mop and vacuuming technique can stop hair from flying everywhere, and help keep corners and baseboards clean too.

Microfiber and Electrostatic Mops

Microfiber mops work great for daily pet hair cleanup on hard floors. Their fine fibers trap and hold hair instead of just pushing it around.

Dampen the mop a little before use, since a touch of moisture helps grab loose hair better. An electrostatic mop, on the other hand, uses static charge to attract pet hair without any water.

This dry method is ideal for quick cleanups between deeper cleaning sessions. It also avoids water damage on wood floors and still collects hair well.

Both mop types need regular cleaning to stay effective. Shake out or rinse your microfiber mop head after each use.

For electrostatic mops, pull the collected hair off the pad and wipe it down. Replace mop heads every few months, depending on how much you use them.

Vacuuming Hard Floors

Your pet vacuum should have a hard floor setting that turns off the brush roll. This stops hair from scattering all over while you clean.

Switch to this mode before vacuuming tile, laminate, or wood. Vacuum in a few directions to grab hair that lies flat against the floor.

Start at one end of the room and work your way across. A rubber broom can help loosen stubborn hair before you vacuum, making the job easier.

Empty your vacuum canister when it’s half full. Pet hair compacts quickly and kills suction if you wait too long.

Clean or replace filters every month to keep your vacuum running strong.

Cleaning Baseboards and Corners

Pet hair loves to pile up in corners and along baseboards where mops can’t reach. Use a vacuum crevice tool to pull hair from these tight spots.

Run the tool along the full length of your baseboards in each room. An electrostatic duster grabs hair from vertical surfaces and corners without scratching paint.

Wipe down baseboards every week to stop buildup. For stubborn hair stuck in corners, wrap a damp microfiber cloth around a flat tool and reach into the angle where the wall meets the floor.

Prevention Tips to Reduce Pet Hair Buildup

The best way to handle pet hair? Stop it from spreading in the first place. Brushing your pet regularly, covering furniture with washable covers, and running air purifiers with HEPA filters can seriously cut down on the amount of hair that ends up everywhere.

Regular Pet Grooming and Furminator Use

Brush your pet a few times a week to remove loose fur before it lands on your floors or furniture. Short-haired pets need brushing two or three times a week, while long-haired breeds may need daily grooming.

A Furminator or similar deshedding tool works wonders for pulling out the undercoat where most loose fur hides. These tools have fine teeth that reach beneath the top layer to grab dead hair.

Use gentle strokes and don’t press too hard on your pet’s skin. Here’s a quick guide:

  • Short-haired pets: 2-3 times per week
  • Medium-haired pets: 3-4 times per week
  • Long-haired pets: Daily brushing recommended

Regular baths help too. Washing your pet every four to six weeks loosens dead fur that comes out during the bath instead of all over your couch.

Use a pet-safe shampoo and brush your pet while their coat is still damp to get even more loose hair.

Washable Covers and Furniture Choices

Washable furniture covers create a barrier between pet hair and your upholstery. Toss them in the washing machine every week instead of deep-cleaning the whole couch.

Look for covers made from tightly woven fabrics that don’t trap fur as easily. Some materials just repel hair better:

  • Leather and faux leather (hair wipes off easily)
  • Microfiber with tight weave
  • Outdoor fabrics made to resist moisture and debris

Avoid velvet, corduroy, and loosely woven fabrics, since they grab onto pet hair. When shopping for new furniture, go for smooth surfaces or removable, washable cushion covers.

Throw washable blankets or throws on your pet’s favorite spots. Change these covers twice a week and shake them outside before washing to get rid of loose hair.

Cleaning Routine and Air Purifiers

Vacuuming two or three times a week keeps pet hair from building up in carpets and along baseboards. Focus on spots where your pet hangs out the most, like by windows or their usual napping places.

An air purifier with HEPA filters captures airborne pet hair and dander before it lands on surfaces. Put the purifier in rooms where your pet spends the most time.

HEPA filters trap particles as small as 0.3 microns, so they catch most pet hair and dander. Here’s a quick cleaning checklist:

  • Vacuum all floors and furniture
  • Wipe down hard surfaces with a damp microfiber cloth
  • Shake out or vacuum pet beds
  • Change air purifier filters monthly

Running your air purifier non-stop in high-traffic pet areas cuts down on floating hair. Empty your vacuum canister after each use to keep suction strong. Replace vacuum filters every three to six months if you have pets.

Product Recommendations for Pet Hair Removal

The right tools can make pet hair removal so much easier. These three products tackle different surfaces and use various tricks to capture stubborn fur.

ChomChom Roller

The ChomChom Roller is a reusable lint roller with a textured fabric pad that collects pet hair without sticky sheets or batteries. It’s 7.5 inches wide, so you can cover large areas pretty quickly.

Just roll it across furniture, clothes, or bedding in one direction, and the hair collects in an internal compartment. To empty it, flip open the fur reservoir and pull out the hair.

You’ll want to clean it after each use, or it can jam up. The roller works best on upholstery but also handles blankets and jackets pretty well.

The button placement can be annoying, honestly. Sometimes you might hit the empty button by accident while rolling. It works better on tight or stretched-out surfaces, so hold clothing or bedding firmly when you use it.

Rubber Broom

A rubber broom combines squeegee and rake features to pull pet hair from floors using friction. It has rubber teeth on one side and a squeegee edge on the other.

Both sides attract and collect hair from carpet, tile, concrete, and linoleum. The squeegee side works best on hard floors and short carpets.

The broom side can sometimes toss debris into the air, so it’s not perfect for every job. Most rubber brooms have adjustable handles, usually between 36 and 60 inches, so you can set it to a comfy height.

This tool takes a bit of muscle to use well. You’ll probably need to vacuum up the piles of hair and debris it collects afterward.

Furminator Deshedding Tool

The FURminator tackles shedding at the source by removing loose undercoat fur from your pet before it lands everywhere. It uses a stainless steel edge that reaches through the topcoat to grab loose undercoat hair.

Regular brushing with this tool can cut down shedding by up to 90 percent. Brush your pet in the direction of hair growth, using gentle strokes.

The tool works for both dogs and cats, but you need to choose the right size and edge length for your pet’s coat. Short-haired pets need a different edge than long-haired breeds.

Use the FURminator once or twice a week during normal shedding, and more often during heavy shedding seasons. Less hair on your pet means less hair on your stuff, plain and simple.

Frequently Asked Questions

Pet owners run into the same problems with fur all the time. Simple household items and some smart prevention can make a real difference in controlling pet hair.

What are effective natural methods for removing cat hair from furniture?

Rubber gloves work surprisingly well for lifting cat hair off upholstered furniture. Dampen a pair of gloves and run your hands across the fabric in one direction.

The hair sticks to the gloves, and you just rinse them clean between passes. A dry sponge can also grab cat hair effectively. Wipe the sponge across your furniture in smooth strokes, and the texture lifts loose fur without hurting the fabric.

Dryer sheets are another easy option. They cut down static electricity that makes cat hair cling to surfaces. Just rub a dryer sheet over your furniture to neutralize the charge and make hair easier to collect.


What home remedies work best for extracting dog hair from couches?

Mix equal parts fabric softener and water in a spray bottle. Lightly mist your couch, then wipe it down with a soft cloth.

The fabric softener helps loosen the fur from the fibers. Wrap tape around your hand with the sticky side out, then pat the couch cushions and surfaces to pick up dog hair. It’s a cheap homemade lint roller, honestly.

A window squeegee can also pull dog hair out of couch fabric. Run the rubber blade across the furniture in long strokes, and the hair will clump together for easy removal.


What are the most efficient strategies for getting rid of dog hair on all types of flooring?

A microfiber mop works well on hardwood and tile floors. The fibers trap dog hair instead of just moving it around.

Dampen the mop a bit for better results. Use a rubber broom on any floor type, since the rubber bristles create static that attracts and lifts hair.

These brooms work on hardwood, tile, laminate, and even low-pile carpet. Vacuum with the right attachment for your floor, and empty the vacuum often to keep suction strong.


Are there techniques to remove dog hair from carpets without using a vacuum?

A pumice stone can lift dog hair out of carpet fibers. Rub the stone gently across the carpet in one direction, and the rough texture grabs hair so you can collect it by hand.

Spray your carpet lightly with water mixed with fabric softener, then use a carpet rake or stiff brush to work through the fibers. The hair will clump together, making it easier to pick up.

Put on damp rubber gloves and run your hands over the carpet. The friction pulls hair from deep in the pile, especially on low to medium pile carpets.


How can one prevent pet hair accumulation in their home?

Brush your pet regularly to get rid of loose fur before it falls off. Daily brushing during shedding season stops a lot of hair from ending up on your floors and furniture.

Use a de-shedding tool for pets with thick undercoats. Cover furniture with washable blankets or pet covers, and wash them weekly to keep hair contained.

Vacuum and sweep at least twice a week. Frequent cleaning keeps hair from working deep into carpet and fabric. Keep your cleaning tools handy so you can spot-clean whenever you need to.


Which products are recommended for effectively tackling embedded dog hair in upholstery?

The ChomChom Roller uses a rolling brush system to lift embedded hair from upholstery. You don’t need batteries or sticky paper for it, so it’s reusable and pretty cost-effective.

It even has a built-in receptacle that collects the hair, so you can just pop it open and toss the mess out.

Pet hair removal stones, made from recycled glass, work well on stubborn embedded fur. Their rough texture pulls hair from deep within fabric, but doesn’t seem to damage upholstery.

If the stone gets dirty, just rinse it under water, and it’s good to go again.

A dedicated pet hair vacuum attachment with rubber bristles can actually reach deep into upholstery. It’s smart to look for attachments meant for furniture that combine suction with rubber nubs.

These tools usually lift hair that standard vacuum attachments just can’t grab.


Write a Step-by-Step Guide on Deep Cleaning a Home in One Afternoon

0

Deep cleaning your whole home in just one afternoon sounds wild, right? But if you’ve got a plan and the right tools, it’s actually possible.

You can deep clean your home in one afternoon by working room by room, starting with the dirtiest spaces first, and using time-saving techniques like letting cleaning products sit while you move to other tasks.

The trick is prepping ahead, staying focused, and knowing which spots need the most elbow grease.

Most of us put off deep cleaning because it just feels like too much. But if you break it into small steps and hit high-traffic spots like kitchens and bathrooms first, it’s manageable.

You don’t have to scrub every inch perfectly. Just go after the grime that regular cleaning usually misses.

Key Takeaways

  • Gather all your supplies, declutter each room, and make a realistic schedule before you begin
  • Clean top to bottom in each room, and start with kitchens and bathrooms when you’ve got the most energy
  • Let cleaning products sit while you tackle other spots, and get help if you can

Essential Preparation Steps for Fast and Effective Deep Cleaning

If you prep well, you’ll save a ton of time and avoid doubling back. Start by decluttering, then grab all your supplies, decide your cleaning route, and set time limits for each room.

Declutter All Rooms Efficiently

Walk through each room with three boxes: donate, trash, and relocate. Pull out anything that doesn’t belong before you even think about cleaning.

This keeps you from wasting time cleaning around piles of stuff. Focus on flat surfaces first: countertops, tables, dressers, you name it.

Clear these off completely so you can actually clean them later. Anything that belongs in another room goes in the relocate box, and you’ll deal with it at the end.

Set a 15-minute timer for each room so you don’t get stuck organizing. You’re not deep organizing right now, just making space to clean.

Gather the Right Cleaning Supplies and Tools

Grab all your cleaning gear and toss it in a portable caddy before you start. Trust me, this saves you so many trips back and forth.

You’ll want microfiber cloths, an all-purpose cleaner, glass cleaner, disinfectant, and a few scrub brushes. Also, don’t forget your vacuum with attachments, mop and bucket, duster, and rubber gloves.

Having everything in one spot can easily save you 20 or 30 minutes.

Here’s what you’ll want for an afternoon deep clean:

  • Microfiber cloths (at least 6-8 for different rooms)
  • All-purpose cleaning solution
  • Disinfectant spray or wipes
  • Glass cleaner
  • Scrub brushes in multiple sizes
  • Vacuum with HEPA filter
  • Mop and appropriate floor cleaner
  • Trash bags

Create a Room-by-Room Cleaning Plan

Start with rooms farthest from your main entrance and work toward the exit. That way, you won’t track dirt back over clean floors.

Your checklist should hit high-traffic areas first. Bathrooms need toilets, sinks, and showers cleaned. Kitchens need appliance and cabinet cleaning. Bedrooms get fresh linens and dusted surfaces.

Group similar tasks together across rooms. Dust everywhere first, then vacuum, then mop. It’s way faster than finishing one room at a time.

Set Up a Realistic Cleaning Schedule

Break your afternoon into 30-minute blocks for each room, give or take. Bathrooms usually take 20-25 minutes, kitchens and living rooms need 35-40.

Take a 10-minute break every couple of hours so you don’t burn out. If your master bedroom has a bathroom, count those as two time slots.

Here’s a rough idea for timing:

Room TypeTime Needed
Bathroom20-25 minutes
Bedroom25-30 minutes
Kitchen35-40 minutes
Living Room30-35 minutes
Hallway/Entry10-15 minutes

Add a 30-minute buffer at the end for rooms that take longer than you expect. That way, you won’t feel rushed or skip stuff you meant to do.

Recommended Cleaning Tools and Solutions for a Spotless Home

Having the right tools ready makes deep cleaning way easier. A well-stocked cleaning kit with versatile supplies and a few time-saving gadgets helps you work faster.

Must-Have Supplies for a Deep Clean

Start with microfiber cloths because they grab dust better than regular rags and won’t scratch stuff. You’ll want four to six so you don’t drag dirt from room to room.

A vacuum with attachments is a must for floors, upholstery, and those tricky corners. Crevice tools, brush attachments, and hose extensions help you get baseboards, fans, and furniture without swapping tools.

Keep a few scrub brushes in different sizes. Use a stiff one for tile and grout, a soft one for counters and sinks, and a little detail brush for corners and faucets.

You’ll also want a mop and bucket, toilet brush, sponges, and an extendable duster. A squeegee is great for windows and glass shower doors. Don’t forget rubber gloves, especially if you’re using strong cleaners.

Choosing Between Chemical and Natural Cleaning Solutions

All-purpose cleaner works for most surfaces, from counters to appliances. Store-bought ones cut through grease fast, but natural options with baking soda and vinegar get the job done too.

Baking soda scrubs out tough stains without scratching. Mix it with water for a paste on sinks, tubs, and stovetops.

Vinegar is great for soap scum and hard water. Mix equal parts vinegar and water in a spray bottle for an easy cleaner.

Glass cleaner keeps windows and mirrors streak-free. If you don’t have any, just mix one part vinegar with four parts water.

For disinfecting, use bleach-based cleaners in bathrooms or hydrogen peroxide if you want something more natural. Wood surfaces need special polish or even a mix of olive oil and lemon juice.

Time-Saving Tools for Speed and Efficiency

A vacuum with attachments saves loads of time since you can hit multiple surfaces without swapping tools. Use the brush for dusting vents and light fixtures instead of climbing up with a rag.

Electric scrubbers (battery-powered) make bathroom cleaning go way faster. The spinning heads do the hard work on grout and tubs. Spin mops with wringers speed up floor cleaning and keep your hands dry.

Extendable dusters get ceiling fans and corners without a ladder. Spray mops with refillable bottles let you clean and apply solution in one go. Magic erasers wipe away scuffs from walls and baseboards fast, no extra cleaner needed.

Keep everything in a caddy so you can carry it all from room to room. You’ll avoid backtracking and keep your momentum up.

Room-by-Room Deep Cleaning Instructions

Going room by room helps you stay on track and not get overwhelmed. Hit high-traffic spots first, then move to the rest, always working from top to bottom in each space.

Kitchen Deep Clean Guide

Start with the fridge. Pull everything out and wipe down shelves with warm, soapy water. Toss expired food and wipe down condiment bottles before putting them back.

Ovens usually need extra attention. If you’ve got a self-cleaning oven, run the cycle. Otherwise, spray it down with oven cleaner and let it sit while you do other things. Wipe it out after about 15-20 minutes.

Take off stovetop grates and burner covers, soak them in hot soapy water, and scrub any burnt-on mess with baking soda paste.

Wipe cabinet fronts and handles with all-purpose cleaner. Pick one or two messy drawers, empty and wipe them out.

Scrub your sink with baking soda, then run hot water and dish soap down the drain to finish up.

Bathroom Deep Cleaning Routine

Spray shower walls and the tub with bathroom cleaner and let it sit while you work on other stuff. That gives the cleaner time to do its thing.

For the toilet, apply bowl cleaner under the rim and let it sit. Wipe down the outside, including the base and behind, then scrub the bowl and flush.

Go back to the shower and scrub the walls, focusing on grout lines. Use an old toothbrush for corners. Clean mirrors with glass cleaner and wipe down the sink and counter.

If your shower curtain liner looks gross, just replace it. Toss bath mats in the wash and put out fresh towels to wrap up.

Bedrooms: Washing and Organizing

Strip all the bedding and wash it in hot water, including sheets, pillowcases, duvets, and mattress protectors. While that’s going, flip or rotate your mattress.

Dust everything from top to bottom: ceiling fans, lights, dressers, nightstands, and baseboards. Wipe down light switches and door handles too.

Take a quick pass through your closet and pull out stuff you never wear. Vacuum or dust the closet floor. If you’ve got carpet, vacuum in a couple of directions to lift out dirt.

Wipe mirrors and windows with glass cleaner. Finish up by making the bed with clean sheets. There’s just something about fresh bedding, isn’t there?

Living Room and Common Areas

Dust every surface, including shelves, entertainment centers, and picture frames. Ceiling fans, light fixtures, and the tops of door frames collect dust too, so hit those spots.

Vacuum upholstered furniture using the attachments. Get into crevices where crumbs and pet hair hide.

Fluff and rotate cushions to even out wear. For carpets, vacuum slowly in overlapping paths and go over high-traffic areas twice.

If you have hardwood or tile floors, sweep first. Mop with the right cleaner for your floor type.

Wipe down electronics, remotes, and light switches with disinfecting wipes. Clean windows and glass doors with glass cleaner.

Straighten up throw pillows and blankets. That little touch finishes the space.

Detailed Kitchen Deep Cleaning Steps

The kitchen needs focused attention on appliances, sinks, and storage areas. Different cleaning methods tackle grease, grime, and built-up residue.

Cleaning and Organizing Appliances

Start with the oven. Remove the racks and soak them in hot, soapy water for 30 minutes.

If your oven is self-cleaning, run that cycle according to your manual. For manual cleaning, make a baking soda and vinegar paste and spread it inside, avoiding heating elements.

Let it sit for 15 minutes, then scrub with a damp sponge and rinse. Clean the microwave by heating a bowl of water with lemon juice for 2 minutes, letting the steam loosen stuck food.

Wipe down the inside with a vinegar and water mix. For the fridge, pull everything out and toss expired food.

Take out shelves and drawers, then wash them in soapy water. Spray the inside with equal parts water and vinegar plus a drop of dish soap, wipe, and dry before putting everything back.

Use glass cleaner on the exterior if it’s stainless steel. Empty crumbs from the toaster and wipe down the coffee maker with a damp cloth.

Sanitizing Sinks and Surfaces

Your sink holds more bacteria than you think. Mix 1 ounce bleach with 2 cups water and a teaspoon of dish soap, then spray the whole sink.

Wait 5 minutes and scrub with a brush. Grab an old toothbrush for the faucet base and drain edges.

Clean the garbage disposal by pouring 1/2 cup baking soda and vinegar down the drain. Let it bubble for a minute, then flush with hot water and grind lemon peels for a fresh scent.

Wipe countertops with hot, soapy water. For stains, use a baking soda paste on laminate or quartz, and lemon with salt for wood counters.

Move small appliances like the toaster and coffee maker so you can clean underneath. Clean grout lines between tiles with hydrogen peroxide mixed with baking soda.

Cleaning Cabinets and Drawers

Remove all cabinet knobs and handles and soak them in hot, soapy water. While they dry, mix 1 part vinegar and 2 parts water in a spray bottle.

Wipe down all cabinet fronts, focusing on areas around handles where fingerprints build up. Use a soapy toothbrush on grooved cabinet fronts to reach into crevices.

Wipe everything with a damp cloth, then dry with a microfiber towel. Empty one drawer at a time and use your vacuum’s brush attachment to get crumbs out of corners.

A lint roller works well for tiny particles. Wipe the inside with a damp cloth if needed.

Replace the cabinet hardware once everything dries. While organizing, check under the sink for leaks or expired cleaning products.

Intensive Bathroom Deep Clean Protocol

The bathroom needs attention on soap buildup, toilet sanitation, reflective surfaces, and tile maintenance. Getting it truly clean doesn’t have to take forever, but you do have to be thorough.

Remove Soap Scum and Grime

Start with the shower and tub, where soap scum loves to hang out. Spray all wall tiles, shower doors, and the tub interior with a good bathroom cleaner.

Let the cleaner sit for 5 to 10 minutes. Use a sponge or scrub brush in circles, hitting corners and grout lines.

For stubborn soap scum on glass doors, spray again and scrub with a non-abrasive pad. Rinse everything with hot water from the showerhead.

Wipe down with a microfiber cloth to prevent water spots. That step saves you trouble later by keeping buildup away.

Disinfect Toilets and Fixtures

Apply toilet cleaner inside the bowl, making sure to coat under the rim. Let it sit while you clean the outside.

Wipe down the tank, lid, seat (both sides), hinges, and base with a cloth and all-purpose cleaner. Scrub the inside of the bowl with a toilet brush, focusing on the waterline and trapway, then flush.

Wipe all exterior surfaces again with a clean, damp cloth. Clean faucets, showerheads, and handles with the same cleaner.

Dry and polish metal fixtures with a microfiber cloth for a streak-free shine. This process usually takes about 10 minutes per toilet.

Clean Mirrors and Glass

Spray glass cleaner directly onto mirrors and any glass surfaces. Use a microfiber towel to wipe in straight lines from top to bottom.

For mirrors with toothpaste splatters or hairspray, spray extra cleaner on those spots. Wipe with a bit more pressure using your fingertip behind the cloth.

Check the mirror from different angles to catch streaks. Clean glass shelves, shower doors, or decorative glass with the same method.

One microfiber cloth does the trick for all the glass. This usually takes about 5 minutes for an average bathroom.

Refresh Floors and Grout

Sweep or vacuum the bathroom floor to get rid of hair and dust before mopping. Mix all-purpose cleaner with hot water in a bucket.

Use a mop or cloth to clean the floor tiles, working from the far corner toward the door. For dirty grout lines, use a narrow brush or old toothbrush dipped in cleaner.

Scrub along the grout with firm pressure to lift dirt. Focus on areas around the toilet base and under the sink where dust and moisture mix.

Rinse your mop or cloth often in clean water. Let the floor air dry or speed it up with a dry towel.

Final Touches: High-Traffic Zones and Frequently Overlooked Areas

Entryways and hallways collect dirt fast. Baseboards, vents, and windows usually get skipped, so give them some attention.

Dust and Clean Windows and Walls

Start at the top of your walls and work downward using a microfiber cloth on an extendable duster. Knock down cobwebs from corners and ceiling edges first.

For windows, mix equal parts white vinegar and water in a spray bottle. Spray the glass and wipe with a lint-free cloth or squeegee in straight lines from top to bottom.

Clean both sides of the window. Get the sills and tracks while you’re at it.

Wipe down light switches, door frames, and wall spots where fingerprints gather. A magic eraser works on stubborn scuffs that regular cleaning can’t handle.

If you have textured walls, use a dry microfiber cloth. Moisture can get stuck in those grooves.

Clean mirrors with the same vinegar solution you used on windows. Buff them dry to keep streaks away.

Detail Attention to Baseboards and Vents

Baseboards trap dust and pet hair that sweeping misses. Wipe them down with a damp microfiber cloth or a cleaning wipe.

For stubborn grime, use a bit of all-purpose cleaner and a scrub brush. Remove vent covers from air ducts and vacuum both sides well.

Wash plastic or metal vent covers in warm, soapy water and let them dry before putting them back. Use your vacuum’s crevice tool to reach inside the duct opening and suck out dust.

Check return air vents and change your HVAC filter if needed. A clean filter helps your air quality and keeps your system running smoother.

Wipe the area around thermostats and light fixtures where dust collects. It’s amazing how fast it builds up there.

Freshen Air with Natural Solutions

Open windows for 10 to 15 minutes and let some fresh air in. That simple step clears out cooking smells and stale air.

Simmer water with lemon slices, cinnamon sticks, or vanilla extract on your stovetop for 20 minutes for a natural air freshener. Place small bowls of baking soda in rooms that need to absorb odors, like bathrooms or closets.

Add a few drops of essential oils like lavender or eucalyptus to cotton balls and tuck them in drawers or closets. You can even spray fabric surfaces like curtains or pillows with water mixed with a few drops of your favorite essential oil, but check the fabric first.

Frequently Asked Questions

Deep cleaning your home in one afternoon takes planning and a good strategy. Here are some questions people always seem to ask.

What essentials should be on a deep clean house checklist for a thorough one-afternoon cleanup?

Focus on high-impact areas that make the biggest difference. Start with kitchen appliances, bathroom fixtures, and floors in every room.

Wipe down all surfaces, clean windows, and vacuum upholstery. Prioritize visible dirt and grime over hidden spots for a one-afternoon clean.

Add scrubbing the toilet, cleaning the stovetop, and mopping hard floors. Dust ceiling fans, light fixtures, and baseboards too.

Save cleaning behind appliances or organizing closets for another day. You have to balance thoroughness with time limits.


Can you provide a comprehensive room-by-room deep cleaning guide to complete the process efficiently?

Start in the kitchen. Clean the fridge exterior, wipe cabinet fronts, and scrub the sink.

Clean the microwave, stovetop, and countertops, then sweep and mop the floor. Move to bathrooms, scrub the toilet, shower, and tub, clean mirrors, wipe counters, and disinfect the sink.

Mop the bathroom floor last. In bedrooms, change bed linens and vacuum under the bed.

Dust all surfaces, clean mirrors or windows, and finish with the floors. For living areas, dust furniture and electronics, vacuum upholstery and carpets, clean windows, wipe hard surfaces, and finish with the floors.


What are the time-saving strategies to consider when attempting to deep clean a house in one day?

Clean from top to bottom in each room so dust and debris fall downward. That way, you don’t have to clean the same surface twice.

Work on one room at a time to stay focused and see progress. Use multi-surface cleaners to cut down on products and spray surfaces so solutions can sit while you do something else.

This breaks down grime without extra scrubbing. Set a timer for each room to keep yourself on track and gather all your supplies in a caddy before you start.


How frequently should a full house deep clean be scheduled to maintain a clean living environment?

Deep clean your home at least twice a year. Spring and fall usually work best for most people.

This keeps your home fresh without overwhelming your routine. If you have pets or kids, you might need to deep clean every three or four months.

Bathrooms and kitchens benefit from monthly deep cleans. Your regular weekly cleaning should keep things in check between the big sessions.


Which tools and cleaning supplies are recommended to achieve the best results when deep cleaning a home?

You’ll want a vacuum cleaner with attachments for all sorts of surfaces. Microfiber cloths usually beat paper towels, and you can toss them in the wash afterward.

Pick up scrub brushes in a few different sizes. That way, you can tackle everything from grout lines to baseboards without frustration.

A mop and bucket come in handy for hard floors. I always keep an all-purpose cleaner, a glass cleaner, and a solid bathroom disinfectant nearby.

Rubber gloves save your hands when you’re scrubbing or using harsh products. For tile work, grab a grout brush, and for windows or shower doors, a squeegee really makes a difference.

Magic erasers are a lifesaver for scuff marks and stubborn stains. Honestly, it’s surprising how much easier cleaning feels when you have the right tools.


What is the most effective way to organize tasks when deep cleaning a house one room at a time?

Start with the rooms that need the most time or are the messiest. Kitchens and bathrooms usually demand the most effort, so it makes sense to tackle these first when you’ve still got energy.

In each room, begin at the top and work your way down. Dust the ceiling fixtures before you move to shelves or counters, then finish with the floors.

This way, you won’t end up cleaning the same spot twice or missing anything obvious. I find it helps to keep things moving.

Try grouping similar tasks together across rooms. For instance, dust all the rooms before you even think about vacuuming.

Honestly, this method feels faster than finishing one whole room before starting another. It lets you build a bit of momentum as you go.


Home Coffee Station Guide: Layout, Storage, Decor, and Essentials

0

Your morning coffee should feel like a treat, not a hassle. Searching through cabinets for filters, digging for your favorite mug, and juggling coffee supplies across the counter creates stress before you even get that first sip.

A dedicated coffee station keeps everything you need in one organized, easy-to-reach spot. Honestly, it’s a game changer for your routine.

Setting up a home coffee station means picking the right spot, choosing your brewer and grinder, figuring out smart storage, and adding some personal flair. You don’t need a huge kitchen or fancy gear to pull this off.

Even a small corner, a bar cart, or a bit of counter space can become your own coffee bar if you approach it right.

This guide covers layout ideas, space-saving storage, and specific product picks. You’ll see how to pick a location, what equipment actually matters, and how to style your station so it stays organized and looks great.

Key Takeaways

  • Pick a spot near outlets with enough room for your brewer, supplies, and workflow
  • Use vertical storage, airtight containers, and trays to keep things tidy and functional
  • Add decor and good lighting to make your coffee space inviting

Planning Your Home Coffee Station

Before you build your coffee station, think about where it will go, what kind of coffee you actually drink, and how much you want to spend. Planning these details now makes your daily routine smoother later.

Assessing Available Space

Start by measuring the area you want to use. You need at least 24 inches of counter width for a basic setup with a coffee maker and a few supplies.

Write down the measurements, including height and depth. Look for spots near electrical outlets and water sources, ideally close to your sink for easy filling and cleaning.

Check if you have vertical space above the counter for shelves or cabinets. Small spaces can work too, honestly. Try a rolling cart, a corner of your counter, or even a narrow console table.

Wall-mounted shelves can hold mugs and supplies without eating up counter space. If your kitchen is tiny, focus on compact equipment and stackable storage.

Defining Your Coffee Preferences

Think about what coffee drinks you make most. If you love drip coffee, you’ll need different gear than someone who makes lattes every day.

Make a list of the drinks you want at your beverage station. Do you need a milk frother? Will you use syrups? How many cups do you usually brew?

If more than one person drinks coffee in your house, take their tastes into account. Your brewing method really matters for planning. Pour-over setups take less space than an espresso machine.

French press fans need less counter space than someone with a big automatic brewer. Choose equipment that fits your taste and your space.

Choosing the Ideal Location

The best spot for your coffee station depends on your routine and your kitchen’s layout. Place it near your breakfast area or along your path to the door if you grab coffee on your way out.

Keep your setup away from the stove so heat doesn’t damage your gear. Think about the work triangle in your kitchen—your coffee nook shouldn’t block the flow between your sink, stove, and fridge.

A corner or the end of a counter works well because it keeps the coffee area separate from cooking. Natural light makes your coffee bar more inviting, but direct sun can ruin your beans.

If your spot is near a window, use opaque containers for beans. Good overhead or under-cabinet lighting helps during those early mornings.

Setting a Realistic Budget

You can start a budget-friendly coffee station for $100 to $150 with basic gear and supplies. That covers a simple coffee maker, storage containers, and a few mugs.

Mid-range setups run $300 to $500 with better gear and more organization. Break your budget down like this:

  • Coffee maker: $30-$300
  • Grinder: $20-$150
  • Storage: $25-$75
  • Accessories: $25-$100
  • Decor: $20-$50

Don’t feel like you need everything at once. Start with the basics and add as you go. Watch for sales, especially after holidays. Used or refurbished machines can save you a lot if you’re on a tight budget.

Coffee Station Layout Ideas

The right layout turns scattered coffee supplies into an organized, efficient space. Your choice depends on your space, furniture, and how you move around in the morning.

Corner Coffee Nook Setup

A corner coffee nook uses space that usually sits empty. Put a small table or cabinet in an open corner, and add floating shelves above for vertical storage.

This setup makes a cozy nook that feels separate from your main kitchen area. Hang two or three shelves at different heights for mugs, canisters, and decor.

Keep your coffee maker on the lower surface, close to an outlet. Store sugar and stirrers at arm level for quick access. The corner setup works well in small kitchens since it doesn’t block traffic.

Add a tray to group loose items and cut down on clutter. If you get good natural light, set your nook near a window for a pleasant morning vibe.

Coffee Bar Cart and Mobile Solutions

A rolling bar cart gives you flexibility that fixed spots just can’t. Move it near the sink to fill the water tank, or roll it aside for more space.

Most carts have two or three shelves for your coffee maker, mugs, and supplies. Get a cart with locking wheels so it doesn’t roll away while you’re brewing.

Put your coffee maker and grinder on top, and use the lower shelves for backup supplies and decor. Some carts have towel bars on the side—hang mugs there with hooks.

Standard carts are about 16 to 20 inches wide and 30 to 36 inches tall. Double-check your coffee maker’s size before you buy. Metal carts look modern, while wood fits farmhouse or traditional styles.

Built-In and Cabinet Coffee Stations

A coffee bar cabinet hides your gear behind closed doors. Dedicate a cabinet or buy a standalone piece deep enough for your coffee maker.

Install a power strip inside so you can plug in appliances without cords everywhere. Built-in stations blend into your kitchen. You can convert a lower cabinet by removing a door and adding a pull-out shelf for your coffee maker.

Add battery-powered LED strips inside for lighting. Drawer organizers keep filters, pods, and stirrers neat. If your cabinet has doors, try cup hooks inside for mugs.

Vertical and Floating Shelf Configurations

Floating shelves use vertical space without bulky cabinets. Hang two to four shelves above your counter for mugs, canisters, and everyday items.

Space shelves 10 to 14 inches apart so you can fit different items. Open shelving forces you to keep things tidy since everything’s on display.

Use matching canisters for a cohesive look. Place heavier items like grinders on lower shelves, lighter decor up high. Combine shelves with under-cabinet hooks for more mug storage.

A three-shelf setup usually holds 6 to 8 mugs, a few canisters, and some decor. Use sturdy anchors that can handle the weight of your coffee gear.

Essential Coffee Equipment and Tools

Building a functional coffee station starts with picking the right equipment for your habits and tastes. The basics include a reliable coffee maker, a decent grinder, some brewing accessories, and a few extras that make the whole thing better.

Choosing the Right Coffee Machine

Your coffee maker is the heart of your station. A drip coffee maker works if you brew multiple cups daily and want something simple.

They’re affordable, easy to use, and don’t need much effort beyond adding grounds and water. If you prefer espresso or milk drinks like lattes, you’ll want an espresso machine.

Entry-level models start around $100, but fancier ones with steam wands can run several hundred bucks. Think about your counter space and whether you want manual or automatic features.

Single-serve machines like Nespresso offer convenience with pods. They’re fast and easy to clean. If you like hands-on brewing, a French press gives you full-bodied coffee with just hot water and coarse grounds.

Pour-over systems like the Chemex or V60 give you control over every step, great for flavor nerds. The AeroPress is small, versatile, and makes smooth coffee in under two minutes.

Match your choice to your schedule, taste, and how much you like to experiment.

Coffee Grinders and Brewing Gear

Fresh-ground beans really do make better coffee. A burr grinder gives you consistent grounds, which matters for flavor.

Blade grinders are cheaper but make uneven grounds. Burr grinders range from hand-crank models (about $30-50) to electric ones ($100-300+).

A gooseneck kettle is key for pour-over, since it gives you precise water control. Electric kettles with temperature settings help you hit the sweet spot (195-205°F).

Even if you use a drip machine, a good kettle is handy for French press, AeroPress, or tea. Consider a coffee scale to measure beans and water.

Consistent ratios (usually 1:15 to 1:17 coffee to water) help you get repeatable results. Digital scales with timers make it easier to track brew time for methods like pour-over.

Must-Have Accessories

Beyond the main equipment, a few accessories can really improve your coffee routine. A milk frother or handheld frothing wand turns plain milk into café-style foam for lattes and cappuccinos.

If your espresso machine doesn’t have a steam wand, grab a standalone frother. They usually cost $20-50 and work surprisingly well.

It’s smart to keep basic supplies on hand, like paper filters for your drip coffee maker or pour-over. If you use an espresso machine, you’ll want a sturdy tamper and a decent knock box for spent espresso pucks.

A dedicated coffee scoop helps with consistent measurements, especially if you’re not using a scale.

A travel mug with solid insulation keeps coffee hot during your commute. Look for leak-proof lids and sizes that actually fit your car’s cup holder.

Keep a mix of everyday mugs at your station in different sizes, depending on what you like to drink.

Small organizing tools matter more than you might think. Canisters for beans, a utensil holder for spoons and stirrers, and a drip tray to catch spills all help keep your workspace clean and functional.

Recommended Product Picks

Breville Bambino Plus Espresso Machine ($500): This compact machine heats up in three seconds. It comes with an automatic steam wand for microfoam and delivers solid espresso shots without hogging your counter.

Baratza Encore Burr Grinder ($140): A reliable entry-level burr grinder with 40 grind settings. It handles espresso to French press and is built to last.

Fellow Stagg EKG Electric Kettle ($165): It features precise temperature control, a gooseneck spout for accurate pouring, and a sleek design. The built-in timer and hold function keep your target temperature for up to an hour.

Hario V60 Dripper Set ($25): This affordable pour-over setup includes a ceramic dripper, paper filters, and a glass carafe. It’s simple, makes great coffee, and barely takes up any space.

Smart Storage Solutions for Coffee Stations

Keeping your coffee station organized really comes down to having the right storage tools. You want coffee beans, ground coffee, pods, mugs, and accessories accessible but not a mess.

Smart organizers help maximize your space and protect your coffee’s freshness.

Organizing Coffee Beans and Pods

Fresh coffee beans last longer in airtight containers, away from light, heat, and moisture. Move beans out of their bags and into opaque or tinted glass containers with tight lids.

Some containers have one-way valves that let carbon dioxide out but keep oxygen from getting in. Store ground coffee the same way, but remember, it loses flavor faster than whole beans.

Label containers with the roast date and type so you can keep track. Keep them on your counter or shelf for easy access when you’re half-awake in the morning.

For coffee pods, dedicated storage keeps things organized and easy to see. Drawer inserts with slots work if you have the space, while wall-mounted pod holders or rotating carousels sit on your counter and show off all your flavors.

Some pod dispensers stack vertically and release one pod at a time. Place a small bin or basket near your coffee maker to collect used pods for recycling, which keeps things tidy and makes cleanup easier.

Drawer and Shelf Organizers

Drawer organizers help turn chaotic junk drawers into efficient storage for coffee accessories. Use divided inserts to separate filters, spoons, stirrers, sugar packets, and reusable filters.

Clear acrylic organizers let you see what’s inside right away, while bamboo dividers add a bit of warmth. Create a spot for each item type so everything goes back where it should.

Small bins inside drawers keep loose items like sweetener packets or extra filter baskets from wandering. Adjustable organizers let you change things up as your needs shift.

Shelf organizers help you use vertical space. Stackable risers add another level for canisters or appliances, and corner shelves make use of awkward spots.

Under-shelf baskets hang from wire shelves and hold filters or tea bags without taking up counter space. Lazy Susans on pantry shelves make syrups and flavorings simple to grab.

Heavier items belong on lower shelves, with lighter accessories up high.

Displaying and Storing Mugs

Under-shelf hooks let you hang mugs from the bottom of cabinets, making use of space that usually gets ignored. These metal hooks slide on easily and hold several mugs, freeing up shelf space for other stuff.

A wall-mounted mug rack can show off your favorite mugs as part of your decor. There are wood peg racks, metal rails with hooks, or floating shelves with hooks underneath.

Install racks near your coffee maker so mugs are within easy reach. Stackable mug trees on your counter hold four to six mugs vertically, which is great for daily use.

Stash seasonal or specialty mugs in cabinets to cut down on clutter. Open shelving lets you display coordinated mug collections and keeps them handy without too much dust.

Arrange mugs by size, color, or however you like using them.

Space-Saving Accessories

Tiered trays give you extra levels on your counter, perfect for sugar bowls, cream pitchers, and stirrers. Two or three-tier designs keep things visible and close by without taking over your counter.

Magnetic strips on the wall or side of cabinets hold metal tools like measuring spoons and tampers, keeping them easy to grab and out of the drawer chaos.

Over-the-cabinet-door organizers add storage in seconds. Hang them near your station for extra filters, cleaning supplies, or backup coffee gear.

Wall-mounted shelves with towel bars hold supplies above and a dish towel below. Narrow floating shelves fit into tight spots between cabinets or appliances.

Pick shelves with a lip or raised edge so nothing slides off.

Decor and Lighting Tips for a Stylish Coffee Station

Looks matter, even for a coffee station. The right decor makes the space a spot you’ll actually want to use every day, while good lighting helps you see what you’re doing and adds some atmosphere.

Incorporating Personal Style

Pick a style theme to tie your coffee station together. Modern setups look great with sleek containers, neutral colors, and clean lines.

If you like farmhouse vibes, go for wood accents, vintage signs, and mason jars. Gold hardware, like drawer pulls or shelf brackets, adds a little fancy touch.

Show off coffee mugs that match your personality. Stack matching sets for a neat look, or mix and match colorful mugs on open shelves for a more relaxed, eclectic vibe.

Wall-mounted mug racks add some visual interest and save counter space. Add personal touches with small decor items. A framed print with a coffee quote can set the mood, and a little potted plant (succulents are easy) brings some life to the area.

A decorative spoon rest or a vintage coffee tin works as both function and decoration. Stick to three main colors to keep things looking cohesive, even if you have a lot on display.

Lighting Options for Your Coffee Area

Lighting can make or break your coffee spot. Task lighting helps you measure coffee and read instructions, especially on dark mornings.

Under-cabinet lighting strips are easy to install and light up your work surface without hogging counter space. A small table lamp adds a cozy vibe and a bit of style—pick one with a warm bulb for the best effect.

The lamp itself can be a fun decor piece. Natural light is always best, so set up near a window if you can.

If your station is in a dark corner, battery-operated LED puck lights work well and don’t need any wiring.

Adding Functional and Fun Accessories

Smart accessories should look good and work well. A decorative tray can keep smaller items like sugar bowls and stirrers together and define the space.

Tiered stands use vertical space and create a nice display. Label your storage containers with chalkboard labels or printed tags, which helps you find things quickly and adds a polished, café-like feel.

Glass canisters show off the rich color of coffee beans and let you see what’s inside. A small basket for filters, stir sticks, or tea bags adds texture and warmth—woven baskets are especially nice.

Mount a magnetic strip on the wall for metal measuring spoons. Consider swapping out one or two decorative pieces each season to keep things feeling fresh without a full overhaul.

Product Recommendations for Your Coffee Station

The right gear makes a huge difference for your coffee station. A good coffee machine, grinder, and some smart storage lay the groundwork for great coffee and a tidy setup.

Top Coffee Machines

Breville Barista Express is a great pick if you love espresso and want a machine with a built-in grinder. It gives you precise temperature control and rich, café-worthy espresso shots.

The price is about $700, so it’s a mid-range investment. If you want something simpler, check out the Technivorm Moccamaster.

This high-end drip coffee maker brews at just the right temperature and delivers consistent results. It’s Dutch-made, costs around $350, and is known to last for years.

On a budget? The Ninja Specialty Coffee Maker handles classic drips and specialty brews, plus it has a milk frother. At about $170, it’s versatile and doesn’t cost a fortune.

Recommended Grinders and Tools

Baratza Encore is the go-to burr grinder for home use. It offers uniform grinds across 40 settings and works for any brewing method.

The grinder runs about $170 and is built to last. If you prefer manual grinders, the 1Zpresso JX is a solid option.

This hand grinder gives consistent results, fits in small spaces, and costs around $140. It’s especially good for pour-over brewing.

Other must-haves include a gooseneck kettle for precise pouring. The Fellow Stagg EKG gives you temperature control and a sleek look at $195.

A reusable coffee filter like the Able Kone can save you money over time and cut down on waste.

Storage Solutions and Decorative Accessories

Fellow Atmos Vacuum Canister keeps your beans fresh by pulling air out of the container. The stainless steel design looks sharp on any countertop, and sizes start at $40.

A mug rack turns storage into display. The SimpleHouseware 6-Hook rack mounts under cabinets for $15, and wall-mounted options save counter space while keeping your favorite mugs close by.

Try adding a coffee bar tray to keep small items like spoons, stirrers, and sugar packets together. Bamboo or marble trays look great and help keep things organized.

Small glass jars are perfect for storing tea bags, sweeteners, and other daily-use supplies.

Frequently Asked Questions

Setting up a coffee station means making choices about space, gear, and storage. Here are answers to some common questions about working with small spaces, picking the right tools, and keeping things organized.

How can I design a coffee station for a small kitchen space?

Start by finding a corner, empty counter spot, or wall you can dedicate to your coffee setup. Even just 24 to 36 inches wide gives you enough room for a coffee maker and the basics.

Wall-mounted shelves and hanging organizers help you use vertical space. You can put floating shelves above your coffee maker for mugs, beans, and filters.

Magnetic strips are handy for holding metal tools like scoops and stirrers. A rolling cart adds flexibility in tight spaces—you can roll it out to brew and tuck it away afterward.

Look for carts with multiple tiers to keep equipment, supplies, and serving stuff separate. Choose a single-serve machine or pour-over brewer instead of a big drip machine if you need to save space.


What are the essential items to include in a home coffee station?

Your coffee maker forms the foundation of your station. Pick one that fits your favorite brewing style, whether that’s drip, espresso, French press, or pour-over.

A coffee grinder comes next in importance. Burr grinders give you consistent grounds and don’t overheat the beans, which is pretty key if you care about flavor.

If you’re watching your spending, a blade grinder will do the trick for basic needs. You’ll also need some storage containers for your coffee beans.

Grab a scale for measuring grounds and a water kettle if your coffee maker doesn’t include one. Keep filters handy, plus a stirring spoon or two, and maybe a small trash bin for easy cleanup.

If you’re into lattes or cappuccinos, consider adding a milk frother or steam wand. A thermometer can help you nail the right temperature.

Don’t forget a few good mugs and whatever serving supplies you like. That pretty much rounds out the basics.


What storage solutions work best for organizing a coffee bar at home?

Clear airtight containers keep your coffee beans fresh and let you see when you’re running low. Stash beans in a cool, dark cabinet, not out on the counter, to keep the flavor locked in.

Drawer organizers and dividers help separate filters, stirrers, and measuring spoons. You can even use drawer inserts from office supply stores to make your own compartments.

Try a Lazy Susan in a corner cabinet or right on the counter. It makes grabbing syrups, creamers, or sweeteners way easier.

Tiered shelves or risers give you some vertical space, so you can see everything at a glance. Put taller stuff like coffee bags in the back, and shorter things like sugar packets up front.

Labels on containers and baskets help you keep things organized over time. It might seem like overkill, but it really helps.


Could you suggest some home coffee station ideas that are both practical and aesthetically pleasing?

If you’re into rustic style, think reclaimed wood shelves with metal brackets and some vintage canisters. Edison bulbs and chalkboard labels add a cozy, cafe vibe.

Modern minimalists might prefer sharp lines, black or white color schemes, and stainless steel gear. Just keep the essentials out and tuck everything else away in matching bins or cabinets.

For a traditional look, go for dark wood cabinets, ornate drawer pulls, and maybe some copper or brass touches. Hanging up coffee-themed art or displaying an old grinder can make things pop.

Mixing open and closed storage keeps things functional but stylish. Show off your favorite mugs or a cool French press, and stash the less pretty stuff behind doors.


How do I integrate a coffee station into my existing kitchen layout without clutter?

Set aside a specific spot for all your coffee gear. That way, your supplies don’t take over the whole kitchen.

Install pull-out shelves or sliding trays in your cabinets for dedicated coffee storage. These tweaks fit into your kitchen without a full remodel.

Try to match the materials and colors of your coffee station to the rest of your kitchen. Using the same counters, cabinet finishes, and handles pulls everything together.

Put your coffee maker between your water source and where you store your beans and gear. This setup makes the whole process smoother, from brewing to cleanup.

Keep what you use daily on the counter, and tuck away the occasional stuff in a nearby cabinet. Make a habit of clearing out extras so things don’t pile up.


Can you recommend a few products that are must-haves for setting up an efficient home coffee station?

The Baratza Encore burr grinder gives you consistent grinding at a reasonable price. It comes with 40 grind settings and handles everything from espresso to French press.

The motor runs quietly, and those burrs really hold up if you use it regularly. It’s a solid pick for both beginners and coffee nerds who want good results without breaking the bank.

OXO Good Grips airtight coffee storage containers keep your beans fresh for weeks. The stainless steel blocks out light, and the push-button release actually creates a tight seal.

They can hold up to 1.5 pounds of whole beans, so you don’t have to refill all the time. I find them easy to clean, too, which is always a plus.

A Fellow Stagg EKG electric kettle gives you precise temperature control for better brewing. The built-in timer helps you track your pour-over process, and the gooseneck spout makes pouring feel effortless.

You can heat water to any temp between 135 and 212 degrees Fahrenheit. It’s a bit of a splurge, but if you love pour-over or want to dial in your brew, it’s worth it.

SimpleHouseware stackable can rack organizers help you make the most of your cabinet space for coffee supplies. These metal shelves are great for organizing syrups, creamers, or even canned goods.

The adjustable design fits different cabinet heights and depths, so you can tweak your setup as you go. I like how they keep things tidy without much fuss.


Meal Prep Strategies That Save Time & Reduce Food Waste

0

Most households toss out hundreds of dollars’ worth of food every year because of poor planning or forgotten leftovers. Smart meal prep strategies can cut your food waste in half while saving you 6-8 hours per week in the kitchen.

The solution isn’t complicated or time-consuming. You just need a different approach to shopping, storing, and using your ingredients.

You don’t have to overhaul your whole routine to see results. Simple tweaks like checking your fridge before shopping, storing food right, and treating every ingredient as valuable can really add up.

These methods work whether you cook for yourself or a whole family. The strategies here show how to plan meals using what’s already in your kitchen, keep food fresh longer, and turn potential waste into new dishes.

You’ll also find some product recommendations to make the whole process smoother. Honestly, it’s not rocket science, but a few tools can help.

Key Takeaways

  • Planning meals around what you already own stops you from buying duplicates and cuts down on waste
  • Good storage containers and techniques keep food fresh and help avoid spoilage
  • Simple prep methods like batch cooking and scrap saving save time while making the most of every ingredient

The Core Benefits of Meal Prep

Meal prep brings two big perks that can totally change your routine. You spend less time cooking and less money on food, plus it’s a lot easier to stick to healthy eating habits during the week.

How Meal Prep Saves Time and Money

Prepping meals in advance can save you 3-5 hours every week. When you batch cook proteins, grains, and veggies all at once, you skip the repetitive setup and cleanup that comes with making meals from scratch every day.

Planning ahead drops your grocery bill. You buy only what you need based on your weekly menu, so there’s less temptation to grab random things at the store.

You waste less food because you use ingredients across multiple recipes before they go bad. The time savings add up fast. You spend one 2-3 hour block prepping instead of 30-60 minutes each night cooking dinner.

This means more free time on busy nights when you’re wiped out from work or life. Who doesn’t want that?

Meal Prep’s Role in Healthy Eating

It’s way easier to eat well when healthy meals are already chilling in your fridge. You’re less likely to order takeout or hit a drive-thru when you’ve got something good at home.

With meal prep, you control portion sizes and ingredients. You can measure out balanced servings instead of guessing at a restaurant.

You also avoid the extra salt, sugar, and weird fats that sneak into processed or restaurant foods. If you have specific nutrition goals, just build those into your weekly prep.

This kind of structure helps you keep up healthy eating habits over time, even if you’re not always feeling super motivated.

How Meal Planning Reduces Food Waste

Planning your meals ahead of time tackles the main causes of food waste at home. When you know what you’ll cook and eat, you only buy what you need and use ingredients before they spoil.

Understanding Food Waste in the Kitchen

Nearly 40% of food in America ends up in the trash instead of on plates. This usually happens when you forget about things in the fridge, buy too much, or let produce go bad.

Food waste costs your household hundreds of dollars every year. Wilted veggies, expired pantry items, and forgotten leftovers all add up.

The kitchen gives you the most control over food waste. Tossing food means you’re wasting money and the resources it took to grow and transport it. That stings a little, doesn’t it?

Meal Planning Methods for Waste Reduction

Check your inventory before shopping. Look through your fridge, freezer, and pantry before making meal plans. Write down what needs to be used soon and base your meals around those ingredients.

Create a shopping list from your meal plan. Buy only what you need for the meals you planned. This stops impulse buys and keeps extra food from piling up.

Plan meals that use similar ingredients. If you use half a bunch of cilantro in one recipe, plan another meal that week to use the rest. That way, you actually use up the whole thing.

Leave space for leftover meals. Schedule a night or two each week for leftovers. This keeps good food from sitting too long and getting gross.

Practice first in, first out. When you put away groceries, move older items to the front and newer ones to the back. Use the oldest stuff first to avoid surprises later.

Step-by-Step Meal Planning Strategies

Good meal planning starts with knowing what you have, deciding what to cook, and buying only what you need. These steps work together to shrink waste and save hours every week.

Taking Inventory of Pantry and Fridge

Check your pantry, fridge, and freezer before planning meals. Write down what you have, especially anything that’s about to expire.

Look for pantry staples like rice, pasta, canned goods, and spices. Group similar items together, like putting all your grains in one spot and veggies in another. This makes it so much easier to see what you’ve got.

Note how much you have of each item. It’s easy to think you’ve got enough chicken for two meals when it’s really just enough for one. Mark anything that’s running low so you can add it to your shopping list.

Creating a Practical Meal Plan

Start by planning three to four dinners for the week, not all seven. Pick recipes that share ingredients so nothing goes to waste.

If you buy a bunch of cilantro, use it in tacos one night and curry another. Build your meal plan around what you already have.

If you find three cans of black beans, plan a burrito bowl or soup. Choose one or two new recipes and fill in the rest with meals you know how to make.

Write down each meal with the day you plan to cook it. Put quick meals on busy days and save longer recipes for when you have more time.

Plan to use fresh produce early in the week and save hardier veggies for later. That way, nothing goes bad before you get to it.

Building a Smart Grocery List

Organize your shopping list by store section to make shopping less of a headache. Group all the produce together, then dairy, then pantry items.

Only add what you need for your planned meals and a few basics you’re running low on. Check your meal plan and inventory before adding anything to the list.

Cross-reference ingredients between recipes so you buy the right amounts. Put specific quantities on your list, like “2 bell peppers” instead of just “peppers.”

Note if you need seasonal produce that might not be there. Stick to your list, even if something’s on sale and you don’t have a plan to use it. Otherwise, it’ll probably just go to waste.

Effective Meal Prep Techniques

Setting aside time to prep meals in advance means picking the right day, cooking food in batches, and making dishes that work for more than one meal. These habits make meal prepping way easier and help you waste less.

Choosing Your Meal Prep Day

Pick a day when you’ve got two to three hours to yourself in the kitchen. Most people go for Sunday or Wednesday because there’s usually less going on.

Look at your week and pick the day when you feel least rushed. Block out that time each week to build a routine.

Morning hours work if you like fresh energy, while afternoons are great if you want to shop and prep on the same day. Stick to your chosen day for a few weeks until it feels automatic.

If a full block feels like too much, split your prep into two shorter sessions. Chop veggies one day, cook proteins and grains the next. This is especially helpful if you’re new to meal prepping.

Batch Cooking and Portioning

Cook big batches of ingredients that reheat well and fit into different meals. Roasted chicken, rice, quinoa, and veggies are all good basics.

Cook these at the same time using your oven, stovetop, and any gadgets you’ve got. Portion out your food right away into containers while it’s still warm.

Use containers that hold one or two servings so you only grab what you need. Label each with the contents and date using masking tape or an erasable marker.

Common batch cooking portions:

  • Proteins: 4-6 ounces per serving
  • Grains: 1/2 to 3/4 cup cooked per serving
  • Vegetables: 1 to 1.5 cups per serving

Keep meals you’ll eat within three days in the fridge and freeze the rest. Freezer meals stay good for two to three months if you use airtight containers.

Let food cool to room temperature before freezing to avoid ice crystals. It’s a small thing, but it matters.

Incorporating Leftovers and Versatile Recipes

Plan your meal prep around components you can mix and match. One batch of seasoned ground beef works in tacos, pasta sauce, grain bowls, and stuffed peppers.

Roasted veggies can be sides, salad toppings, omelet fillings, or sandwich extras. Create a simple formula: prep two proteins, two grains, and three vegetable options each time.

Mix and match these through the week so you’re not eating the same thing every day. Switch up sauces, seasonings, or toppings to keep things interesting.

Turn last night’s dinner into today’s lunch by adding something fresh. Roasted chicken from dinner can become a salad or a wrap with different veggies.

Keep a running list of recipes that use similar ingredients so nothing gets forgotten in the fridge. If you buy a bunch of cilantro, plan meals that all use it up that week.

Storage Solutions to Maximize Freshness

Good storage keeps your prepped meals safe and tasting good for days or even weeks. The right containers, proper temperatures, and smart organization help prevent waste and make meals easy to grab when you need them.

Choosing the Right Storage Containers

Glass storage containers work best for most meal prep needs. They don’t absorb odors or stains, and you can safely reheat food in them using a microwave.

Glass also doesn’t leach chemicals into your food when heated. That’s a relief, honestly.

Airtight containers are essential for keeping food fresh longer. They slow bacterial growth and prevent moisture loss.

Look for containers with secure-fitting lids that snap or lock into place. It’s worth double-checking the seal before you stack them in your fridge.

Plastic containers cost less and weigh less than glass. They’re good for freezer storage since they won’t crack in cold temperatures.

Move food to a plate before microwaving plastic containers to avoid chemicals leaching into your meals. It’s one extra step, but probably worth it.

Match container sizes to your portions. Single-serving containers help you avoid reheating more food than you’ll eat.

Separate containers for different meal components keep ingredients from getting soggy. A little extra planning here goes a long way.

Refrigeration and Freezing Tips

Keep your fridge between 35°F and 38°F. Bacteria grow quickly between 40°F and 140°F, so staying below this range keeps food safe.

Set your freezer to 0°F. It might sound obvious, but not everyone checks.

Let hot food cool for 30 minutes before sealing and refrigerating it. This prevents condensation that makes food soggy.

Don’t wait until food reaches room temperature though, as bacteria can start growing. It’s a bit of a balancing act.

Store leftovers on middle or bottom shelves, not in the door. Door shelves face warmer air each time you open the fridge.

Avoid packing your fridge too full since air needs to circulate to maintain proper temperatures. Give your leftovers some breathing room.

Freeze meals in plastic containers or resealable bags to prevent cracking. Label each container with the date and contents.

Most cooked meals stay good in the freezer for 2-3 months. Thaw frozen meals in the fridge overnight, never on the counter.

Organizing Your Kitchen for Easy Access

Place older meals toward the front of your fridge and freezer. Eating them first prevents spoilage and waste.

Store newer batches in the back. It’s a simple rotation, but it works.

Group similar items together. Keep all breakfast containers in one area and lunch items in another.

This system saves time when you’re rushing in the morning. No more digging through stacks of containers.

Use clear containers so you can see what’s inside without opening them. Stack containers of the same size to save space.

Leave some empty space between containers for air flow. Your fridge will thank you.

Store dressings, sauces, and toppings in small mason jars or containers. Keep them separate from the main meal until you’re ready to eat.

Line produce containers with paper towels to absorb extra moisture and extend freshness. It’s a small trick, but surprisingly effective.

Practical Examples and Time-Saving Tips

Real meal prep success comes from establishing routines that work with your schedule. Making smart choices about ingredients that last longer and serve multiple purposes helps too.

Sample Weekly Meal Prep Routine

A Sunday afternoon prep session can set you up for the entire week with just two hours of focused work. Start by cooking a large batch of quinoa and brown rice, which takes 30 minutes with minimal attention.

While grains cook, roast two sheet pans of vegetables like bell peppers, zucchini, and sweet potatoes at 425°F for 25 minutes. The kitchen smells pretty great at this point.

During the final 30 minutes, prepare two proteins such as baked chicken thighs and a pot of black beans. Season the chicken simply with salt, pepper, and garlic so it works in different flavor profiles throughout the week.

Let everything cool for 15 minutes before portioning into containers. This step is easy to forget, but it matters.

Your weekly meals might look like this:

  • Monday: Chicken with roasted vegetables and quinoa
  • Tuesday: Black bean tacos with leftover roasted peppers
  • Wednesday: Quinoa bowl with fresh greens and remaining chicken
  • Thursday: Beans and rice with sautéed zucchini
  • Friday: Sheet pan vegetables in a frittata with new eggs

How to Use Seasonal Produce Efficiently

Buying produce in season saves money and reduces waste since these items are fresher and last longer in your refrigerator. Winter squash bought in fall stays fresh for weeks on your counter.

Summer tomatoes need to be used within days but cost less when abundant. It’s a tradeoff, but worth it for the flavor.

Plan your meal prep ideas around what’s currently in season. In spring, asparagus and peas work well in grain bowls and pasta dishes.

Summer brings zucchini and peppers that roast beautifully for multiple meals. Fall squash can be cubed and frozen after roasting, extending its use for months.

When you buy seasonal items in bulk, prep them immediately. Wash berries and store them with a paper towel to absorb moisture.

Chop sturdy vegetables like carrots and celery right away so they’re ready to use. Leafy greens stay fresher when wrapped in damp towels inside containers.

Reducing Waste with Pantry Staples

Stock your pantry with versatile items that have long shelf lives and work across multiple cuisines. Dried beans, lentils, canned tomatoes, and whole grains form the foundation of countless meals.

These pantry staples cost less per serving than their fresh or prepared counterparts and create less waste since they don’t spoil quickly. It’s a relief when you realize you have dinner options even if you haven’t shopped in a while.

Essential pantry items that reduce food waste:

  • Canned beans for quick proteins when fresh options spoil
  • Frozen vegetables as backups for wilted produce
  • Dried pasta for meals when meal prep runs out
  • Jarred pasta sauce that lasts months after opening
  • Rice and quinoa that store for years

When fresh ingredients start to decline, your pantry saves the day. Wilting spinach goes into pasta with canned tomatoes and white beans.

Softening peppers blend into tomato sauce. Aging herbs get chopped and frozen in olive oil in ice cube trays for future use.

Top Product Recommendations for Meal Prep

The right tools make meal prep easier and help food stay fresh longer. Glass containers keep meals safe and visible, while airtight seals prevent spoilage and freezer burn.

Best Glass Storage Containers for Meal Prep

Glass containers offer clear advantages for meal prep. They don’t absorb odors or stains like plastic, and you can see what’s inside without opening them.

Pyrex Simply Store containers are durable and dishwasher-safe. They come in multiple sizes from 1 cup to 7 cups, which lets you store everything from snacks to full meals.

The lids snap on tight but aren’t completely airtight. It’s something to keep in mind for long-term storage.

Prep Naturals Glass Meal Prep Containers include three compartments in each container. This design keeps different foods separated until you’re ready to eat.

They’re oven-safe up to 400°F when you remove the lids. That’s handy if you want to reheat something without dirtying another dish.

Look for containers with measurement markings on the sides. These help you track portion sizes without extra measuring tools.

Glass containers last for years if you handle them carefully. They might cost more upfront, but they pay off over time.

Most Reliable Airtight Containers

Airtight seals are critical for preventing food waste. They keep moisture in your food where it belongs and stop air from causing freezer burn.

Rubbermaid Brilliance containers use a latch system that creates a complete seal. The clear bases let you check your food without opening them.

These work well for soups and sauces that might leak in regular containers. No one wants a fridge disaster.

OXO Good Grips containers feature silicone gaskets in the lids. Press the center of each lid to hear a click that confirms the seal is tight.

They stack neatly in your refrigerator to save space. Organization really does make a difference.

Store leafy greens with a paper towel inside airtight containers. The towel absorbs extra moisture that would make the greens wilt.

Label each container with the date you prepared the food so you know when to use it by. It’s easy to lose track otherwise.

Digital Tools for Meal Planning

Apps and digital tools remove the guesswork from meal prep. They organize your shopping list and help you plan meals that use similar ingredients.

Mealime generates recipes based on your dietary needs and creates a shopping list automatically. The app groups items by store section, which speeds up your grocery trips.

You can adjust serving sizes to match how many meals you want to prep. It’s flexible, which is nice.

AnyList lets you share shopping lists with family members in real time. When someone buys an item, it updates for everyone.

The app also stores your favorite recipes and suggests ingredients you might need. That little reminder can be a lifesaver.

Paprika Recipe Manager saves recipes from any website and scales ingredients up or down. It tracks what’s in your pantry so you can plan meals around foods you already have.

This feature cuts down on waste and extra shopping trips. Fewer last-minute runs to the store? Yes, please.

Frequently Asked Questions

Meal prep works best when you understand how to plan efficiently, store food properly, and build routines that fit your schedule. These answers cover the practical details that make meal prep easier to start and maintain.

What are some effective meal prep practices to minimize time spent cooking during the week?

Focus on batch cooking one or two times per week instead of cooking every day. Choose a consistent day, like Sunday or Wednesday, to prepare multiple meals at once.

This approach cuts total cooking time by 40 to 60 percent compared to daily meal preparation. That’s a big difference over time.

Use your oven and stovetop at the same time. Roast vegetables on a sheet pan while cooking rice on the stove and proteins in a slow cooker.

This method allows you to prepare three components in the time it normally takes to make one. Efficiency feels good.

Pre-chop vegetables and wash greens right after grocery shopping. Store them in clear containers so they are ready to use.

You can also cook plain proteins like chicken breast or ground turkey in bulk, then season them differently throughout the week to avoid flavor fatigue. Variety is key.

Prep ingredients instead of full meals if that feels easier. Having pre-cooked grains, washed produce, and portioned proteins ready means you can assemble meals in five to ten minutes.


How can meal prepping contribute to reducing household food waste?

Meal prep reduces waste by turning ingredients into complete meals before they spoil. When you plan your meals ahead of time, you buy only what you need and use everything you purchase.

This prevents the common problem of vegetables sitting in your fridge until they go bad. We’ve all been there.

Prep work also helps you use up food that is close to expiration. If you notice greens starting to wilt or proteins nearing their use-by date, you can cook them immediately and extend their life by three to five days.

Cooked food stores longer than raw ingredients in most cases. Portioning meals into containers makes it clear how much food you have prepared.

This visibility stops you from forgetting about meals in the back of the fridge. Studies show that households that meal prep waste 20 to 30 percent less food than those that do not.

Freezing prepared meals or cooked components adds even more waste prevention. Soups, casseroles, cooked grains, and sauces all freeze well for up to three months.


What are the essential storage tips to extend the freshness of prepped meals?

Store prepped meals in airtight glass or BPA-free plastic containers. Glass containers work best because they do not absorb odors and can go directly from fridge to microwave.

Make sure lids seal tightly to prevent air exposure, which causes food to dry out and spoil faster. Don’t overlook this step.

Keep cooked meals in the refrigerator for three to four days maximum. Label containers with the prep date using masking tape or a marker.

Foods with higher moisture content, like soups and stews, tend to last longer than drier dishes like plain roasted chicken. Separate wet ingredients from dry ones when possible.

Store salad dressings in small containers and add them right before eating. Keep sauces separate from grains or proteins until you reheat the meal.

This prevents sogginess and maintains better texture. Freeze meals you will not eat within four days.

Divide them into single portions before freezing so you can thaw only what you need. Most cooked meals stay good in the freezer for two to three months.

Let frozen meals thaw in the refrigerator overnight rather than at room temperature to reduce bacteria growth. It’s safer, even if it takes a little more planning.


Can you provide a beginner’s guide to meal planning with simple steps and examples?

Start by picking three to five meals you want to eat this week. Choose recipes that use some of the same ingredients to save money and make shopping less hectic.

If you buy a head of broccoli, maybe toss it in a stir fry on Monday, then add it to pasta on Wednesday. That way, nothing goes to waste, and you don’t have to think too hard about variety.

Write your grocery list by store sections, like produce, proteins, and pantry staples. This makes shopping quicker and helps you avoid grabbing random stuff you don’t need.

Stock up on basics like rice, beans, frozen veggies, and eggs. These work in all kinds of recipes, so you’ll always have options when you’re short on time or ideas.

Set aside an hour or so for meal prep. Cook your proteins first since they usually take the longest. While those are going, get your grains ready and chop up your veggies.

Once everything cools, portion your meals into containers. This part feels a little tedious, but it saves you loads of time later in the week.

Here’s a simple example: make chicken bowls for lunch. Cook four chicken breasts, a batch of brown rice, and roast some mixed veggies on two sheet pans.

Divide everything into four containers. Now you’ve got lunch sorted for almost half the week, and it only took about 75 minutes.

For breakfast, try prepping egg muffins with veggies and cheese. Bake them in a muffin tin, let them cool, and stash them in the fridge.

Just reheat one or two in the morning, and you’ve got a protein-packed breakfast in under two minutes. Not bad, right?


Which products are recommended to facilitate efficient and sustainable meal prepping?

Glass meal prep containers with snap-lock lids make storing food easier, and they’ll last for years. Look for sets with different sizes, usually from one cup to four cups.

The Pyrex 18-Piece Glass Storage Set is a solid pick. These containers nest inside each other, and you can toss them in the microwave or dishwasher without a second thought.

A programmable slow cooker or an Instant Pot can cut down on your active cooking time. The Instant Pot Duo 7-in-1 cooks chicken or beef in about 20 to 30 minutes, which is way faster than the usual hour or two.

It also works as a rice cooker and steamer, so you don’t have to clutter your kitchen with a bunch of gadgets. Less mess, less stress.

Silicone baking mats are a nice upgrade from parchment paper. They keep food from sticking to sheet pans and clean up is a breeze.

Reusable silicone bags are handy for storing chopped veggies or marinating proteins. Plus, you’re not tossing out a bunch of plastic, which always feels good.


What planning methods are most useful in creating a balanced and varied meal prep routine?

Try using a simple formula for balanced meals: pick one protein, one carb, and toss in one or two veggies. You’ll cover your nutritional bases without obsessing over calories or macros.

For example, maybe it’s grilled chicken, sweet potato, and roasted Brussels sprouts. Easy enough, right?

Switch up your proteins and cooking styles every week so things don’t get boring. If you did chicken this week, maybe go for ground turkey or tofu next time.

Change how you cook, too, like roasting one week, then stir frying or slow cooking the next. It keeps meals from feeling like a chore, and you don’t have to hunt for brand new recipes all the time.

Make a meal rotation calendar with three or four weeks of different meals. After a month, just start over—you won’t feel stuck eating the same thing.

Plan for one or two flexible meals each week using whatever you’ve got in the fridge. That way, you’re not running to the store all the time.


How to Clean Stainless Steel Appliances: Complete Maintenance Guide

0

Stainless steel appliances really make a kitchen look modern, but wow, fingerprints and water spots show up fast. Lots of folks end up using the wrong cleaners or tools, and that can scratch or mess up the finish for good.

Learning a few simple tricks will help your appliances stay shiny and last longer. You don’t need fancy products, either.

The key to keeping stainless steel appliances looking new is using gentle cleaning methods, wiping in the direction of the grain, and drying the surface completely to prevent water spots and streaks. Simple things like microfiber cloths, dish soap, and white vinegar do the job for most cleaning.

Here’s a step-by-step guide to cleaning stainless steel appliances. You’ll see which products work best, what to skip, and how to tackle tough stains.

Whether you’re just dealing with smudges or something more stubborn, these methods will help your appliances look their best.

Key Takeaways

  • Use soft microfiber cloths and always wipe in the direction of the grain to prevent scratches and streaks
  • Water, mild dish soap, and white vinegar are effective cleaners that won’t damage stainless steel surfaces
  • Regular cleaning and immediate attention to spills prevents buildup and extends the life of your appliances

Understanding Stainless Steel Appliances

Stainless steel appliances come in different finishes, and each finish affects how you need to clean them. Some finishes are more prone to showing fingerprints and smudges than others.

Types of Stainless Steel Finishes

Your appliances probably have one of three main finishes. The brushed finish shows visible lines or grain running in one direction, and it’s the most common style on fridges, dishwashers, and ovens.

The mirror finish is super shiny, almost like a mirror, and doesn’t have a visible grain. This one really shows fingerprints and smudges fast.

Some appliances come with a fingerprint-resistant coating from the factory. That coating helps repel oils from your hands, but you need to use gentle cleaners or you might break down the protective layer.

Always clean with the grain if you can see it. Going against the grain just makes scratches and streaks more obvious.

Unique Cleaning Challenges

Stainless steel seems to attract fingerprints, water spots, and smudges like a magnet. Every time you touch it, oils from your skin transfer onto the surface.

Hard water can leave behind mineral deposits that look like cloudy spots if you don’t wipe them away quickly. Food splatters and grease build up around handles and controls, especially where you grab the appliance the most.

Heat from cooking sometimes bakes these residues onto the surface, making them even tougher to remove later. Regular cleaners or anything abrasive can leave permanent scratches.

The grain pattern on brushed stainless steel will show every streak if you wipe the wrong way. It’s worth taking a second to figure out which direction the grain runs before you start cleaning.

Importance of Proper Care

If you use the wrong products, you can damage the protective chromium oxide layer on your stainless steel appliances. That layer keeps rust and corrosion away.

Harsh chemicals like bleach or chlorine will break down this coating and leave permanent discoloration. Abrasive scrubbers and steel wool leave scratches that trap dirt and make future cleaning a pain.

Once scratched, the surface loses its smooth look and picks up even more fingerprints and grime. Regular maintenance stops that buildup and helps your appliances stay looking new for years.

Essential Tools and Recommended Products

The right tools make a huge difference in how your stainless steel appliances look. Good products protect the finish and actually get rid of fingerprints and smudges.

Choosing the Right Microfiber Cloths

Microfiber cloths work best because they trap dirt without scratching the surface. Look for ones with at least 200 GSM (grams per square meter) for better absorption.

Have at least two cloths ready for each cleaning session. Use one for applying cleaner and the other for drying and buffing, which helps prevent streaks.

Avoid cotton towels or paper towels since they can leave lint and might scratch the finish over time. Wash microfiber cloths separately in warm water and skip the fabric softener, which messes with their effectiveness.

Replace your cloths every few months, or sooner if they start feeling rough or lose their softness.

Best Stainless Steel Cleaners

Commercial stainless steel cleaners are made to remove fingerprints and bring back that shine. Weiman Stainless Steel Cleaner and Bar Keeper’s Friend are two popular options that create a protective coating against future smudges.

Always check the label to make sure the cleaner is safe for appliances. Some have harsh chemicals that can ruin modern finishes. You only need a small amount, so don’t go overboard.

Spray-on cleaners work well for big surfaces like fridge doors, and wipes are handy for quick touch-ups. Always test a new cleaner on a hidden spot first, just in case. Stick with the grain when applying to avoid streaks or marks.

Natural Cleaning Alternatives

White vinegar mixed with equal parts distilled water makes a great natural cleaner. This combo cuts through grease and removes water spots without harsh chemicals.

Pour it into a spray bottle for easy use. Dish soap and warm water also work well for daily cleaning—just a few drops in a bowl of water is enough.

If you have stubborn stains, make a paste with baking soda and water. Gently apply it, let it sit a few minutes, then wipe clean. A little olive oil or mineral oil after cleaning can boost shine, but don’t use too much or you’ll end up with a greasy surface.

Supplies to Avoid

Never use steel wool, abrasive scouring pads, or scrub brushes on stainless steel. Those will leave scratches you can’t fix.

Even “non-scratch” pads are sometimes too rough. Bleach and ammonia-based cleaners will discolor the finish and break down that protective layer.

Tap water can leave spots, so try to use distilled or filtered water if possible. Glass cleaners usually leave streaks on stainless steel, and rough sponges or magic erasers can scratch too.

Step-By-Step Cleaning Instructions

Cleaning stainless steel appliances takes the right technique and products. You’ll want to check the finish, set up a daily habit, handle tough stains when needed, and finish with a polish.

Preparation and Surface Assessment

Before cleaning, figure out which way the grain runs. The grain is the little lines you see on the surface.

Spray a bit of water on two spots next to each other. Wipe one spot horizontally and the other vertically with a microfiber cloth. The direction that looks cleaner and smoother is your grain direction.

Wipe away any loose crumbs or food bits with a dry cloth. Check for scratches or dents that might need special care.

Gather your supplies:

  • Microfiber cloths (at least 3)
  • Dish soap or white vinegar
  • Warm water
  • Olive oil or baby oil
  • Spray bottle

Don’t use steel wool, abrasive scrubbers, or bleach-based cleaners. Those will scratch and damage the finish.

Daily Cleaning Routine

Mix a few drops of dish soap with warm water in your spray bottle. Spray the solution onto a microfiber cloth, not directly on the appliance, so you don’t get drips or water spots.

Wipe along the grain using gentle, even strokes. Go from top to bottom or side to side, depending on your grain pattern.

Rinse your cloth with clean water and wring it out well. Go over the surface again to pick up any soap left behind. Soap residue dries into streaks and attracts more dirt.

Dry the appliance right away with a fresh microfiber cloth. Stainless steel gets water spots super quickly, so don’t skip this step.

For fingerprints between deep cleans, you can use a glass cleaner sprayed onto a cloth and wipe in circles. Just don’t overdo it.

Deep Cleaning for Tough Stains

White vinegar is great for water spots and mineral deposits. Fill a spray bottle with straight white vinegar and spray it on your cloth. Wipe the stain with the grain and let it sit 30 seconds before wiping again.

For grease and stuck food, use dish soap on a damp cloth. Scrub gently along the grain until the mess comes off. Sometimes you need to repeat this for heavy buildup.

Baking soda paste works for stubborn stains that vinegar can’t handle. Mix three parts baking soda with one part water to make a thick paste. Apply it with a soft cloth, rub gently with the grain, then rinse it off well.

Stain Type Guide:

StainSolutionMethod
Water spotsWhite vinegarSpray and wipe
GreaseDish soapDirect application
Burnt foodBaking soda pasteGentle scrubbing
Rust marksCommercial cleanerFollow product directions

Don’t let any cleaning solution sit on the surface for more than a few minutes. Always rinse and dry after treating stains.

Polishing for a Streak-Free Shine

Put a few drops of olive oil, mineral oil, or baby oil on a clean microfiber cloth. That’s all you need for an appliance door.

Rub the oil on with the grain, using light, even strokes. The oil helps fill tiny scratches and adds a bit of a barrier against fingerprints.

Buff with a dry part of your cloth to soak up any extra oil. Too much oil just looks greasy and collects dust. The finish should look even and have a nice, soft shine.

Commercial polishes like Weiman Stainless Steel Wipes or Therapy Stainless Steel Cleaner + Polish combine cleaning and polishing in one step. These are handy for weekly touch-ups when you want a little extra shine.

Club soda works as a quick polish between oil treatments. Spray it on a cloth and wipe with the grain for a fast shine boost. The carbonation seems to help lift light residue and leaves a streak-free finish.

Polish your appliances once a week if you can. If you have kids who leave fingerprints everywhere, you might want to do it twice a week.

Special Cleaning Techniques for Different Stains

Different stains on stainless steel need their own cleaning tricks. The best technique depends on what caused the stain and how long it’s been there.

Removing Fingerprints and Smudges

Fingerprints are probably the most common marks you’ll spot on stainless steel appliances. The oils from your skin make them show up right away.

Start by dampening a microfiber cloth with warm water. Wipe the surface in the direction of the grain, which are those tiny lines you can see on the stainless steel.

If fingerprints won’t budge, add a drop of mild dish soap to your damp cloth. Wipe gently, then rinse with a clean, damp cloth to get rid of any soap left behind.

Dry the area immediately with a soft towel so you don’t get water spots. You can also use isopropyl alcohol for a quick clean.

Just apply a small amount to a microfiber cloth and wipe the fingerprints away. This method works great for daily touch-ups and doesn’t leave streaks.

Tackling Hard Water Spots

Hard water leaves white or cloudy spots on stainless steel, especially near sinks and faucets. It’s the minerals in the water that cause these marks.

White vinegar is your best friend for hard water spots. Mix equal parts white vinegar and water in a spray bottle.

Spray the solution right onto the spots. Let it sit for about 5 to 10 minutes so the vinegar can break down the mineral buildup.

Wipe with a soft cloth, moving with the grain. If the spots are stubborn, just repeat the process.

Rinse with clean water once the spots are gone. Always dry the area with a clean towel, since water left behind can make new spots.

Rust and Discoloration Removal

Rust spots usually show up when other metal objects sit on your stainless steel. Discoloration can happen from heat or even chemical spills.

For light rust, mix three parts baking soda with one part water to make a thick paste. Spread it right on the rust spot.

Let it sit for 15 to 20 minutes. Use a soft cloth to rub gently in the direction of the grain.

The baking soda’s mild abrasiveness lifts the rust without scratching the steel. If you’ve got heat stains, grab some white vinegar.

Apply vinegar to the discolored area and let it sit for 10 minutes. Wipe clean and dry well.

For really stubborn discoloration, you may need a professional stainless steel cleaner.

Using Baking Soda Paste for Stubborn Stains

Baking soda paste isn’t just for rust, it’s great for burnt-on food, grease, and those weird spots that resist regular cleaning. Mix baking soda with just enough water to form a spreadable paste.

Make sure the paste is thick enough to stick to vertical surfaces. Apply it to the stain and let it sit for at least 10 minutes, or up to 30 minutes for tough messes.

The baking soda will gently break down the stain. Wipe away the paste with a damp microfiber cloth or soft sponge.

Rub in circles at first, then finish by wiping with the grain. Rinse with clean water and dry right away.

Never use steel wool or harsh scrubbers with your baking soda paste, those will scratch the surface.

Proper Maintenance and Care Tips

Regular maintenance keeps your stainless steel appliances looking good and helps prevent long-term damage. A few specific care habits really go a long way.

Maintaining Shine and Protective Layers

Water is your first line of defense for daily cleaning. Wipe down surfaces with a damp microfiber cloth after each use to stop buildup before it starts.

If you want extra shine, put a bit of mineral oil or olive oil on a clean cloth. Buff the surface gently in the direction of the grain, and you’ll create a protective layer that repels fingerprints and water spots.

Key shine maintenance steps:

  • Use distilled water instead of tap water to avoid mineral spots
  • Buff dry right after cleaning to keep water spots away
  • Apply oil-based polish about once a month for extra protection
  • Always work with the grain, not against it

Regular oiling makes cleaning easier next time. You might notice fingerprints and smudges wipe away more quickly when you keep up this barrier.

Preventing Scratches and Buildup

Always use cutting boards or trivets under hot pots and pans. Dragging metal cookware across stainless steel can leave marks that are almost impossible to remove.

Avoid abrasive tools altogether. Steel wool, scouring pads, and rough sponges will scratch and dull the finish.

Stick to soft microfiber cloths meant for delicate surfaces. When spills happen, clean them up right away.

Dried food, grease, and liquids are much harder to remove later and can even stain or discolor your appliance.

Items to avoid:

  • Metal scouring pads
  • Bleach or chlorine-based cleaners
  • Abrasive powders
  • Sharp metal utensils on the surface

Scheduled Routine Maintenance

Clean your stainless steel appliances at least once a week with water or mild dish soap. For high-use appliances like refrigerators, you might need to clean every few days.

Deep clean monthly using white vinegar mixed with water in equal parts. This helps remove stubborn buildup and brings back the shine without harsh chemicals.

Weekly maintenance checklist:

TaskFrequencyMethod
Wipe surfacesDailyDamp microfiber cloth
Remove fingerprints2-3 times weeklyWater or vinegar solution
Deep cleanMonthlyVinegar solution or stainless steel cleaner
Apply protective oilMonthlyMineral or olive oil

Dust your appliances regularly between cleanings. This keeps particles from scratching the surface when you wipe it down later.

And don’t forget to keep your cleaning cloths clean, dirty cloths just move grime around instead of picking it up.

Common Mistakes to Avoid with Stainless Steel

Using the wrong products or techniques can scratch, discolor, or ruin the protective coating on your stainless steel appliances. The biggest mistakes usually involve harsh chemicals, rough scrubbers, or wiping against the grain.

Misusing Cleaning Products

Never use bleach or ammonia-based cleaners on stainless steel. These chemicals break down the protective chromium oxide layer that keeps rust and corrosion away.

They can actually cause permanent discoloration, pitting, or even holes in the surface over time. Avoid abrasive scrubbers like steel wool, scouring pads, or rough sponges, since they leave scratches that dull the finish.

Even scrubbers labeled “gentle” can be risky if they contain hard particles. Skip cleaners with chlorine, hydrochloric acid, or other harsh ingredients, and if a product smells strongly of chemicals, it’s probably too harsh.

Paper towels can scratch some finishes too, especially the cheaper or rougher ones.

Safe alternatives include:

  • Mild dish soap with warm water
  • White vinegar diluted with water
  • Baking soda paste for tough spots
  • Microfiber cloths or soft cotton rags
  • Products made specifically for stainless steel

Always test new cleaners on a hidden spot first. Different appliance brands use different finishes, so what works on one might damage another.

Incorrect Cleaning Motions

Scrubbing in circles leaves swirl marks that are tough to get rid of. These marks trap dirt and make the surface look dull.

Circular scrubbing just pushes debris into the tiny grooves in the metal instead of removing it. Always wipe in straight lines, following the grain.

Use long, even strokes with light to moderate pressure. Pressing too hard can grind particles into the surface and leave scratches.

Never spray cleaners directly onto the appliance. That causes uneven coverage and streaks, plus moisture can seep into seams and edges.

Spray your cleaner onto a cloth instead. This way, you control how much product you use and avoid excess liquid pooling on the surface.

Not Following Appliance Grains

Stainless steel has a visible grain pattern that runs in one direction, kind of like wood. Wiping against the grain pushes dirt deeper into the grooves and can cause fine scratches.

It also makes streaks more visible and harder to wipe away. Before you start cleaning, check the direction of the grain, usually horizontal on refrigerator doors and vertical on dishwasher fronts, but it varies.

Look at the surface in good lighting to spot the pattern. Always clean, polish, and dry in the same direction as the grain.

This lifts dirt out of the grooves instead of pushing it in. When buffing with olive oil or polish, follow the grain for the best results.

It really makes a difference in how clean and shiny your appliances look.

Frequently Asked Questions

If you want your stainless steel to stay looking good, clean with the grain, use non-abrasive materials, and apply a little protective oil to keep fingerprints away and maintain shine.

What are the best practices for maintaining stainless steel appliance surfaces?

Clean stainless steel appliances regularly with a microfiber cloth and warm water. Wipe in the direction of the grain to avoid streaks and surface damage.

Dry the surface right after cleaning to prevent water spots. Once a week, use a little mineral or olive oil to create a barrier against fingerprints and smudges.

Stay away from harsh chemicals or abrasive scrubbers. Keep chlorine-based cleaners and steel wool pads far from your appliances.


What is the safest method to clean stainless steel cooktops without causing scratches?

Start by wiping away loose crumbs or debris with a soft, damp microfiber cloth. Mix a few drops of mild dish soap with warm water for your cleaning solution.

Use the soapy water with a microfiber cloth, wiping gently in the direction of the grain. For stuck-on food, let the solution sit for a few minutes to loosen things up before wiping.

Rinse with a clean, damp cloth to remove any soap left behind. Dry the surface well with a fresh microfiber cloth to avoid water spots and streaks.

Never use steel wool, abrasive sponges, or scouring pads on your cooktop. They’ll scratch the surface and leave permanent marks.


How can one naturally clean stainless steel kitchen appliances using household items?

White vinegar is a surprisingly effective natural cleaner for fingerprints and light stains. Spray undiluted vinegar onto the surface and wipe with a microfiber cloth, following the grain.

Baking soda mixed with water makes a gentle paste for tougher stains. Spread the paste on problem areas, let it sit for five minutes, then wipe clean with a damp cloth.

This method works well for grease and food residue, and you don’t need harsh chemicals. Rubbing alcohol can remove stubborn grease marks and disinfect at the same time.

Just apply it to a microfiber cloth and wipe the surface. For a final polish, use a little olive oil on a clean cloth and buff in the direction of the grain to restore shine and keep fingerprints away.


Which are the most effective commercially available products specifically designed for stainless steel appliance cleaning?

Weiman Stainless Steel Cleaner & Polish is great for removing fingerprints and streaks. It also leaves a protective coating, so it’s handy for daily maintenance.

Bar Keepers Friend Stainless Steel Cleaner handles tough stains and minor scratches. It’s a good choice for deep cleaning when natural methods don’t cut it.

Therapy Stainless Steel Cleaner & Polish offers a non-toxic, plant-based option if you’re worried about chemicals. It works as well as traditional products but is safer for your family and the environment.

Stick with products labeled for stainless steel. Avoid multi-surface cleaners, since they might have harsh chemicals that aren’t good for stainless steel finishes.


What are some common mistakes to avoid while cleaning stainless steel appliances?

Don’t grab abrasive pads, steel wool, or rough sponges for stainless steel surfaces. Those scratch up the finish, and honestly, you can’t really fix that once it happens.

Try to clean with the grain of the steel, not against it. Wiping the wrong way leaves streaks and might mess up the finish over time.

Skip chlorine-based cleaners and bleach on stainless steel. These harsh chemicals can discolor the surface and ruin the protective layer for good.

If you leave water or cleaning solutions to air dry, you’ll probably notice water spots or mineral deposits later. Those are a pain to get rid of.

Go easy on the oil while polishing. Too much just attracts dust and leaves a sticky mess that doesn’t look great.


Can you outline a step-by-step process for the regular maintenance of stainless steel appliances?

Start by grabbing a dry microfiber cloth and giving your appliances a daily wipe-down. This helps get rid of dust and those annoying fingerprints, keeping things looking fresh.

Once a week, mix some warm water with a couple drops of mild dish soap. Dampen a microfiber cloth with that soapy water, then wipe the surfaces, making sure to go with the grain.

After that, rinse the area using a clean, damp cloth to get rid of any leftover soap. Dry everything right away with a fresh microfiber cloth so you don’t end up with water spots.

Take a clean cloth, put a little mineral or olive oil on it, and buff the surface along the grain. This step brings back some shine and adds a bit of protection.

About once a month, tackle any stubborn stains or water spots with white vinegar. Spray the vinegar on, let it sit for a couple minutes, then wipe it off and dry the area.

While you’re at it, check around handles, edges, and near burners for hidden grime. Those spots tend to collect gunk that you might miss during your usual cleaning.


Essential Kitchen Tools Every Home Cook Should Have: Buyer’s Guide & Top Picks

0

Setting up a kitchen can feel overwhelming with so many tools out there. But honestly, you don’t need every gadget to cook well.

A few essential tools will help you prepare almost any meal with confidence.

The right kitchen tools make cooking easier, safer, and more enjoyable by helping you work faster and get better results. A sharp knife slices through vegetables smoothly.

Good measuring cups help your recipes turn out right every time. Quality pots and pans heat evenly so your food cooks properly.

These basics form the foundation of every successful home kitchen.

This guide covers the most important tools you need and explains why each one matters. You’ll find out how these items improve your cooking and see a few specific products worth buying.

Whether you’re just starting out or upgrading your current setup, these essentials will serve you well for years.

Key Takeaways

  • Quality kitchen tools improve cooking results and make meal preparation faster and safer
  • Essential items include sharp knives, cutting boards, measuring tools, cookware, and basic utensils
  • Investing in the right tools saves time and reduces frustration in the kitchen

Why Essential Kitchen Tools Matter

The difference between struggling through a recipe and actually enjoying the process often comes down to your tools. Quality kitchen tools directly affect how your food turns out, how safely you work, and how long your gear lasts.

How the Right Tools Improve Cooking Outcomes

Good kitchen tools help you cook food more evenly and consistently. A sharp chef’s knife gives you uniform cuts, so vegetables cook at the same rate instead of some burning while others stay raw.

A heavy-bottomed pan distributes heat evenly, so you don’t end up with hot spots that scorch your food. The right measuring cups and spoons make sure your recipes turn out the same way every time.

Baking especially depends on precise measurements. Too much flour, for example, makes cakes dense and dry.

Quality mixing bowls, spatulas, and tongs give you better control during cooking. You can fold ingredients without deflating batters or flip delicate fish without it falling apart.

Impact on Safety and Efficiency

Kitchen tools for beginners matter most when it comes to safety. A dull knife forces you to use more pressure, which leads to slips and cuts.

A sharp knife cuts cleanly with minimal force, so you have more control. Heat-resistant tools protect your hands from burns.

Silicone spatulas and metal tongs with long handles keep your fingers away from hot surfaces. A stable cutting board with non-slip grips stops dangerous sliding while you prep.

Time efficiency improves dramatically with proper tools. Tasks that take 15 minutes with poor equipment might take just 5 minutes with good tools.

A quality can opener works smoothly, and good tongs let you turn multiple items quickly instead of struggling with each piece.

Choosing Quality and Durability

Investing in durable kitchen essentials saves money over time. A $30 chef’s knife that lasts 10 years costs less than replacing cheap $10 knives every year.

Quality tools keep their performance instead of degrading after a few uses. Look for these durability markers:

  • Stainless steel or high-carbon steel for knives and utensils
  • Heavy-gauge aluminum or stainless steel for pots and pans
  • Heat-resistant silicone rated to at least 400°F
  • Solid construction without loose handles or weak joints

Well-made tools just feel better to use. Comfortable grips reduce hand fatigue during long cooking sessions.

Balanced weight makes tools easier to control. These factors matter especially for home cooking where you use the same tools over and over.

Knife Fundamentals: Building Your Core Set

A strong knife collection starts with three essential blades that handle nearly every kitchen task. Focus on quality over quantity, and learn proper care to improve your cooking speed and safety.

Chef’s Knife, The Heart of the Kitchen

Your chef’s knife is the most important tool you’ll own. It handles about 90% of your cutting tasks, from slicing vegetables to cutting proteins like chicken and beef.

Look for a blade between 8 and 10 inches long. The knife should feel balanced in your hand, with the weight evenly distributed between the blade and handle.

High-carbon stainless steel is your best choice because it stays sharp longer and resists rust. What makes a good chef’s knife:

  • Comfortable grip that fits your hand size
  • Full tang (metal extends through the handle)
  • Balanced weight distribution
  • Sharp, slightly curved blade for rocking motion

The right chef’s knife improves your knife skills quickly. You’ll chop faster and with more control.

Your cuts will be more consistent, which helps food cook evenly. Don’t buy the most expensive knife you find.

A mid-range knife from a trusted brand will serve you better than a cheap set or an overpriced professional model.

Paring Knife and Serrated Bread Knife

A paring knife gives you precision for small, detailed work. Use it for peeling fruit, deveining shrimp, or trimming fat from chicken.

The blade is usually 3 to 4 inches long, which makes it easy to control. A serrated bread knife cuts through crusty bread without crushing it.

The saw-like teeth grip the surface and slice cleanly. This knife also works well for slicing tomatoes and cutting cakes.

When to use each knife:

Knife TypeBest For
Chef’s KnifeChopping vegetables, slicing proteins, mincing herbs
Paring KnifePeeling, trimming, detailed cutting
Serrated KnifeBread, tomatoes, soft fruits

These three knives cover all your basic needs. You won’t need specialty knives until you develop specific cooking interests.

Knife Care and Safety

Sharp knives are safer than dull ones. A sharp blade cuts where you want it to, while a dull blade slips and needs more pressure.

Wash your knives by hand with soap and water. Never put them in the dishwasher, which damages the blade and handle.

Dry them right away to prevent rust and water spots. Use a honing steel weekly to keep the blade’s edge straight.

This tool straightens the blade without removing metal. You’ll need professional sharpening once or twice a year depending on how often you cook.

Basic knife safety rules:

  • Cut away from your body
  • Keep fingers curled when holding food
  • Use a stable cutting board
  • Store knives in a block or on a magnetic strip

Never leave knives in a sink where you can’t see them. Don’t try to catch a falling knife.

Proper storage and handling will keep your knives sharp and your hands safe.

Cutting Boards and Prep Tools for Every Task

The right cutting boards and prep tools make chopping, slicing, and prepping faster and safer. Different materials serve different purposes.

Having basic gadgets like peelers and graters saves time on everyday tasks. You need at least two types of cutting boards in your kitchen.

Cutting Boards: Materials and Usage

Plastic cutting boards work best for raw meat, poultry, and fish because you can sanitize them easily in the dishwasher. Wooden cutting boards are better for vegetables, fruits, and bread because they’re gentler on your knife blades and naturally resist bacteria when properly maintained.

A good wooden cutting board should be at least 12×18 inches to give you enough workspace. Look for bamboo or maple options that won’t warp or crack easily.

Keep your plastic boards separate and use different colors if possible to avoid mixing raw meat surfaces with ready-to-eat foods. Replace your cutting boards when they develop deep grooves or cracks.

These damaged areas trap bacteria and are hard to clean properly. Always wash boards with hot soapy water after each use.

Occasionally treat wooden boards with food-safe mineral oil to keep them from drying out.

Food Prep Must-Haves: Peelers, Graters, and More

A sharp vegetable peeler makes quick work of potatoes, carrots, and other produce. The Swiss-style peelers with swivel blades adapt to different shapes and require less pressure than fixed-blade models.

You’ll prep vegetables faster and waste less of the edible parts. A box grater handles multiple tasks with its different blade sizes.

Use the large holes for shredding cheese and zucchini, the medium holes for softer vegetables, and the fine side for hard cheeses or citrus zest. Look for models with a non-slip base so the grater stays steady while you work.

The microplane zester is essential for adding fresh flavor to your dishes. It creates fine shreds of citrus zest, garlic, ginger, or hard cheese without the bitter pith or large chunks.

This small tool makes a big difference in sauces, marinades, and baked goods where you want concentrated flavor without changing the texture.

Measuring and Mixing Tools for Precision and Organization

Accurate measurements make the difference between a dish that works and one that flops. The right measuring and mixing tools help you follow recipes, maintain consistency, and prep ingredients efficiently.

Dry and Liquid Measuring Cups

Measuring cups come in two types, and you need both. Dry measuring cups have flat rims and come in sets with sizes like 1 cup, ½ cup, ⅓ cup, and ¼ cup.

You fill them to the top and level off the excess with a straight edge. This method works best for flour, sugar, grains, and other solid ingredients.

Liquid measuring cups look different because they have spouts and measurement lines on the side. They usually hold 1, 2, or 4 cups.

You place the cup on a flat surface and check the measurement at eye level for accuracy. The extra space at the top prevents spills when you pour.

Using the wrong type leads to inaccurate measurements. A cup of flour measured in a liquid measuring cup will weigh less than it should.

This matters most in baking, where small differences affect texture and rise.

Measuring Spoons and Kitchen Scale

Measuring spoons handle small amounts of both wet and dry ingredients. A standard set includes 1 tablespoon, 1 teaspoon, ½ teaspoon, and ¼ teaspoon.

You’ll reach for them when measuring spices, baking powder, vanilla extract, or oils. Just fill the spoon and level it off for dry stuff, no fuss.

A digital kitchen scale gives you more accuracy than using cups and spoons. Weight measurements take away the guesswork, like how tightly you pack flour or whether that cup is really level.

Most scales switch between grams and ounces. The tare function lets you zero out your bowl before adding ingredients, which is handy.

Professional bakers usually prefer scales for consistent results. You can portion foods evenly and cut down on waste by measuring only what you need.

Mixing Bowls for Versatile Meal Prep

Mixing bowls are a staple for all sorts of kitchen jobs. You really want at least three sizes on hand.

Small bowls are perfect for whisked eggs or holding measured ingredients. Medium ones are ideal for mixing batters and dressings.

Large bowls come in handy for salads, bread dough, or marinating meat. Stainless steel bowls resist stains and odors, and you can even use them as a double boiler over simmering water.

Glass bowls let you see what’s happening and go in the microwave. Nesting sets make storage less of a headache.

Bowls with non-slip bottoms or pour spouts are a nice touch if you mix a lot. Wide, shallow bowls make whisking easier, while deep bowls keep splatters in check with electric mixers.

Cookware Essentials for Everyday Cooking

Your pots and pans really shape what you can cook at home. The right set means you can handle anything from scrambled eggs to a weekend stew without hunting for missing pieces.

Skillets and Frying Pans: Types and Uses

You’ll want at least two skillets. A 12-inch skillet is great for big batches and family meals.

This size works for searing chicken, stir-fries, or a frittata for four. Non-stick skillets make delicate foods like eggs or fish easy to cook, and you can use less oil.

An 8-10 inch non-stick pan is perfect for smaller portions or quick meals. A cast iron skillet should have a spot in your kitchen too.

It holds heat really well and goes straight from stove to oven. With basic care, it lasts decades. The 10-12 inch size is the sweet spot for most needs.

Saucepans and Stockpots for Versatile Recipes

A 2-3 quart saucepan covers most daily cooking. You’ll use it for soup, rice, oatmeal, and sauces.

Pick one with a heavy bottom to avoid burning. A lid helps things boil faster and keeps heat in while simmering.

Your stockpot should hold at least 8 quarts. That way, you can make big batches of soup, boil pasta, or cook corn on the cob for a crowd.

The tall, narrow shape helps reduce evaporation if you’re cooking for a while. A Dutch oven is another workhorse—it bridges the gap between pots and pans.

This heavy pot with a tight lid is great for braising, baking bread, or making chili. Use it on the stove or in the oven. A 5-7 quart size will handle most recipes.

Utensils and Kitchen Gadgets: Everyday Helpers

Basic kitchen utensils are your daily sidekicks. You need tools to flip, stir, drain, and grab hot food safely—without scratching your pans.

Spatulas, Spoons, and Whisks

Have at least two types of spatulas. Silicone spatulas scrape bowls clean and fold ingredients together, plus they won’t scratch nonstick pans or melt at high heat.

A metal spatula with a thin edge flips eggs, pancakes, and burgers easily. The flat surface slides right under food without tearing it up.

Wooden spoons are classics. They stir sauces, sauté veggies, and don’t conduct heat up the handle.

Wood doesn’t scratch pots or react with acidic foods either. A whisk is key for beating eggs, mixing batter, or making smooth sauces.

An 8 to 10-inch balloon whisk covers most jobs. The wire loops beat air into food and break up clumps better than a spoon.

These tools usually cost $5 to $15 each. Pick ones that feel comfortable in your hand—you’ll reach for them constantly.

Tongs, Strainers, and Colanders

Tongs are basically an extension of your hand. They flip chicken, toss salads, and grab hot corn on the cob.

If you use nonstick pans a lot, look for tongs with silicone tips. A fine-mesh strainer rinses quinoa, drains canned beans, and sifts flour.

The small holes catch more than a colander. You can also strain lumps out of sauces with it.

A colander drains pasta and washes veggies. Get one that sits steady in the sink and has feet or a solid base.

Metal colanders last longer and handle boiling water without warping. Tongs, strainers, and colanders all solve different kitchen problems—each one earns its keep.

Small Appliances That Streamline Cooking

Modern small appliances make repetitive tasks quick and free up your hands for everything else. A good blender or food processor can seriously cut prep time, while mixers make baking way less of a chore.

Blenders, Food Processors, and Immersion Blenders

A stand blender is great for smoothies, soups, and sauces. Look for at least 64 ounces of capacity so you aren’t stopping every two seconds to scrape things down.

These machines have powerful motors that crush ice and frozen fruit without complaining. Food processors chop veggies in seconds and can shred cheese or make dough.

Pick one with at least 11 cups of capacity if you want to avoid doing things in batches. Smaller versions exist, but they can be limiting.

An immersion blender lets you blend soup right in the pot—no need to juggle hot liquid between containers. It’s compact and cleans up fast.

You can also use it for small jobs like salad dressings or baby food. It’s one of those tools you don’t realize you need until you have it.

Hand Mixers, Stand Mixers, and Specialty Appliances

A stand mixer tackles heavy doughs and big baking projects. Go for at least a 5-quart bowl so you aren’t limited by size.

These machines mix, knead, and whip without you holding the device. A hand mixer is cheaper and easier to store, and it works for most baking tasks—just not bread dough.

If you’re following a recipe written for a stand mixer, bump up the speed setting by one. Other handy appliances? An air fryer for crispy food with less oil, a slow cooker for set-it-and-forget-it meals, and an Instant Pot that pressure cooks and more.

A basic rice cooker makes perfect rice every time, which is honestly a relief if you’ve scorched a pot or two before.

Food Storage and Kitchen Organization

Good food storage keeps ingredients fresh and cuts down on waste. The right containers protect your food from air and moisture, and solid baking dishes make cooking and cleanup easier.

Airtight Containers and Food Storage Solutions

Airtight containers are a must for keeping pantry staples fresh and organized. They block out moisture, air, and pests from your flour, sugar, rice, or other dry goods.

Good food storage containers also let you see what you actually have, which helps you avoid buying stuff twice. Look for options made from glass or BPA-free plastic.

Glass containers don’t hold on to odors or stains, and you can pop them in the microwave. Plastic is lighter and won’t shatter if you drop it.

You want a mix of sizes. Small containers are for spices and herbs, medium for snacks and leftovers, and large ones for bulk items like cereal or pasta.

Square or rectangular shapes use shelf space better than round ones. Make sure lids seal tightly but aren’t a pain to open. Stackable designs are a lifesaver for crowded cupboards.

Baking Dishes and Sheet Pans

A rimmed baking sheet (or sheet pan) is one of the most useful things in any kitchen. You can roast veggies, bake cookies, or cook a whole meal on one pan.

The raised edges catch drips before they hit your oven. Get at least two half-sheet pans (18×13 inches)—they fit most ovens and give you room for family meals.

Heavy aluminum pans heat evenly and don’t warp at high temps. Baking dishes and a casserole dish are essential for lasagna, gratins, or baked desserts.

A 9×13-inch glass or ceramic dish covers most recipes. Glass lets you watch food brown on the bottom, while ceramic holds heat and looks nice on the table.

Essential Tools for Food Safety and Accurate Cooking

A thermometer takes the guesswork out of doneness. The right cleaning tools protect your investment and help prevent contamination.

Thermometers for Safe and Perfect Results

An instant-read thermometer is your best friend for juicy chicken or not-overcooked steak. Digital thermometers give you a reading in seconds, so you can pull pork chops at 145°F or check that ground beef is safe at 160°F.

A meat thermometer really helps with roasting big cuts or whole birds. You want a probe that reads quickly and stays accurate. Go for models with a wide temperature range and a clear display—backlit screens are handy in dim kitchens.

Stick the probe into the thickest part of the meat, avoiding bone and fat. Here are a few solid picks:

  • ThermoWorks Thermapen ONE – Reads in one second with professional accuracy
  • Lavatools Javelin PRO Duo – Budget-friendly with a big display
  • ThermoPro TP19 – Waterproof and foldable for easy storage
  • Meater Plus – Wireless probe you can monitor remotely

Cleaning and Care Tips for Longevity

Hand-wash knives and wooden boards to keep them from warping or going dull. Dishwasher-safe boards and utensils save time, but high heat can damage handles and finishes after a while.

Cast iron care is simpler than it sounds. Rinse your skillet while it’s still warm, scrub with a stiff brush or chain-mail scrubber, dry it completely, and rub a thin layer of oil on the surface.

Don’t stress about soap—a little won’t ruin your seasoning, but you rarely need it anyway. Use separate cleaning tools for areas where you prep raw meat.

Keep a dedicated brush or sponge for cutting boards that touch meat. Swap out sponges weekly and sanitize boards with diluted bleach or white vinegar. Use gentle scrubbers on stainless steel and nonstick pans to avoid scratches where bacteria can hide.

Top Product Suggestions: Four Essential Picks

When you’re picking kitchen tools, quality beats quantity every time. Good products last longer, work better, and honestly just make cooking less annoying.

Best Chef’s Knife for Home Cooks

The Wüsthof Classic 8-inch Chef’s Knife is a standout for most home cooks. This German-made knife feels balanced and sharp, so you can chop, slice, and mince without your hand getting tired.

The 8-inch blade is a sweet spot for most tasks. You can rock it for mincing garlic or use smooth slicing motions for bigger stuff. Full tang construction means the metal runs through the whole handle, giving better balance and durability.

Victorinox Fibrox Pro 8-inch Chef’s Knife is a great budget pick. It costs less but still works like a pro tool. The textured handle gives you a solid grip, even when things get slippery.

Top-Rated Cutting Board

John Boos Maple Wood Cutting Board protects your knife edges better than plastic or glass. Wood boards come with natural antimicrobial properties and, over time, develop a patina that honestly just looks cool in any kitchen.

Pick a board that’s at least 12 by 18 inches. You want enough space so ingredients don’t keep falling off the sides.

Thicker boards, around 1.5 to 2 inches, stay flat and resist warping. Honestly, thin boards just don’t hold up.

Oil wooden boards about once a month with food-grade mineral oil. This keeps them from cracking and makes the surface feel nice and smooth.

If you lean toward plastic, the OXO Good Grips Carving and Cutting Board is a solid choice. It’s dishwasher safe and has a juice groove to catch any runaway liquids.

Reliable Measuring Cups and Spoons Set

OXO Good Grips Stainless Steel Measuring Cups and Spoons give you accuracy you can count on. The markings stay put, even after loads of washes, and the magnetic handles snap together so you aren’t hunting for missing pieces.

When shopping for measuring tools, check for these:

  • Flat tops for leveling off dry ingredients
  • Long handles that balance on bowl edges
  • Nesting design to save some drawer space
  • Measurement markings in both metric and imperial

The basics should be covered: 1 cup, 1/2 cup, 1/3 cup, and 1/4 cup for cups. For spoons, at least 1 tablespoon, 1 teaspoon, 1/2 teaspoon, and 1/4 teaspoon.

Must-Have Skillet or Frying Pan

Lodge Cast Iron Skillet (10 or 12 inches) holds heat like a champ and, with a bit of care, builds up a natural non-stick surface. You can use it on the stove, in the oven, or even over a fire if that’s your thing.

Cast iron needs a little attention, but it’ll last for ages. Wash it with hot water (skip the soap), dry it right away, and rub a thin coat of oil on after each use.

If you’re after easy cleanup, the T-fal Professional Non-Stick Fry Pan is worth a look. Its non-stick surface makes eggs and fish slide right off, and it heats up fast for quick weeknight dinners.

Essential Small Appliance for Everyday Cooking

Vitamix E310 Explorian Blender handles smoothies, soups, and sauces with a motor that really crushes ice and blends frozen fruit smoothly. The 48-ounce container fits most family needs without hogging all your counter space.

Cuisinart Elemental 8-Cup Food Processor takes care of what blenders can’t. It slices veggies evenly, shreds cheese in no time, and whips up pie dough before you know it.

The 8-cup size is just right for prepping ingredients for family meals. Blenders make things silky smooth, while food processors chop and slice but leave some texture. Which one you grab more often totally depends on how you like to cook.

Frequently Asked Questions

Home cooks usually wonder which tools to buy first, how certain items make cooking easier, and what actually gives you the best bang for your buck. Here are some answers to help you build a kitchen that really works for you.

What are the essential kitchen utensils that every home cook should own for daily meal prep?

You need a chef’s knife for pretty much all your cutting, whether it’s veggies, proteins, or herbs. A cutting board keeps your knife and counters safe from damage.

Measuring cups and spoons help you get the right amount of each ingredient. A spatula lets you flip and stir without scratching your pans, while tongs are great for turning meat or tossing a salad.

A wooden spoon is perfect for stirring hot dishes without messing up your cookware. Don’t forget a whisk for mixing and adding some air to your batters.


Can you identify top kitchen gadgets that enhance the efficiency of home cooking?

A box grater makes quick work of shredding cheese, zesting citrus, or grating veggies. A kitchen timer saves you from overcooking by letting you know when food’s done.

Silicone baking mats are a nice swap for parchment paper and make nonstick surfaces for cookies or roasted veggies. A meat thermometer helps you cook proteins to the right temp, no guessing required.

A garlic press gets garlic minced in seconds, and kitchen shears handle herbs, meat, and even opening tricky packages much faster than a knife sometimes can.


Which kitchen appliances are considered must-haves for a well-equipped home kitchen?

A refrigerator keeps your food fresh and safe. A stove or cooktop gives you the heat control you need for most recipes.

An oven opens up baking, roasting, and broiling. A microwave is handy for fast reheating and defrosting.

A toaster or toaster oven covers bread, bagels, and small reheats. If you bake a lot, a stand mixer can be a real time saver, though not everyone needs one.


How do specific kitchen tools contribute to the overall quality and ease of cooking at home?

Sharp knives let you make clean cuts, which keeps food looking and tasting better. Good pots and pans distribute heat evenly, so you don’t end up with burnt spots.

Reliable measuring tools help your recipes turn out right every time. A sturdy colander drains pasta and rinses produce without spills or burned hands.

Heat-resistant spatulas and spoons keep your cookware scratch-free and give you better control. Tongs let you handle hot food without risking your fingers.


Could you suggest a few multipurpose kitchen tools that are particularly helpful for novice cooks?

A chef’s knife covers almost all your cutting needs, from veggies to meat. Kitchen shears do double (or triple) duty as scissors, herb snippers, and poultry trimmers.

A big skillet cooks eggs, veggies, proteins, and even one-pan meals. Tongs can flip, serve, and toss salads, so you don’t need a separate utensil for each job.

Mixing bowls work for prepping, marinating, whisking, and even serving. A box grater takes care of shredding, zesting, and grating without cluttering your drawer with extra gadgets.


What are some high-quality brands or products for essential kitchen tools recommended for home cooks?

Victorinox and Wüsthof both make chef’s knives that hold a good edge. They’re solid picks at different prices, depending on your budget.

OXO has comfortable measuring cups, peelers, and other hand tools. I find their designs easy to use and they usually last a long time.

Lodge cast iron skillets heat evenly and, with a little care, can stick around for decades. If you want cookware sets, Cuisinart and Calphalon both make sturdy options that handle daily use pretty well.

Pyrex glass mixing bowls don’t stain and you can toss them in the microwave without worry. If you bake a lot, KitchenAid stand mixers have a reputation for power and lasting through years of use.


Organize a Small Kitchen: Practical Strategies for Maximum Space

0

A small kitchen doesn’t have to feel cramped or chaotic. With the right systems and tools, you can make it work as well as one twice its size.

The key is figuring out how to use every inch wisely, from cabinets and drawers to walls and corners.

Lots of folks struggle to organize a small kitchen because they try to cram too much in. You end up with overstuffed drawers, cluttered counters, and missing items when you need them.

But if you use vertical storage, drawer dividers, and a bit of ruthless decluttering, you can turn that cramped kitchen into a functional, enjoyable space.

Key Takeaways

  • Remove unused items and organize remaining kitchen essentials into zones based on how you use them
  • Use vertical space with wall racks, hanging systems, and stacking bins to store more without taking up counter room
  • Install drawer dividers, pull-out racks, and lazy susans to make every cabinet and drawer work harder

Assess and Declutter Your Kitchen

Start by pulling out items you don’t use and sorting what stays. This gives you a realistic sense of your space and helps you decide what truly belongs in your kitchen.

Remove Unused Items Efficiently

Take everything out of your cabinets and drawers. Group items into keep, donate, and toss piles.

Check expiration dates on food and spices. Toss anything expired, no second guessing.

Look at duplicate items. You really don’t need three can openers or five spatulas in a small kitchen.

Keep just one of each tool unless you honestly use more. For dishes and food containers, only hang on to what you can wash daily.

Throw out containers with missing lids or cracks. Test all your storage containers and make sure the lids actually fit before putting them back.

Set aside a donation box for good-condition items you haven’t touched in a year. That includes extra gadgets, serving platters, or duplicate cookware.

Sort and Categorize Kitchenware

Group similar items together so you can see what you have. Put all baking supplies together, cooking utensils in another spot, dishes separate from glasses.

Try using these categories:

  • Daily essentials: Coffee mugs, everyday plates, frequently used pots
  • Cooking tools: Spatulas, wooden spoons, measuring cups
  • Baking supplies: Mixing bowls, measuring spoons, baking sheets
  • Food storage: Containers with matching lids
  • Small appliances: Toaster, blender, coffee maker

Label each group with tape or sticky notes while you’re sorting. It helps you figure out how much space each category needs later.

Streamline Small Appliances and Utensils

Pick one or two appliances to keep on your counter. Store everything else in a lower cabinet or pantry.

Maybe the coffee maker or toaster gets a spot out, but the stand mixer or food processor can go in storage. Wrap appliance cords with cable ties or velcro straps so they don’t tangle.

Store attachments and accessories in labeled bins with their appliances. Think about which tools actually multitask.

A rimmed sheet pan can bake cookies, roast veggies, and catch drips. A rimless cookie sheet, well, just bakes cookies. Keep the tools that do more than one job.

Count your utensils. Two or three spatulas are plenty, not a whole drawer full. Keep your favorites and donate the rest.

Master Cabinet Organization for Space Maximization

Cabinet organization can turn wasted space into storage you actually use. The right tools and layout make it easier to access everything.

Optimize Cabinet Layout and Grouping

Group items by where you use them most. Keep coffee mugs and filters near the coffee maker, pots and pans close to the stove.

Cutting boards and knives should go near your prep area. This setup saves time and keeps your counters clearer.

Try grouping like this:

  • Store baking supplies (flour, sugar, measuring cups) together in one cabinet
  • Keep cooking oils, spices, and seasonings near the stove
  • Put dishes and bowls in the cabinet closest to your dishwasher
  • Dedicate a cabinet to food storage containers and lids

A lazy susan works great in corner cabinets. Place one there for oils, vinegars, or canned goods. Just spin it to grab what you need without moving everything else.

Utilize Shelf Risers and Pull-Out Racks

Shelf risers let you double up in a single cabinet. Stack plates below, bowls above, and you can see everything without lifting heavy stacks.

Pull-out racks make deep cabinets way more useful. Try a pull-out spice rack in the narrow space between your fridge and counter.

Install pull-out shelves in base cabinets so you can reach items in the back. Add drawer dividers to deep drawers and store dishes vertically instead of stacking them flat.

Clear stacking bins work under the sink for cleaning supplies. Stack two bins to use the full cabinet height and keep things visible.

Store Infrequently Used Items Up High

Add ceiling-height cabinets if you can. Use the top shelves for stuff you hardly ever need, like the turkey roaster or holiday platters.

Keep a small step stool handy for safe access. The extra height gives you storage without eating up floor space.

Put everyday essentials at eye level. Middle shelves are for weekly-use items, and keep the things you use most between waist and shoulder height for comfort.

Label containers on high shelves so you know what’s inside from below. Clear bins help you see contents without climbing up.

Smart Strategies for Drawer Organization

Drawers work best when you create clear zones with dividers. The right setup keeps stuff from sliding around and gives everything a home.

Implement Drawer Dividers

Drawer dividers can turn chaos into order. Measure your drawers before buying organizers.

Expandable dividers are useful since they fit different widths and you can change them later. Place dividers to make compartments by item size, with wider sections for big utensils and narrow slots for gadgets.

Bamboo dividers look nice and last, while plastic ones cost less and are easy to clean. The SpaceAid Bamboo Drawer Dividers come with inserts and labels, adjust from 12 to 20 inches, and snap into place without tools.

Troubleshoot the Junk Drawer

Every kitchen has a junk drawer. Start by emptying it completely and sorting the contents.

Only keep essentials like batteries, twist ties, and takeout menus. Store them in small containers or a multi-compartment tray.

Assign each section a job, like “writing tools” or “kitchen tools.” Add a shallow tray organizer with a few compartments to keep things in place.

Check this drawer every month and clear out what doesn’t belong. Set a limit for each item type so it doesn’t overflow again.

Create Zones for Utensils and Tools

Sort utensils by how often you use them and what they’re for. The drawer closest to your prep area should hold everyday tools like spatulas, wooden spoons, and whisks.

Put cooking utensils near the stove and baking tools near your mixing area. Use a multi-section tray with several compartments.

Keep your most-used tools in the front for easy grabbing. Store similar items together, like all measuring spoons in one spot.

Deep drawers are great for larger tools. Stand up rolling pins, meat mallets, and pastry brushes in tall containers so you see everything at once.

Make the Most of Vertical Storage

Your walls are full of untapped storage potential. Add shelves, hooks, or magnetic strips to empty wall space to keep everyday items handy and your counters clear.

Install Open or Floating Shelving

Open shelving can turn blank walls into useful storage. Install floating shelves above your counters for dishes, glasses, or go-to ingredients.

These shelves fit nicely between your counter and upper cabinets. Pick shelves that match your kitchen’s style and can handle the weight you plan to put on them.

Metal brackets give strong support for heavy things like dinnerware or appliances. Wood or metal floating shelves look sleek for lighter items.

Mount shelves at heights that work for you. Everyday items go at eye level, less-used stuff higher up.

Try narrow shelves in tight spaces, like above the sink or next to the fridge. The Container Store Elfa Classic Shelving offers adjustable options and can support up to 100 pounds per shelf.

Incorporate Hanging Pot Racks and Hooks

Wall-mounted pot racks free up cabinet space by moving bulky cookware onto the wall or ceiling. Use S-hooks to hang pans, lids, and utensils at different heights.

Install hooks under cabinets or on bare walls for mugs, measuring cups, and kitchen tools. You can also put hooks inside cabinet doors for pot holders or dish towels.

This keeps things within reach without filling up drawers or shelves. A pegboard system gives you flexible storage you can rearrange as your needs change.

Add Magnetic Racks and Strips

Magnetic strips make it easy to store things on your walls without drilling a bunch of holes. Stick a magnetic knife strip on the wall to keep your knives organized and out of the drawer. That frees up space and looks kind of cool, honestly.

Try using magnetic strips for metal utensils, scissors, or even small metal spice containers. The fridge side works as another spot for magnetic storage, too. Just slap on a few magnetic shelves or containers for oils, spices, or whatever tools you reach for most.

Modern Innovations Stainless Steel Magnetic Knife Bar holds around 12 knives and you can mount it on almost any wall. Magnetic storage is really best for daily-use stuff since everything’s right there, easy to grab.

Product Suggestions for Small Kitchen Organization

The right gear can turn a tiny kitchen into a surprisingly efficient spot. Rotating platforms help you use awkward corners, spring-loaded dividers keep drawers from getting chaotic, magnetic strips clear off your counters, and wheeled storage brings flexibility where permanent stuff just won’t work.

Best Lazy Susans for Cabinets

A lazy susan makes those deep, annoying corner cabinets way more useful. You can actually reach everything instead of losing jars in the back forever.

Pick a size between 10 and 16 inches across, depending on your cabinet. Two-tier versions double the storage and stop little jars from vanishing underneath bigger stuff.

Go for ones with raised edges so nothing slides off when you spin it. Plastic lazy susans are lighter and easy to clean, but wood looks nicer if you’re using them on open shelves.

The turntable should spin smoothly, no wobbles. Use them for spices, cans, oils, vinegars, or baking supplies.

Some even have dividers to sort your stuff. Keep your most-used items on the outer edge so you don’t have to reach in every time.

Top Drawer Dividers and Organizers

Drawer dividers stop your utensils from turning into a jumbled mess. Spring-loaded dividers adjust easily and fit drawers from 12 to 18 inches long.

Types of drawer organizers:

  • Spring-loaded dividers for custom setups
  • Fixed trays for standard silverware
  • Shallow bins for tiny things like measuring spoons
  • Bamboo organizers if you want a natural vibe

Pick dividers at least 3 inches tall for deep drawers. They should fit snug so they don’t slide around when you open the drawer. Grippy feet on the bottom help with that, too.

Mix and match organizer types in one drawer. Use small bins for random bits like bottle stoppers and bag clips. Larger sections are good for spatulas and serving spoons. Keep your go-to tools in the top drawer by your prep area.

Most Practical Magnetic Knife Strips

Magnetic knife strips go on your wall or even inside a cabinet door, so you don’t need a clunky knife block. An 18-inch strip usually fits four to six knives, depending on their size.

Wood strips with strong magnets protect your knife blades better than metal ones. The magnets should be strong enough to hold your heaviest chef’s knife, no problem. Mount the strip at chest height near your cutting board for easy access.

You can use magnetic strips for metal utensils too, like measuring spoons or scissors. That clears up more drawer space. If you’re mounting inside a cabinet door, use short screws so they don’t poke out the other side.

Metal strips cost less but might scratch knife edges over time. Always check the weight capacity before buying to make sure your knives won’t fall off.

Space-Saving Bar Carts and Rolling Islands

A bar cart or rolling island can give you extra prep space and storage without needing to install anything permanent. Look for carts 24 to 30 inches wide so they fit between your counter and table.

What to look for:

  • Locking wheels so it doesn’t roll away
  • Two or three shelves for storage
  • Butcher block or stainless steel top
  • Towel bar or hooks on the side

Use the top for meal prep or as a coffee station. Store pots, pans, or appliances on the lower shelves. Some carts even have wine racks or stemware holders built in.

Roll the cart into a corner or closet when you need the floor space back. Metal carts hold more weight, but wood looks warmer. A rim around the top shelf keeps stuff from sliding off when you move it.

Innovative Solutions and Space Enhancers

Smart storage tools can help you claim back those awkward or wasted spots in your kitchen. Pull-out systems, fold-down surfaces, and stackable bins all work together to make the most of every inch.

Utilize Pull-Down and Pull-Out Shelves

Pull-down shelves bring high-up cabinet stuff down where you can reach it. These spring-loaded systems let you store holiday dishes or appliances you only use sometimes, without needing a step stool.

Pull-out shelves shine in base cabinets and under the sink. They slide forward so you can see everything, even what’s in the back. Try a pull-out spice rack in that skinny gap between your fridge and the wall to use dead space.

Rev-A-Shelf Two-Tier Pull-Out Organizer fits most base cabinets and holds heavy things like pots and appliances. The gliding system makes it easy to reach deep cabinet items without kneeling or stretching.

Explore Multifunctional and Fold-Down Tables

A fold-down table on your wall gives you extra counter space when you need it and disappears when you don’t. Handy for meal prep, a laptop, or even a quick breakfast spot. You can put one near the stove for extra prep or by a window for a cozy nook.

Look for tables with built-in shelves or hooks underneath. Some even have a chalkboard surface or magnetic strip for hanging utensils. Measure your wall and check how much room you’ll need when the table is open.

If you plan to use it for heavy tasks, check the weight limit. Most fold-down tables hold 30 to 50 pounds.

Incorporate Stacking Bins and Under-Cabinet Options

Stacking bins help you use vertical space inside cabinets. Clear acrylic bins are nice since you can see what’s inside without moving everything around. Use them under the sink for cleaning supplies or in pantry cabinets to group similar items.

Under-cabinet organizers attach to the bottoms of wall cabinets. Hooks can hold mugs or wine glasses. Small drawers under cabinets hide away spices, tea bags, or little tools.

SimpleHouseware Stackable Can Rack Organizer stores canned goods in a compact way. The stepped design lets you see every label. Spectrum Ashley Under Cabinet Paper Towel Holder keeps paper towels off the counter but right where you need them.

Frequently Asked Questions

Small kitchens come with their own set of questions about storage, space-saving tricks, and which products actually help you make the most of every square foot.

What are some effective cabinet organization tips for a small kitchen?

Install pull-out racks between cabinets to use dead space that usually gets ignored. These narrow organizers are great for spices, oils, and other slim stuff that disappears in regular cabinets.

Go for ceiling-height cabinets to use vertical space. Keep rarely used items up top and everyday stuff at eye level.

Stack bins under your sink to make the most of vertical space. Clear bins let you see what’s inside without digging or labeling.

Put lazy susans in corner cabinets so things are easy to reach. These spinning platforms keep bottles and cans organized and close by.


Can you provide strategies for drawer organization that maximize space utilization?

Customizable drawer dividers give every item a home. Bamboo dividers are sturdy and you can adjust them to fit your drawer perfectly.

Store everyday dishes in deep drawers instead of cabinets. It’s easier to grab plates and cups this way.

Fill the whole drawer width with organizers to avoid wasted space. Keep things separate but not crammed so you can see and grab what you need.

Group similar items together based on how you use them. Store utensils near your prep area and cooking tools by the stove.


How can vertical storage solutions be implemented in a compact kitchen environment?

Hang pots and pans from a rack above the stove or on a wall. This frees up cabinet space and keeps cookware handy while you’re cooking.

Install open shelves on empty wall space between counters and upper cabinets. Use them for stuff you grab daily, like mugs or cooking oils.

Mount a rod with S-hooks on an unused wall section. Hang utensils, measuring cups, or little baskets filled with kitchen tools.

Add a macrame basket under upper cabinets for onions, garlic, or other produce. It keeps the counters clear and uses space that would otherwise go to waste.

Wall-mounted dish racks hold plates, cutting boards, or drying dishes. Black metal racks look especially good in modern or farmhouse-style kitchens.


What decluttering strategies are recommended for maintaining a tidy and spacious small kitchen?

Only keep essentials on your counters. Limit what you display to cutting boards, a knife block, or appliances you actually use every day.

Organize your junk drawer with dividers or small containers. Recycle boxes and jars to separate rubber bands, twist ties, pens, and other random stuff.

Put less-used kitchen gear in hard-to-reach cabinets near the ceiling. Save the best storage spots for tools and dishes you use all the time.

Let dishes and glassware double as decor by displaying them on open shelves. This way, you don’t need extra decorative items and your essentials stay visible.

Keep a small rolling bar cart just outside the kitchen for entertaining supplies. Glasses and bottles stay close but don’t take up precious kitchen space.


Could you suggest budget-friendly ideas for organizing a small kitchen efficiently?

Install simple shelves cut to fit weird angles or odd walls. Paint or stain the wood to match your cabinets for a custom look without spending much.

Use in-sink dish racks instead of countertop ones. These keep dishes out of sight while drying and help keep counters clear.

Repurpose bookends to organize cookbooks on your counter or shelves. It’s cheap and keeps recipes right where you want them.

Add corner shelves in the gaps between upper cabinets and windows. Rounded edges make them look smooth and help you use every bit of space.

Store things where you actually use them. Keep your chopping board above the knife drawer and mugs on a shelf above the coffee maker so you don’t need to buy extra organizers.


What are three essential products that can help keep a small kitchen well-organized?

A pull-out spice rack fits snugly between cabinets, turning that awkward gap into useful storage. It keeps spices organized and easy to spot, so you won’t waste time digging through crowded shelves.

Customizable bamboo drawer dividers let you set up any drawer just how you want it. They’re tough, eco-friendly, and you can adjust them whenever your collection of utensils changes.

Clear stacking bins help you use every inch of vertical space under the sink or in your pantry. Since they’re transparent, you can see what’s inside right away, making it way easier to grab what you need.